Accessibility Updates in Dragonflight
Greetings, adventurers! As we approach the launch of Dragonflight, we would like to highlight some of the recent accessibility improvements we’ve added to World of Warcraft. Since our last update in Shadowlands, we’ve been hard at work building new features and adding more options.
New accessibility features are available to everyone, and most options can be found in the Options panel of the Game Menu (default hotkey: Escape). Let’s look at some of the highlights.
Updated UI and HUD
Sweeping changes have been made from the ground up to provide a clutter-free layout that allows players to customize their HUD to better fit their individual needs. Explore a fresh-looking Heads-Up Display (HUD) and User Interface (UI) designed to be adjustable, effective, attractive, and easily accessible for everyone. You can read all about it in our blog article.
New Talent System
Dragonflight debuts the biggest change to the Talents system yet, giving you more freedom to experiment and more options to choose from than ever before. Get familiar with the changes so you can make the most of this update, including Loadouts, the Search Bar, and Importing and Sharing talent builds.
Advanced Tip: Here are some advanced chat command lines that can be used to access the Talent frame.
Loads loadout for the current specialization by name. This command will load the first one found in the case of duplicate names.
- /run ClassTalentHelper.SwitchToLoadoutByName(loadoutName)
- /loadoutname loadoutname
- /lon loadoutname
Loads loadout for the current specialization by dropdown index. Indices start at 1.
- /run ClassTalentHelper.SwitchToLoadoutByIndex(1)
- /loadoutindex 2
- /loi 3
Activates specialization for the current class by spec name.
- /run ClassTalentHelper.SwitchToSpecializationByName(specName)
- /specname specname
- /spn specname
Activates specialization for the current class by index in the order within the Specializations tab. Indices start at 1.
- /run ClassTalentHelper.SwitchToSpecializationByIndex(1)
- /specindex 2
- /spi 3
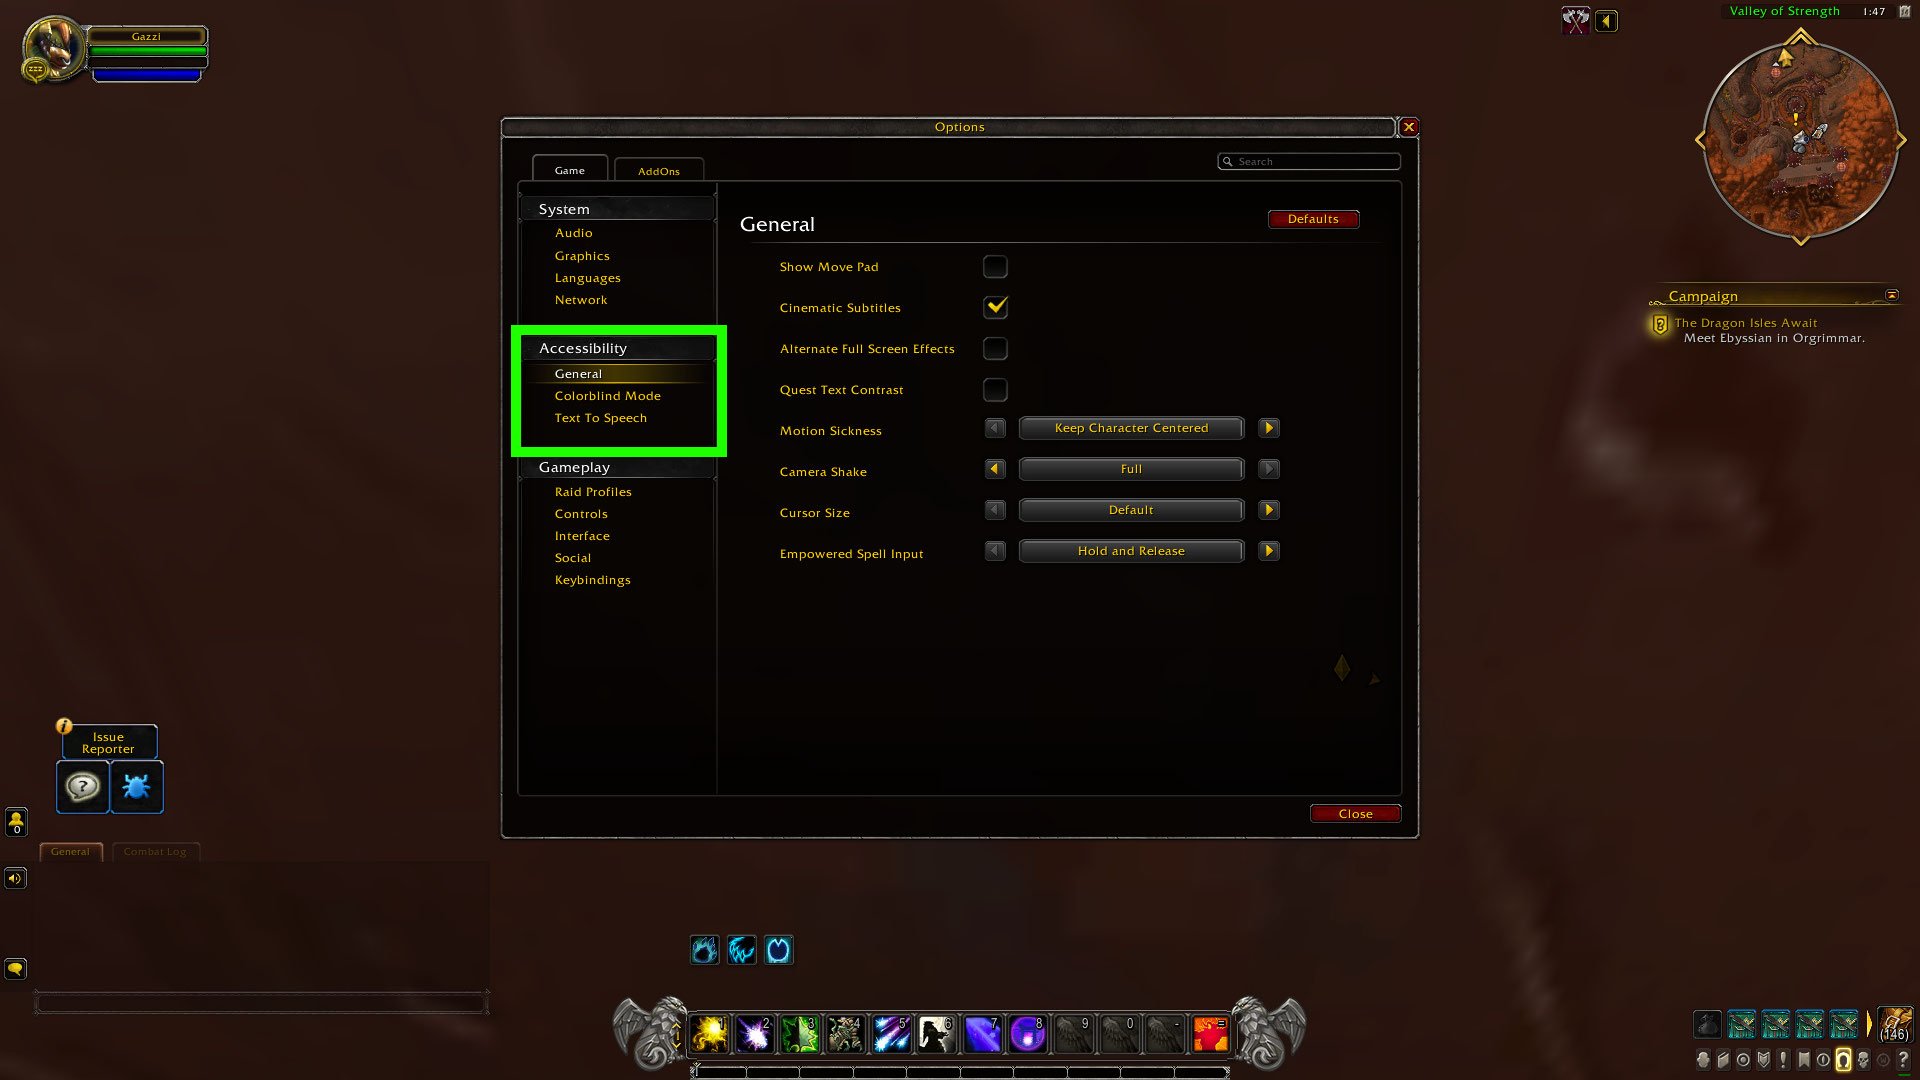
New Options Menu
The previous “Interface” and “System” menus have been combined into the more intuitive “Options” menu. This update allows you to find various Accessibility options more easily.
New Option: Field of Vision (FOV) reduction
You can now adjust your camera FOV control in Options > System > Graphics to help with motion sickness.
New Option: Press and Hold Casting
When enabled, this option allows you to press and hold a keyboard hotkey to continually cast a spell on an Action Bar without having to repeatedly press the button. Keep in mind that this feature currently works only with spells and keyboard hotkeys (or gamepad buttons). Macros, mouse clicks and on-use items are not currently supported. You can enable this option under Options > Gameplay > Combat > Press and Hold Casting.
New Option: Dracthyr Empowered Casting
Dracthyr Evokers have special Empowered abilities that they can use to change the strength of the spell or ability they are casting. By holding down a button on your keyboard or mouse, you will power up a spell. The longer you charge the spell, the more damage it could do or the more targets the spell could hit. You have the option to toggle between two modes for Empowered abilities: Hold and Release (this is the default option) or Press and Tap. Read more about the Dracthyr Evoker in our preview.
Advanced Tip: Here are some advanced chat command lines that can be used to fine tune Dracthyr Empowered Casting.
- /console EmpowerMinHoldStagePercent 0 (Default value: 1.0. Accepts values from 0.0 to 1.0) For use with the "Hold and Release" and "Press and Tap" settings. Any "release" inputs are ignored up to this point in the first segment of the cast bar (the grey segment), as a percentage. Lowering the value from the default will make it so that releasing the key after that point in the first segment will cancel the cast, instead of continuing to fill to a level 1 empower.
The ReleaseThreshold will prevent your release inputs from being registered for 300ms, but if you release after that, the MinHold will then hold the spell until the first segment is complete (same as if you’d released your finger with Hold and Release). If you want to only use ReleaseThreshold with this input mode, they can set MinHoldStagePercent to 0.0 or an otherwise small value.- /console EmpowerTapControlsReleaseThreshold 0 (Default value: 300. Accepts values from 0 to 1000) For use with the "Press and Tap" setting. Any key taps after the one that starts the spell will be ignored as release commands until this many milliseconds have passed. The timer begins when the cast is initiated by the game client. If you're experiencing high latency, you may want to try different values for this setting makes it easier to reliably cast a level 1 empower.
New Feature: Interact Key
Press the Interact Key to interact with NPCs and objects with a key press (default hotkey: F) instead of your mouse. Interactive NPCs and objects will highlight as you enter interact range and face them. A helpful icon will appear above NPCs as needed. This also functions for quest item interactions, and we've added an option to enable a sound when an interaction becomes available. Enable this option under Options > Gameplay > Controls > Enable Interact Key.
New Action Targeting System
You can use Action Targeting to automatically target enemies as you approach them, allowing you to start casting abilities immediately. Action Targeting dynamically switches targets based on where you’re looking. This option doesn’t stop you from using the default Tab Target system to loc on a target. Enable this option under Options > Gameplay > Combat > Enable Action Targeting.
Advanced Tip: While not available in the game settings directly, there are several changes that you can make to how this works in-game using command variants (CVars). To use a Cvar, enter the following into your chat window: /console [command] [value] (no brackets). For example: /console SoftTargetIconEnemy 1
A few below that you might find useful:
- The CVar SoftTargetInteractRange can be changed to increase the reporting range for an interaction. The default range is set to 10.
- By default, not everything displays an interact icon overhead, to reduce visual clutter in the game world. The following CVars are set to “0” by default, but can be set to “1” to enable interact icons in additional cases: SoftTargetIconEnemy, SoftTargetIconFriend, SoftTargetIconInteract, SoftTargetIconGameObject, SoftTargetLowPriorityIcons.
- You can force on the Name Plate for the interact target (including GameObjects) by setting the following CVars to “1”: SoftTargetNameplateEnemy, SoftTargetNameplateFriend, SoftTargetNameplateInteract.
- While not enabled by default, you can set SoftTargetFriend to enable soft targeting for friendly (healable) targets. It functions identically to enemy soft targeting, with a matching set of CVars to control/tune it.
- One additional CVar that can be particularly useful for visually impaired players is SoftTargetInteractArc. It normally defaults to “0”, which means interact requires direct facing to the target. Setting it to “1” or “2” gives it additional arc leeway.
New Option: Display Name Size Adjustment
You can now adjust a minimum on-screen text size to keep it legible. The text will also fade to indicate distance rather than shrinking in size. Enable this option under Options > Accessibility > General > Minimum Character Name Size.
Gamepad API Support Improvements
We've made additional API updates to these control schemes improving support for controllers, touchpads, and gyros so addon creators can leverage them, including added support for gamepad button icons to improve their legibility on the action bar, and the ability to combine gamepad and mouse input in a single control scheme.
Dragonriding: Ride Along
Enabling this setting allows you to make your Dragon Isles drake interactible. Any other players that interact with you will become whelps that move alongside your Dragon Isles Drake. Find Lithragosa near any Rostrum of Transformation, including the one at Skytop Observatory during the Dragonriding Tutorial or in Valdrakken, and select the "I heard something about helping my fellow adventurers?" dialog followed by "Please enable passengers for me." Whelps are able to earn Dragon Glyphs, but do not count as participants during Dragonriding Racing.
Dragonriding: FOV Effects
Dragonriding FOV changes do not occur if you have selected "Reduce Camera Motion" in the Accessibility > General menu.
Dragonriding: Full Screen Effects
Dragonriding top-speed full screen effects do not display if you have checked "Alternate Full Screen Effects" in the Options > Accessibility > General menu.
Advanced Tip: Use "/console dragonRidingPitchSensitivity 1" to fine tune your Dragonriding pitch keys. While dragonriding, pitch up/down keys are tuned to levels that better suit the gameplay of dragonriding. The chat command "/console dragonRidingPitchSensitivity 1" controls this setting, accepting any number between 1 and 10 including decimals.
Improving accessibility In World of Warcraft for all players is an ongoing effort. We'll continue to work on making Azeroth a welcoming world of adventure for everyone and share more updates as they become available. Thanks for playing!