Season 04: Vondel Map Tactical Preview
Per the full Call of Duty®: Modern Warfare ® II and Call of Duty®: Warzone™ Season 04 Announcement, we intercepted an important intelligence report on the brand-new map Vondel, to be made available for Battle Royale and DMZ experiences within Warzone™.
The following is an exact copy of the report, with redactions ([[REDACTED]]) in place to protect current identities and ongoing operations:
SITREP
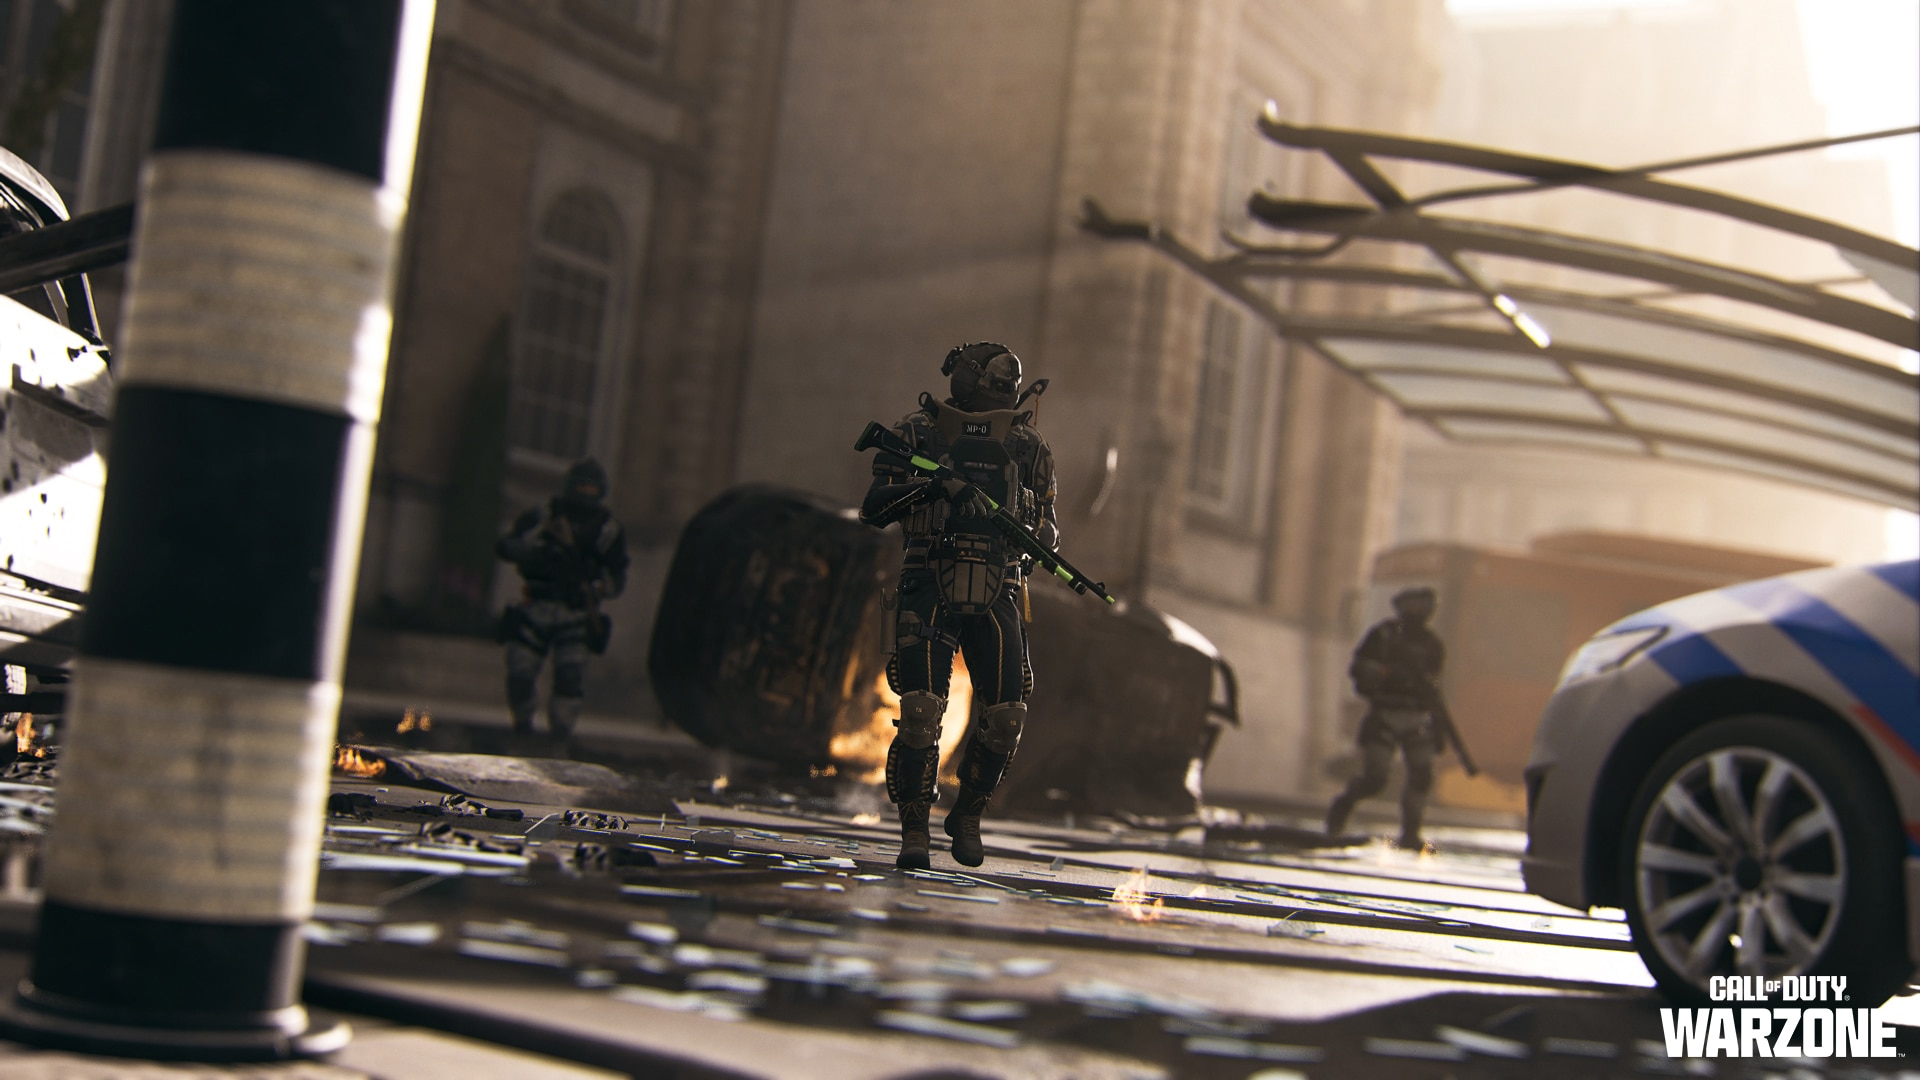
On June 8, 2023, SpecGru commenced Recon Operation: Red Light, Green Light. This intelligence, surveillance, and reconnaissance (ISR) operation took place in Vondel, an historic district within a greater metropolis built on an extensive river network, well away from the current areas of operation (AOs) — Al Mazrah and Ashika Island.
Following the complete evacuation of all Vondel civilians after the events of [[REDACTED]], SpecGru deployed several fireteams, including Victor Team consisting of Jesus “Chuy” Ordaz, Enzo Reyes, and Kleópatros “Kleo” Gavras.
They and other SpecGru forces were met with heavy resistance on the ground. However, they still confirmed the presence of notorious Operator Nikto before reporting that [[REDACTED]] appears to have taken complete control of the city.
Their report follows.
RECON REPORT: POINTS OF INTEREST
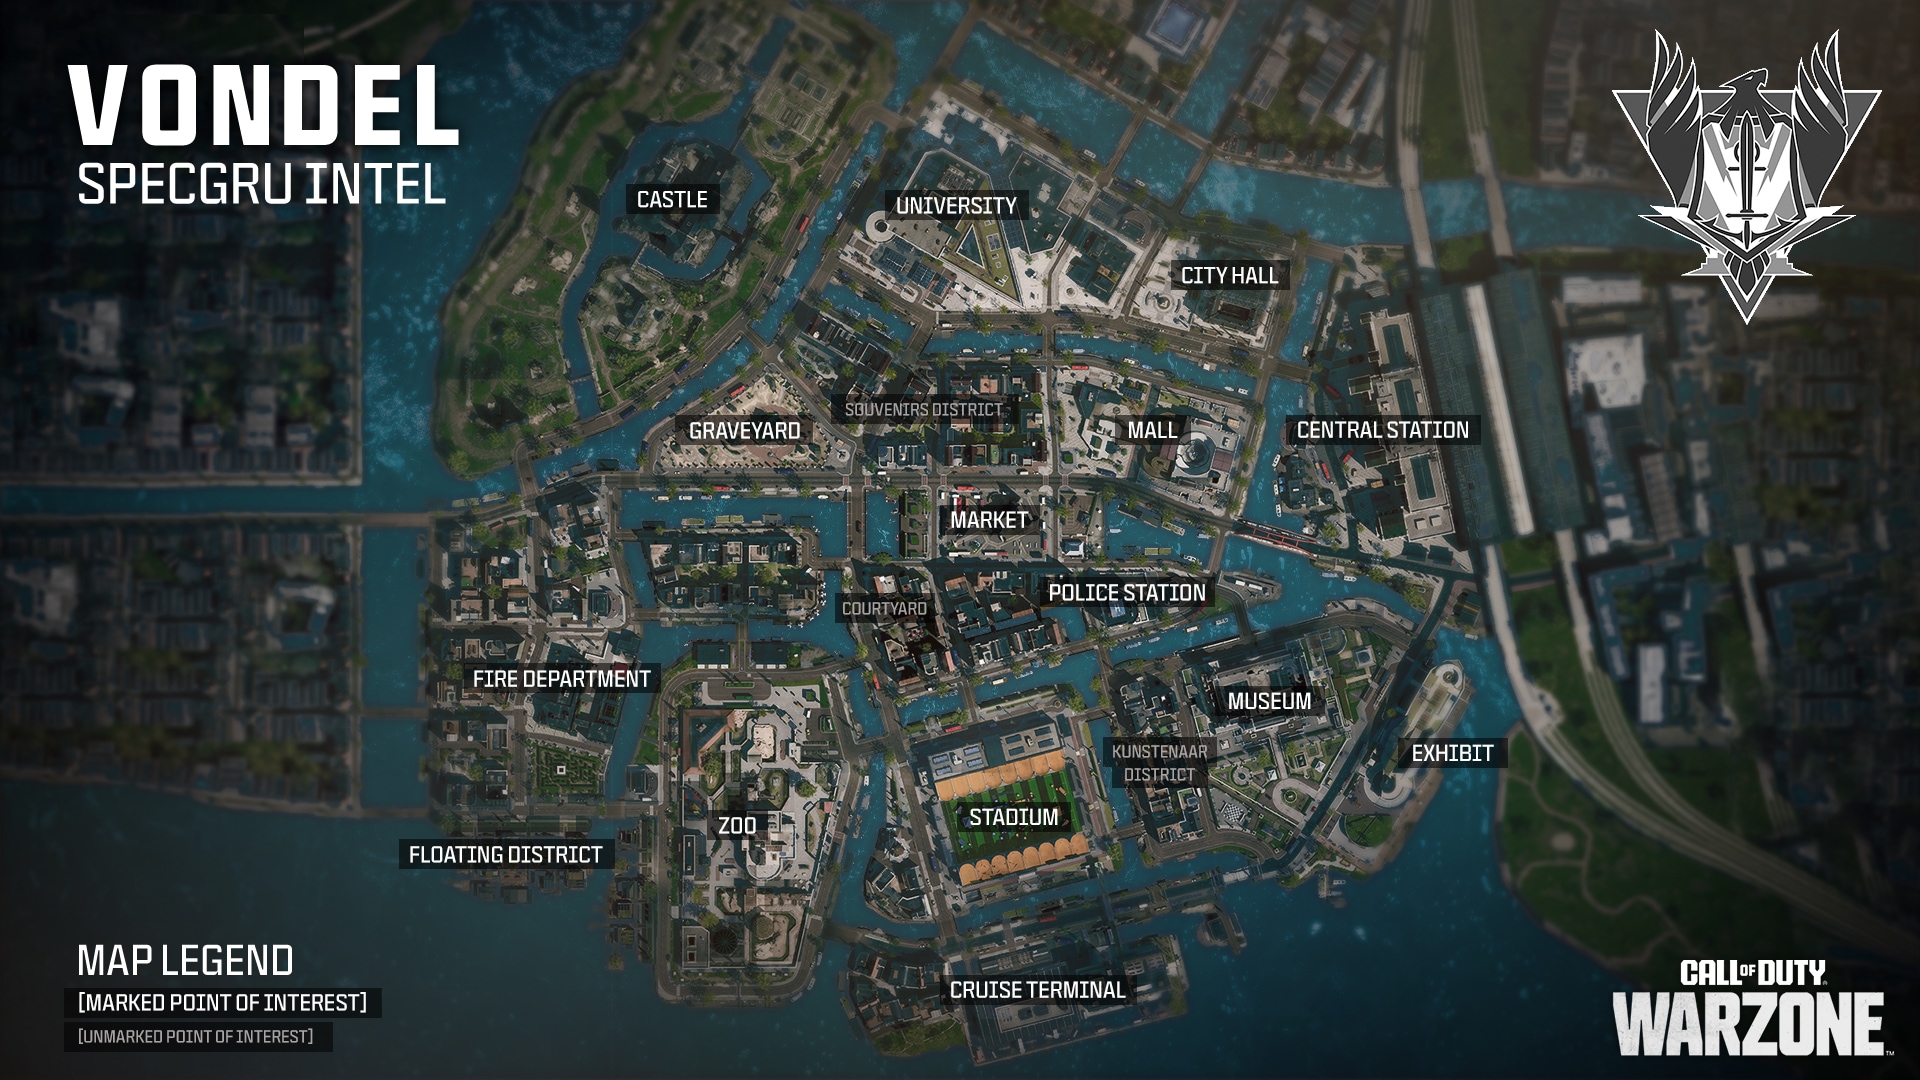
This satellite image represents the entire AO of Vondel.
Prior to deployment, Operators are advised to familiarize themselves with the various points of interest overlaid therein.
Note: When referencing hostile forces within the AO, this refers to DMZ infiltrations only.
With this in mind, the following is an initial briefing on each Vondel point of interest:
Castle
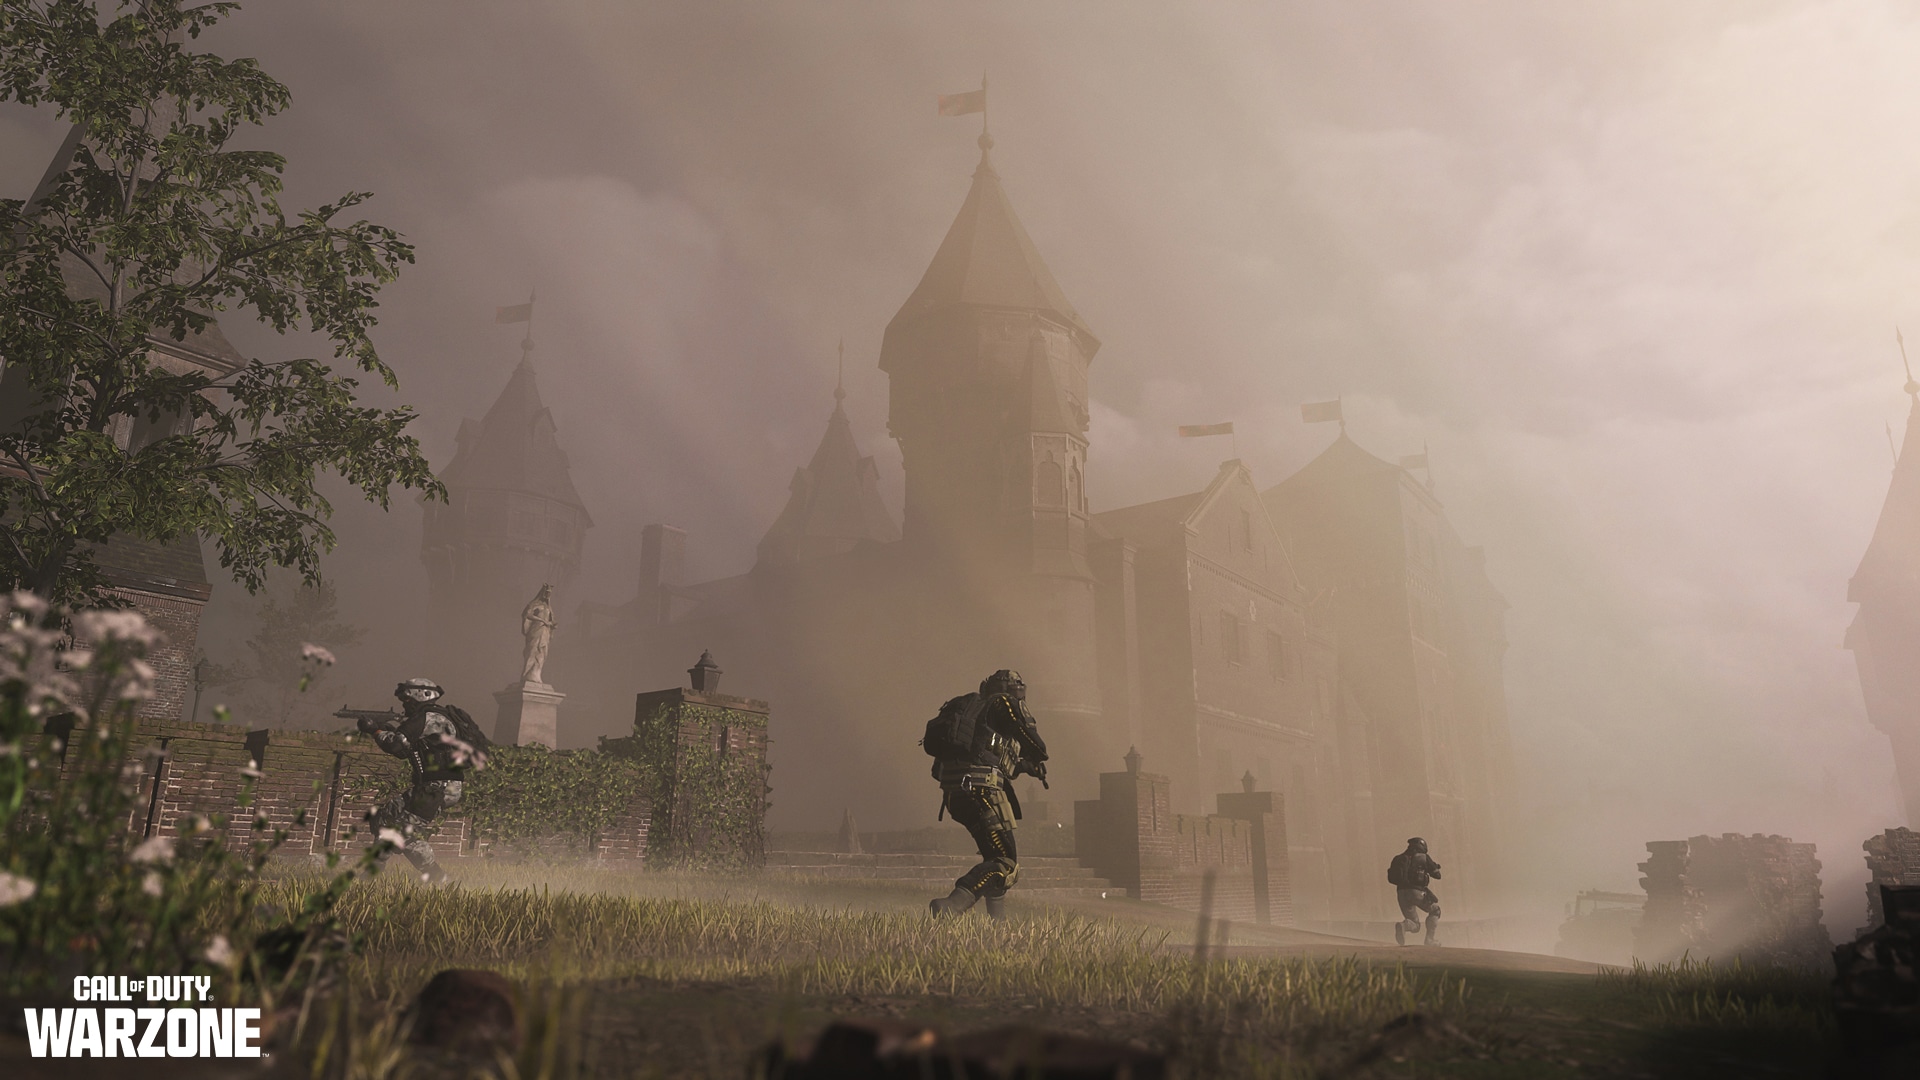
Vondel’s Castle is a 13th-century world heritage site located in the city’s northeast sector. Intel suggests that the central island currently holds the main fortified headquarters of [[REDACTED]] and that they are deeply entrenched within the fortress.
As the mist dissipated, Operator Kleo reported a complex interior with several bedrooms, chambers, living spaces, and hallways connected by passageways, a crypt, and at least one water access point.
This fortification is technically the tallest structure in Vondel, though it may not offer the most prominent of sightlines. Operators should expect light to medium enemy resistance when breaching its interior locations.
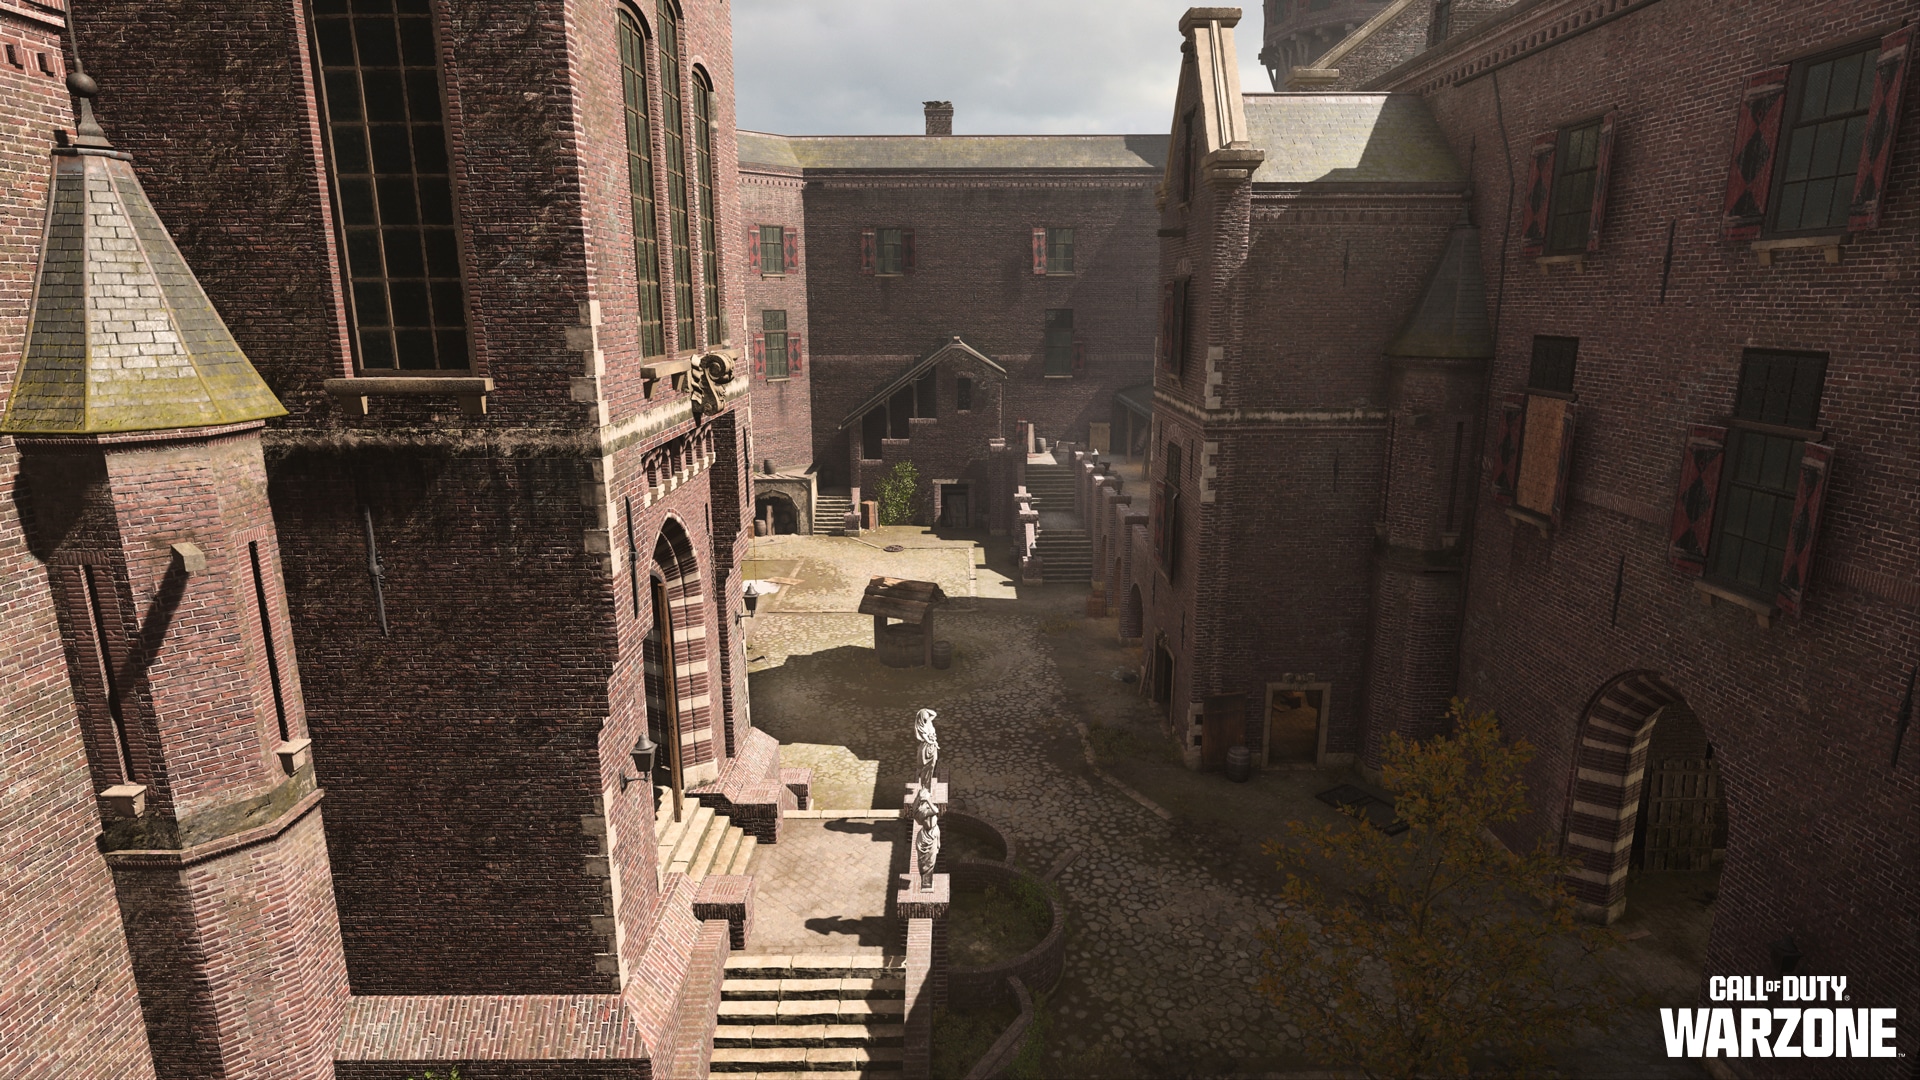
On the perimeter, there appears to be a small, abandoned chapel with a crypt, as well as a working farm, a pavilion, and some gardens.
The survey team encountered several UAV towers in this location, making it one of the more exposed areas for recon tech in Vondel. Operators should be prepared to encounter one or multiple enemy Strongholds and heightened enemy response.
Be advised: The main road network only covers the southeast side of the island; other access points are the bridges leading to the main Castle and dirt roads around it. Although entry points via the land are limited, there are numerous amphibious access points, including the Castle’s moat. The use of watercraft or amphibious vehicles, along with stealth underwater infiltration, is recommended.
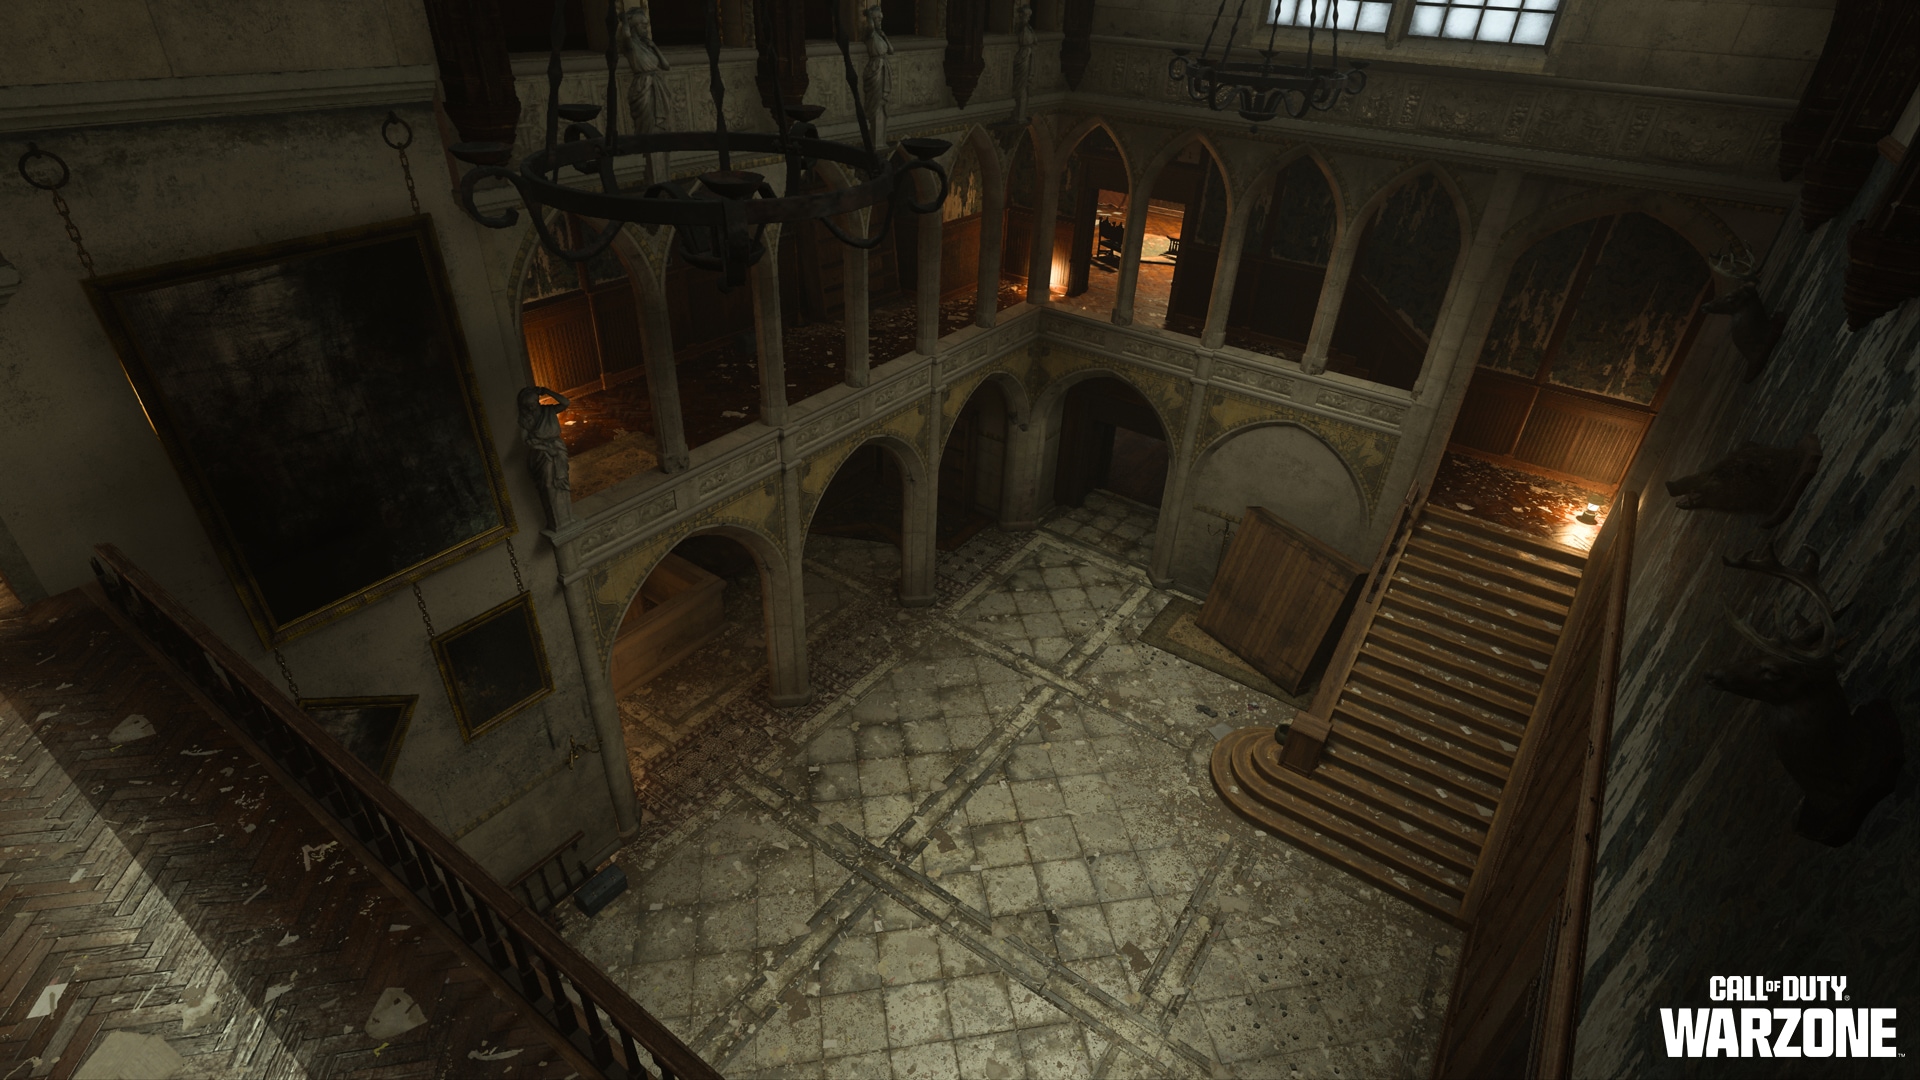
The Castle itself is the main lynchpin for control of this area. Operator Chuy confirmed that the interior of the ransacked, three-story structure includes a dining hall, kitchen, master bedroom, bathrooms, a multi-story foyer, and a multitude of other chambers. Expect fast-paced, close-quarters engagements.
The exterior is outfitted with several ascenders that lead to impressive vantage points at the top of the structure where Operators can utilize numerous (but exposed) sightlines to other points of interest.
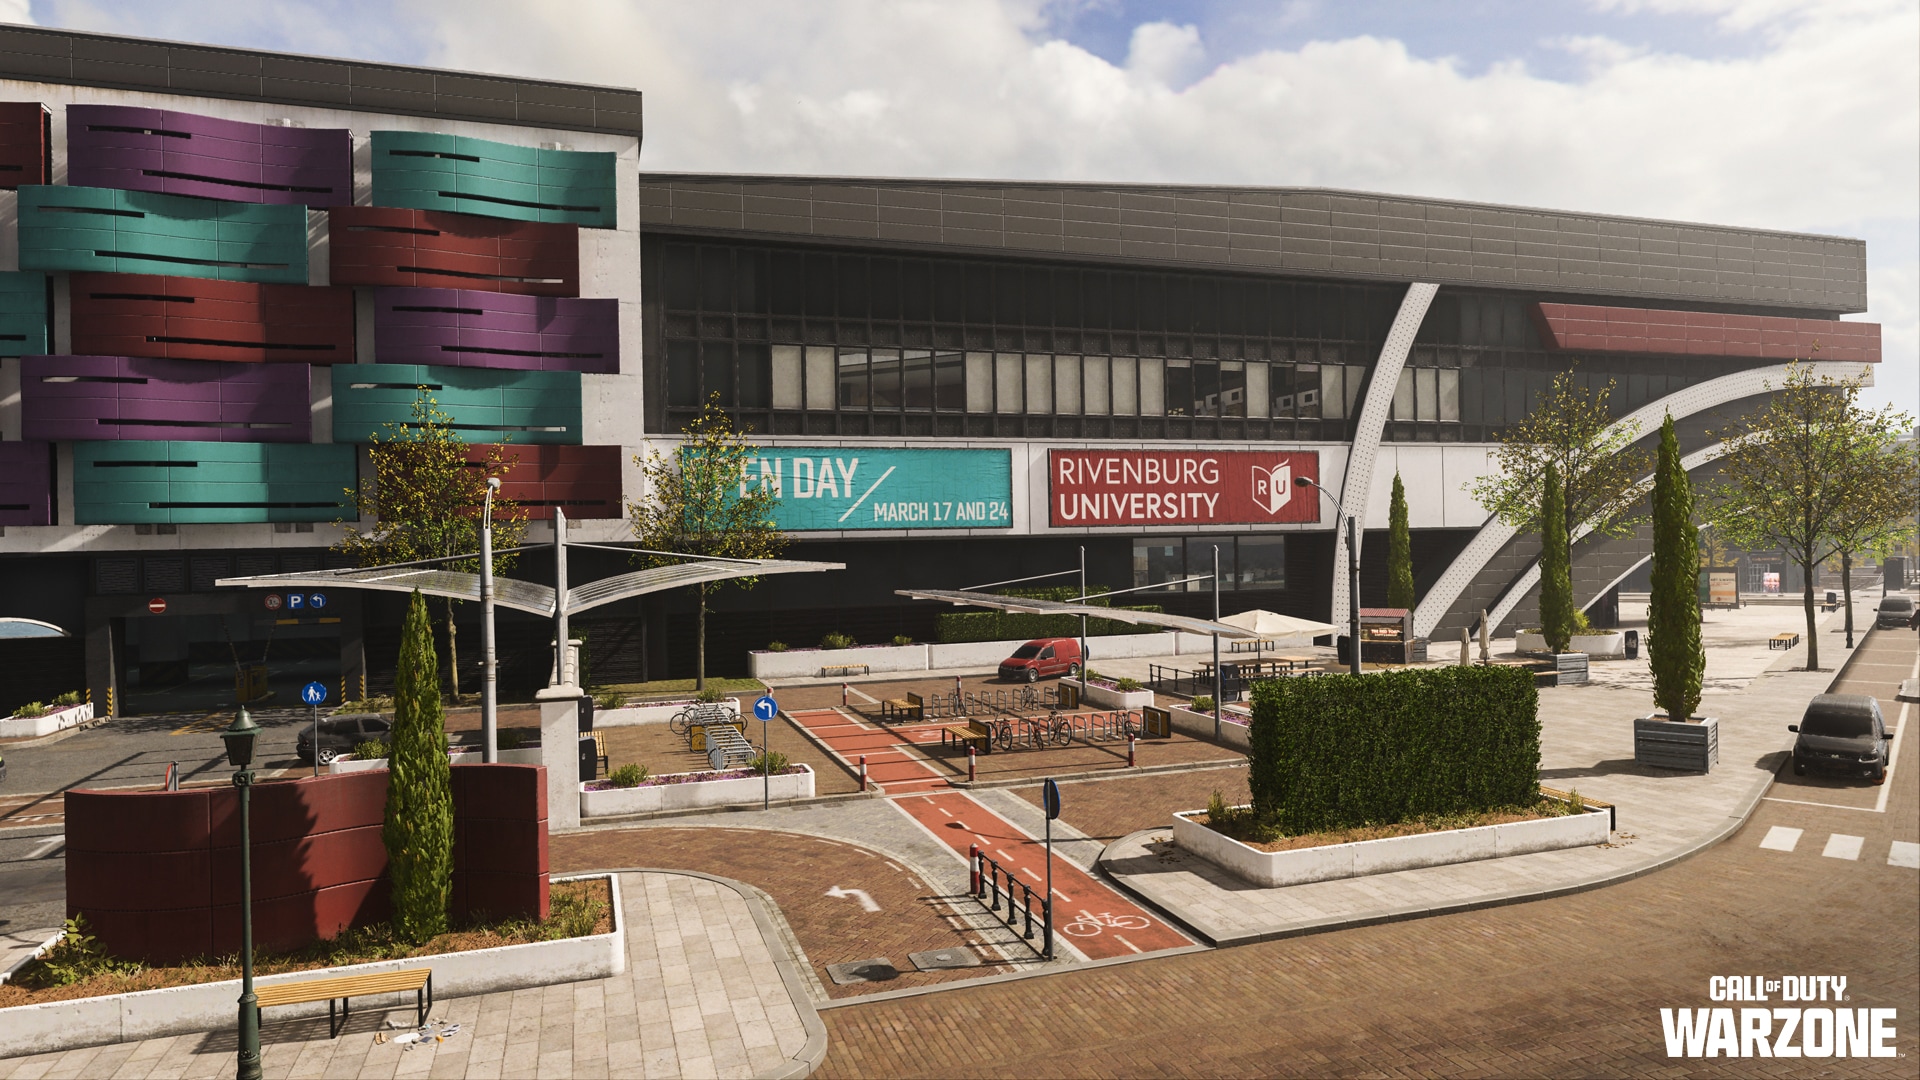
University
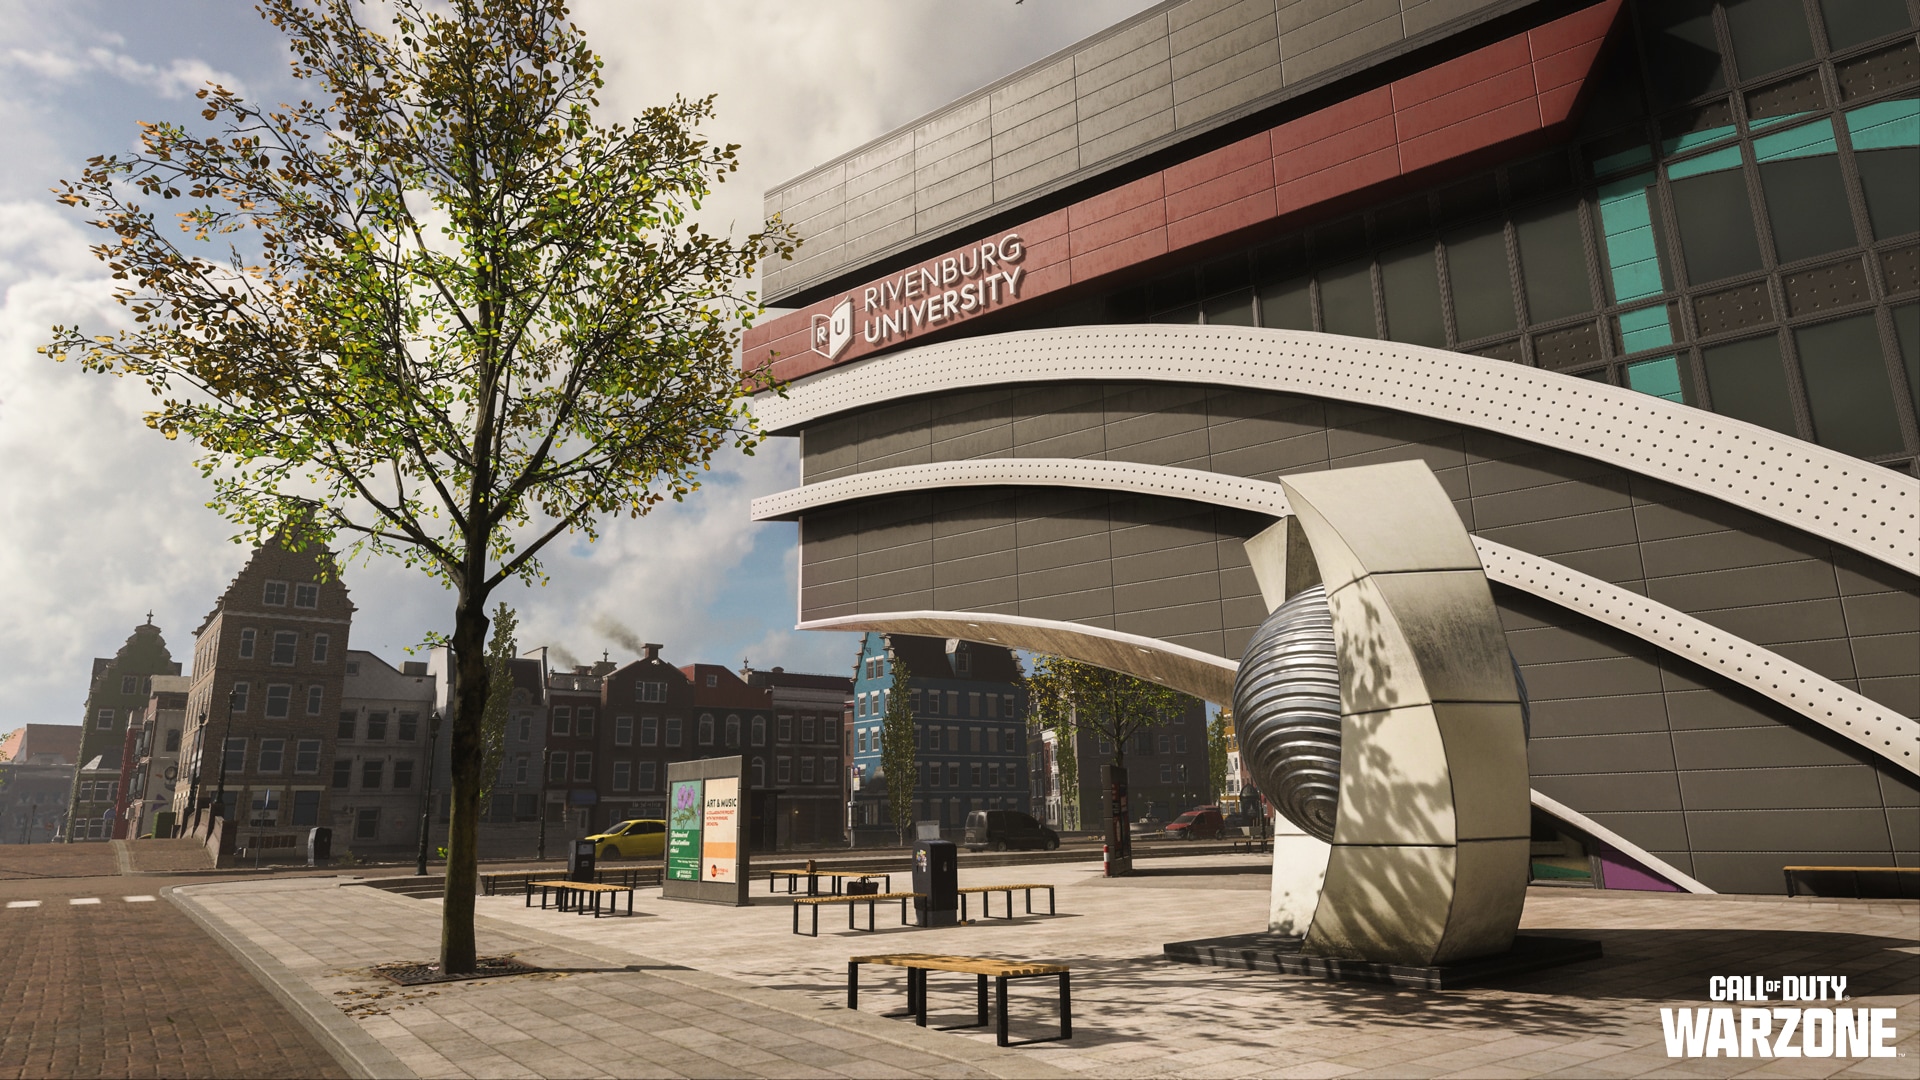
Prior to the events of [[REDACTED]], Rivenberg University was a renowned research facility.
The main structure is three stories, with its primary entrance leading to a reception area. The atrium is an open concept with staircases leading up and down floors, with shops and a second-story courtyard.
A courtyard ascender, as well as the other three around the building, leads to the top of the university parking structure, which also has a spiral ramp up to the other levels and the green roof.
Additionally, there is the Rivenberg Art Center, which contains multiple floors of what appears to be midcentury artwork, as well as an artist’s penthouse on the accessible third floor. There are two exterior ascenders to this living space, with views over to City Hall, the Mall, and back to the University.
This area also contains a University village, with several small shops and their maintenance hallways, a staging area for a concert, the gas station behind the Art Center, and a few floating homes on the rivers surrounding the island.
Be aware: The atrium provides many opportunities for a counterattack. Operator Reyes describes the artist’s penthouse as an advantageous location to clock enemies coming from nearby POIs such as Castle, City Hall, and Mall. Also, note the reinforced glass of the University village roof connects to the second floor of the University. Operators should use that as a potential flank route against those on higher floors.
Intel suggests that there are two enemy Strongholds in this region — one in the University and the other in the village — both heavily occupied by elite soldiers. Additional intel gathered during [[REDACTED]] suggests a possible Dead Drop [[REDACTED]].
The gas station is the only dedicated land vehicle filling station in North Vondel. To gain an advantage, Operators are advised to activate the UAV tower at the Art Center behind the station, and use caution when navigating the exposed bridge to the northern road.
City Hall
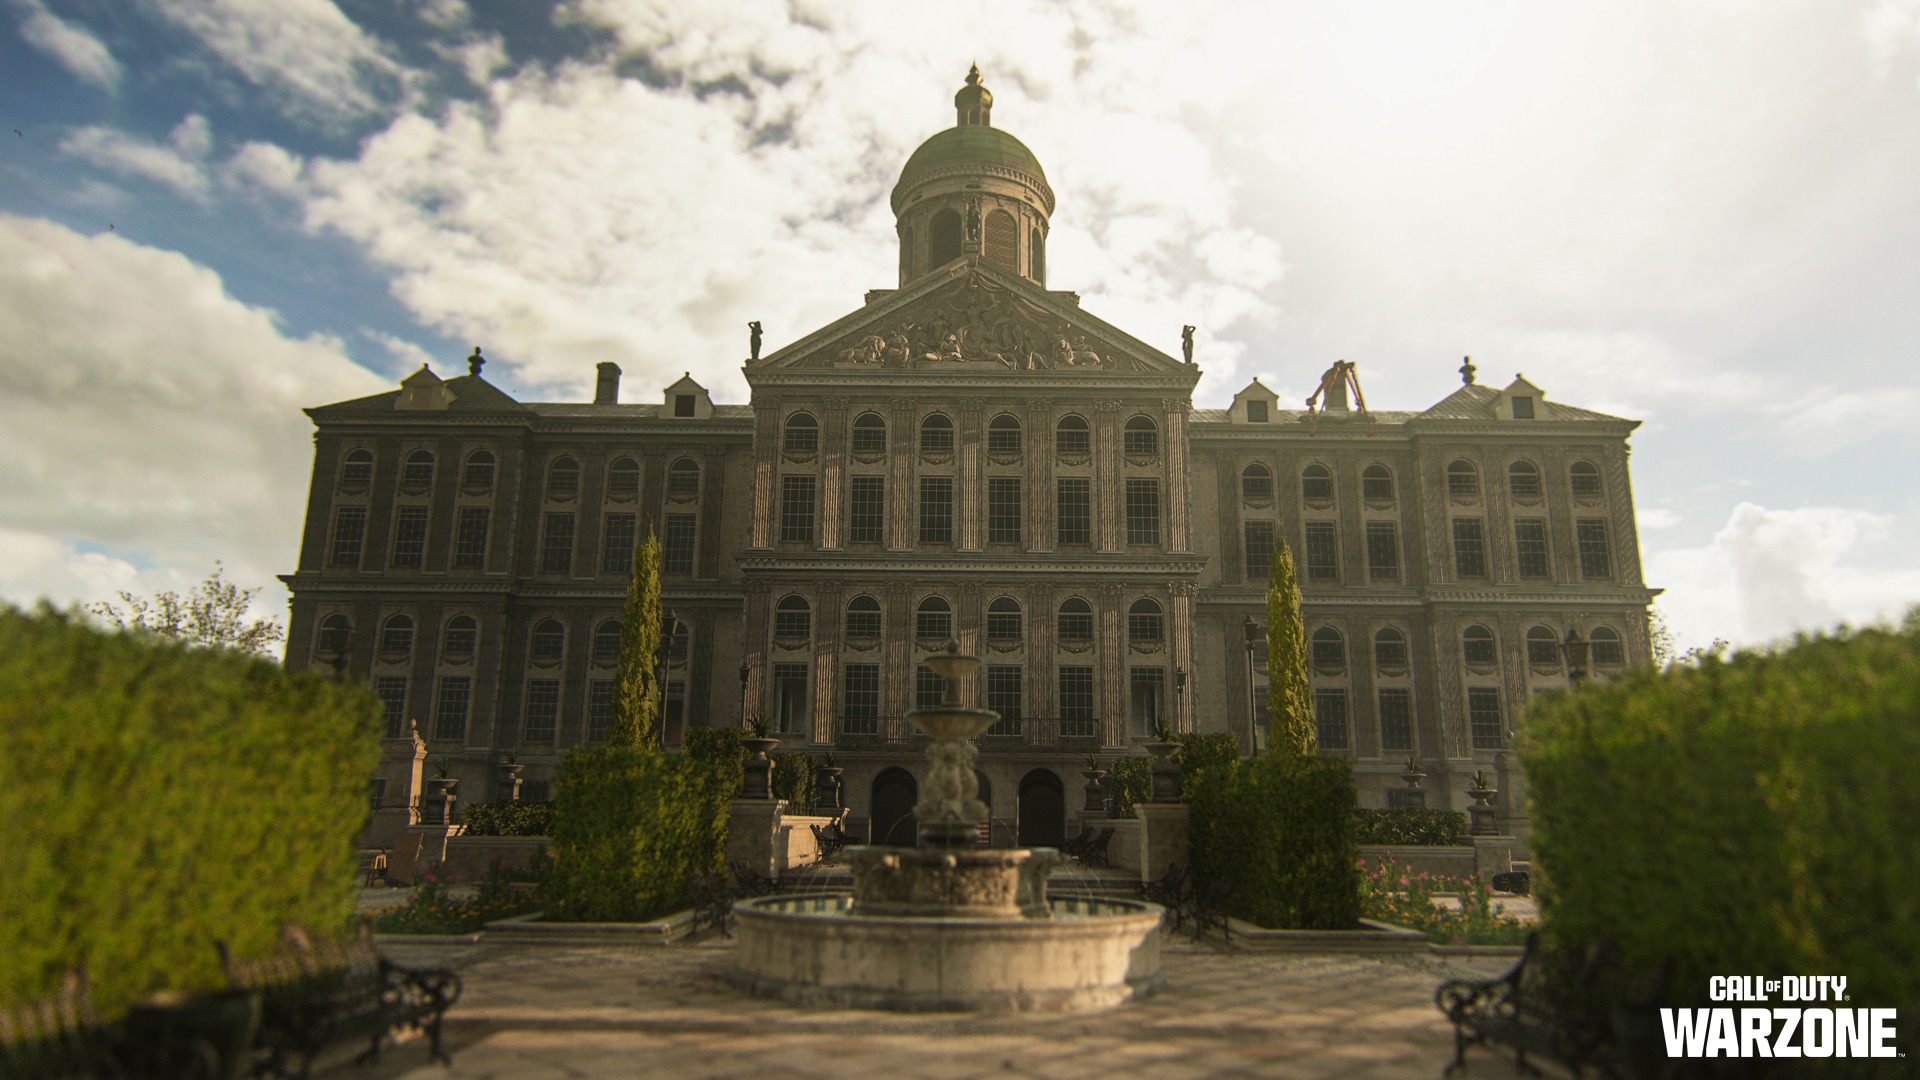
The Greek Revival building has five floors, two of which are widely accessible. The main vestibule contains a grand staircase to the building’s iconic main room, which has a marble-floored foyer with several lion statues and an impressive ceiling fresco.
From meeting rooms to the rear mailroom to the central courtyard, there is no shortage of areas to sweep through to find enemy opposition. The building’s rooftop cupola will serve as a handy vantage point. Operators can access this via an exterior ascender from the foyer balconies or by navigating the adjacent rooftops.
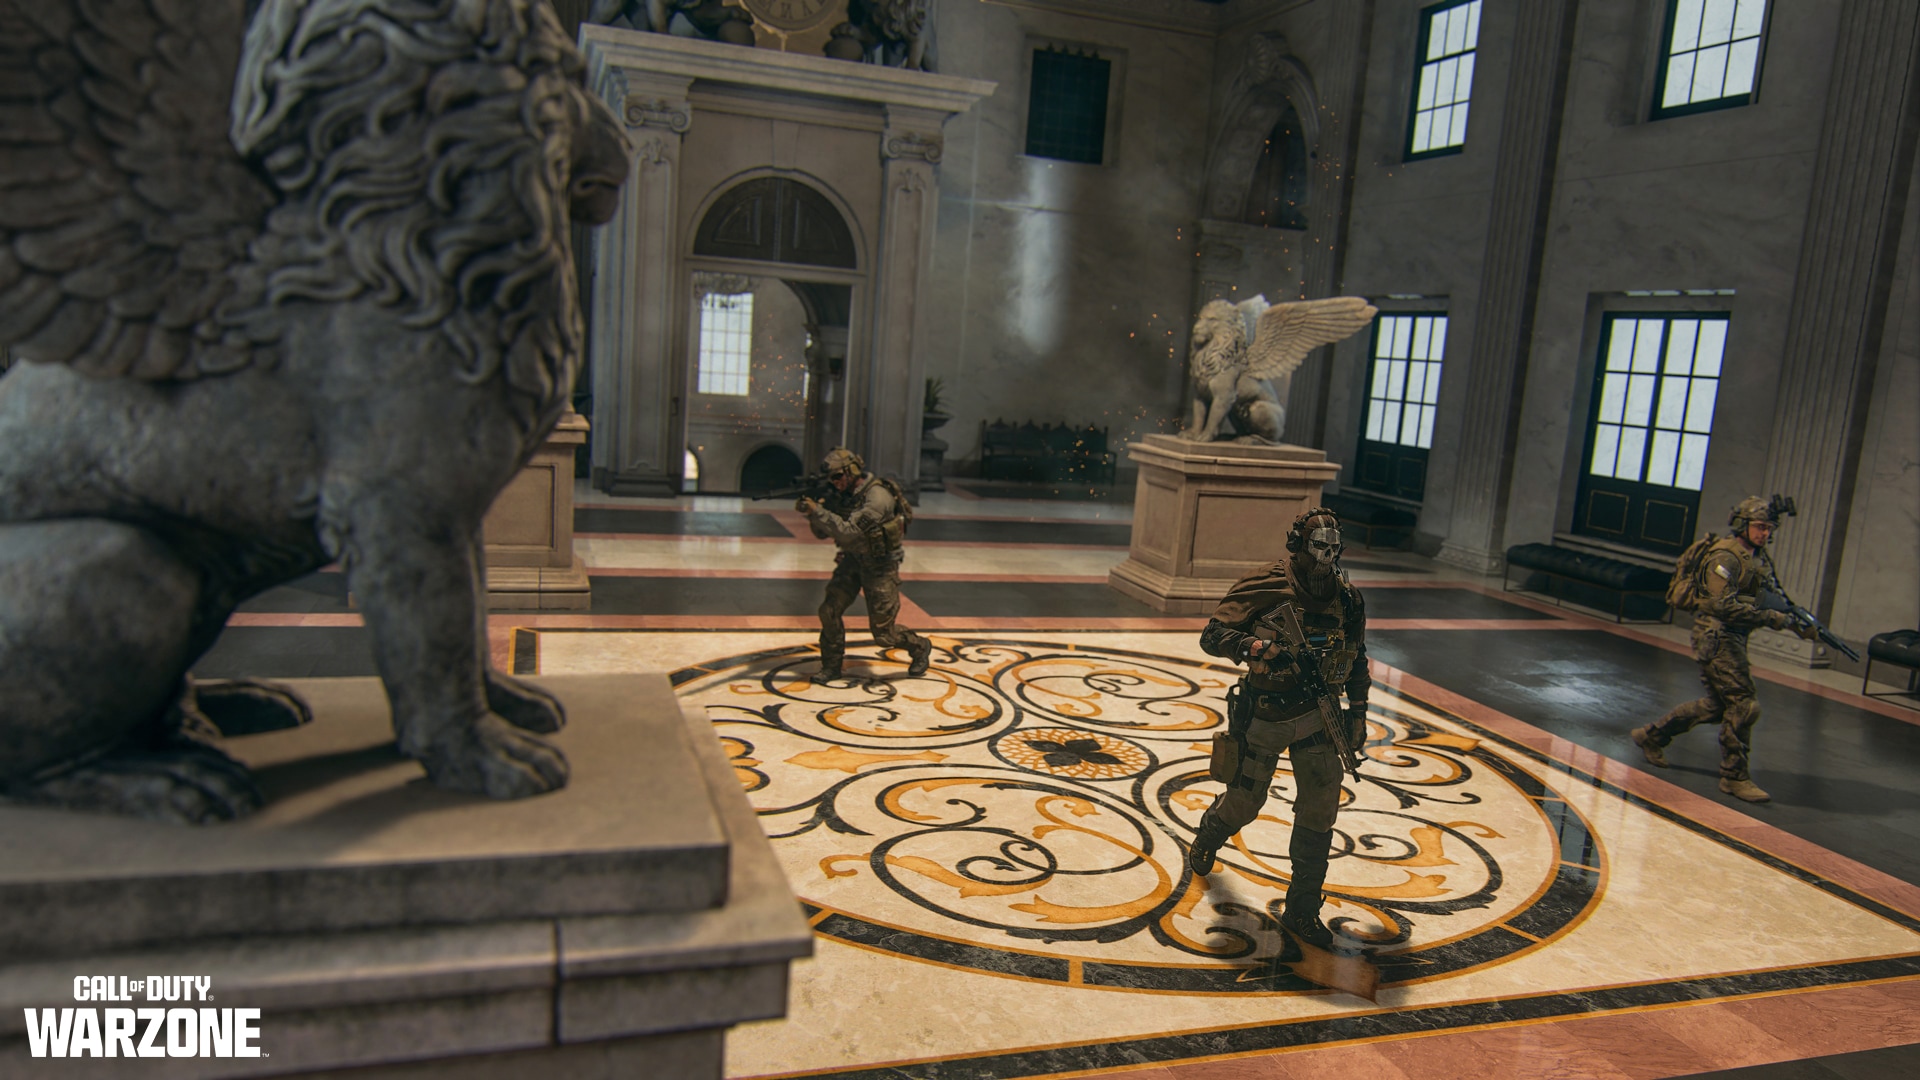
Operators who manage to lock down this area may hold the advantage in most combat situations. Close-quarters combat should be expected within the Town Hall, with most midrange combat possible through the exterior of the building via the windows.
A nearby UAV tower covers the Town Hall. Operators are advised to activate this tower when taking a stealth approach. Intel suggests that an elite force controls City Hall, and Operators should proceed with caution. There also appears to be several suitable extraction points in and around this area.
Central Station
Primary target Nikto and [[REDACTED]] forces appear to have attacked the Central Station, with severe collateral damage reported throughout the vicinity. There is evidence they used this location as their insertion point during the events of [[REDACTED]].
Access points to the Station include numerous ground-level doors at the front and side entrances of the building, as well as a handful of underground entrances.
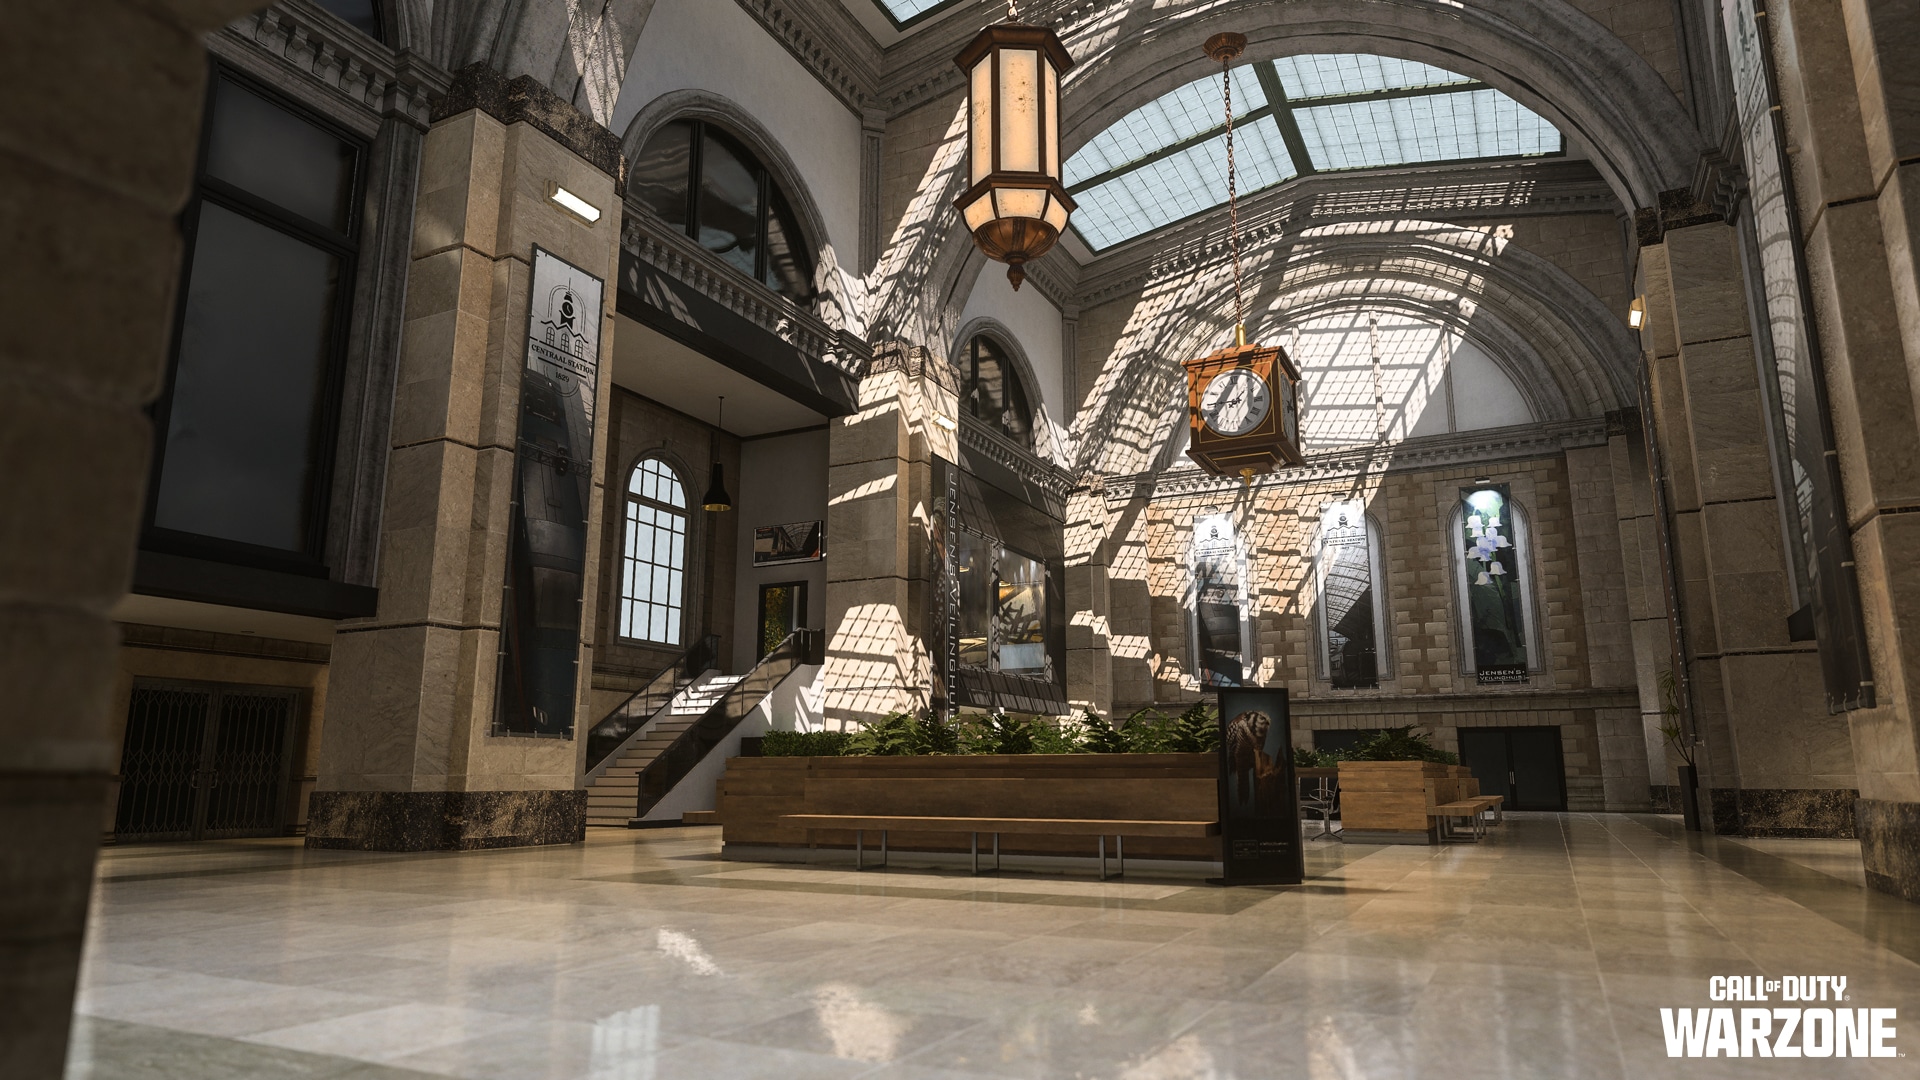
Operators should use caution while infiltrating the latter. Alternatively, the staircases on either the north or south sides of the building can be utilized for more immediate platform access.
Be advised: When inside the main Station, check the ticket plaza, mezzanine, and shops for useful items — and be wary of hostile forces. The recon team noted what appears to be a connecting tunnel beneath the main staircase, as well as elevator shafts up to the second-floor Museum area and roof.
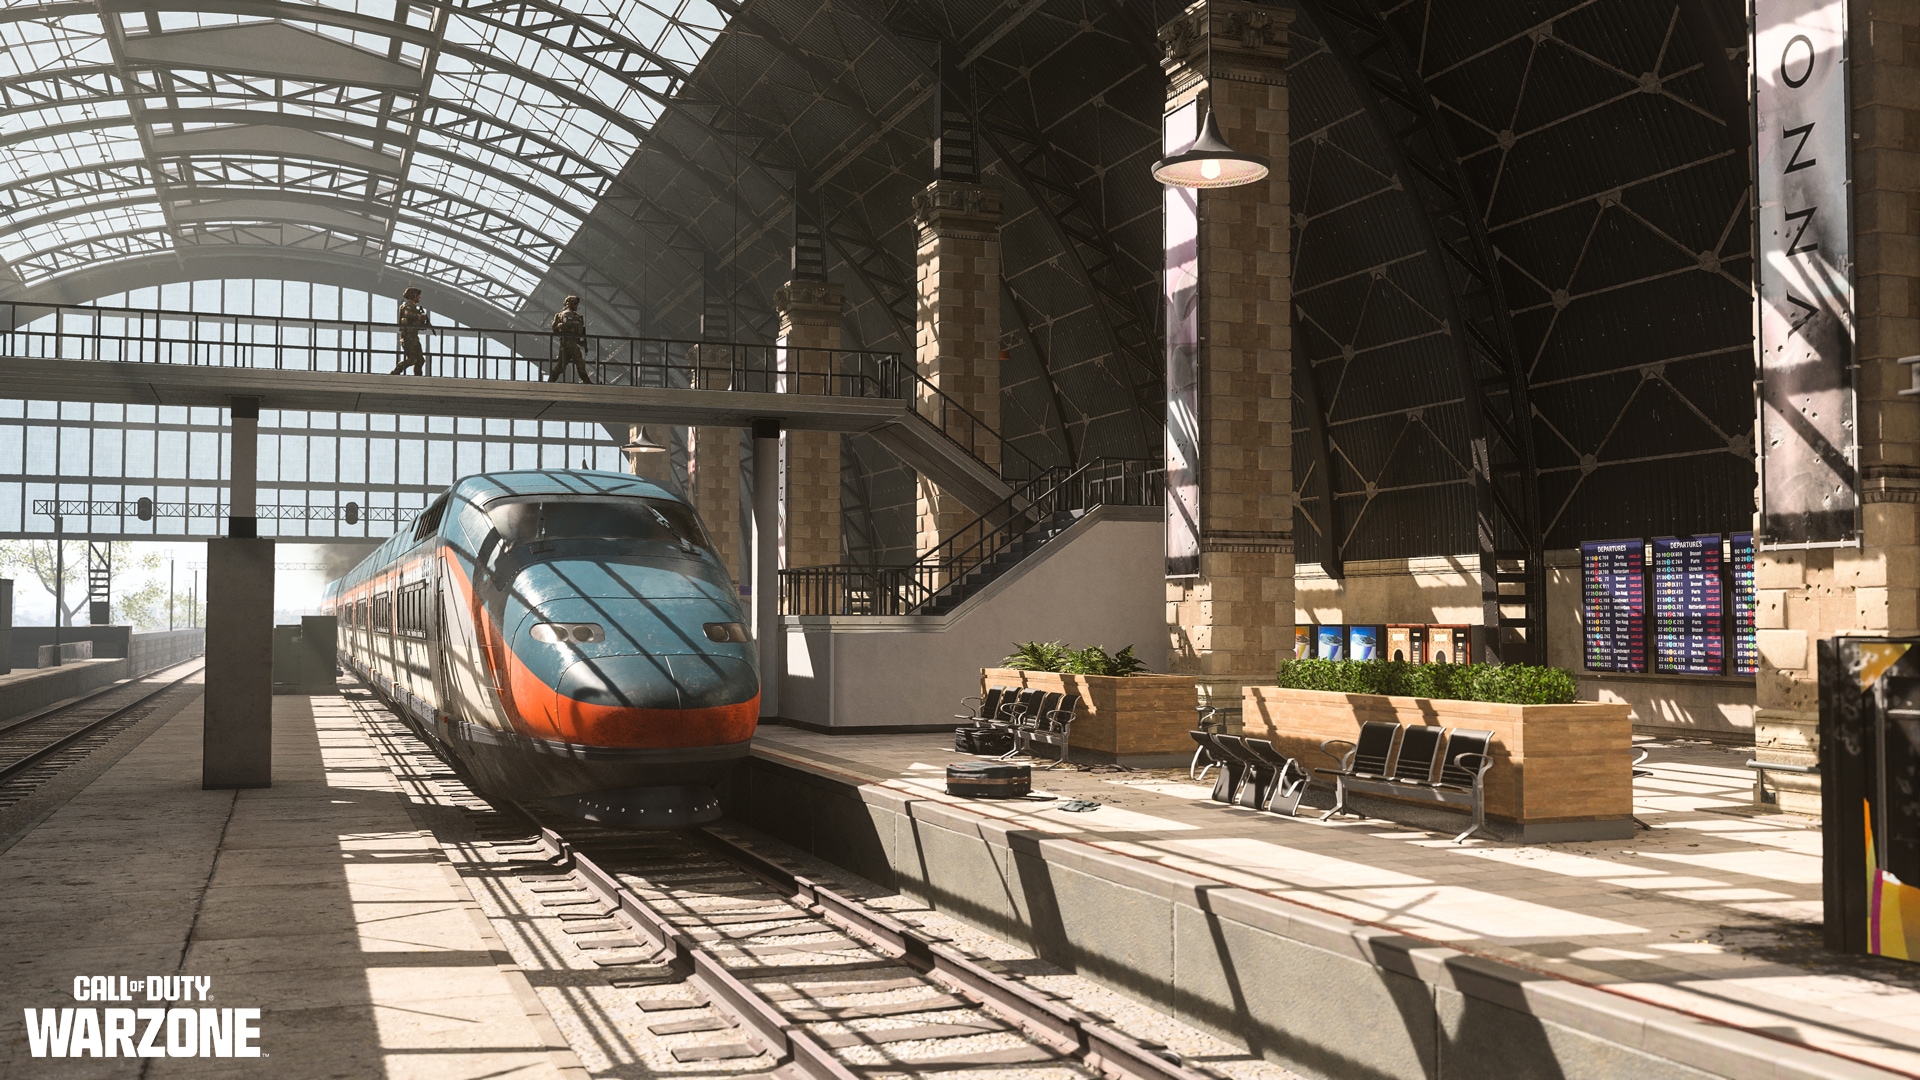
The stationary trains on the main platform are firmly locked. There are two walkways over the tracks that lead to the secondary platform, which has a small underground space. Short- to midrange weaponry will be the most combat effective around this platform. Expect close-quarters engagements in the small spaces within the Station structure.
Northeast of the Station is a small plaza and a canal that serves as Vondel’s northern border. The western and southern perimeter are earmarked by a red bridge that leads to a Mall, a canal-side gas station, a bus depot, a “tramhalte” stop, and a bicycle lock-up area. This area is an optimal bivouac spot as enemy forces appear to be much fewer than in the main Station.
Mall
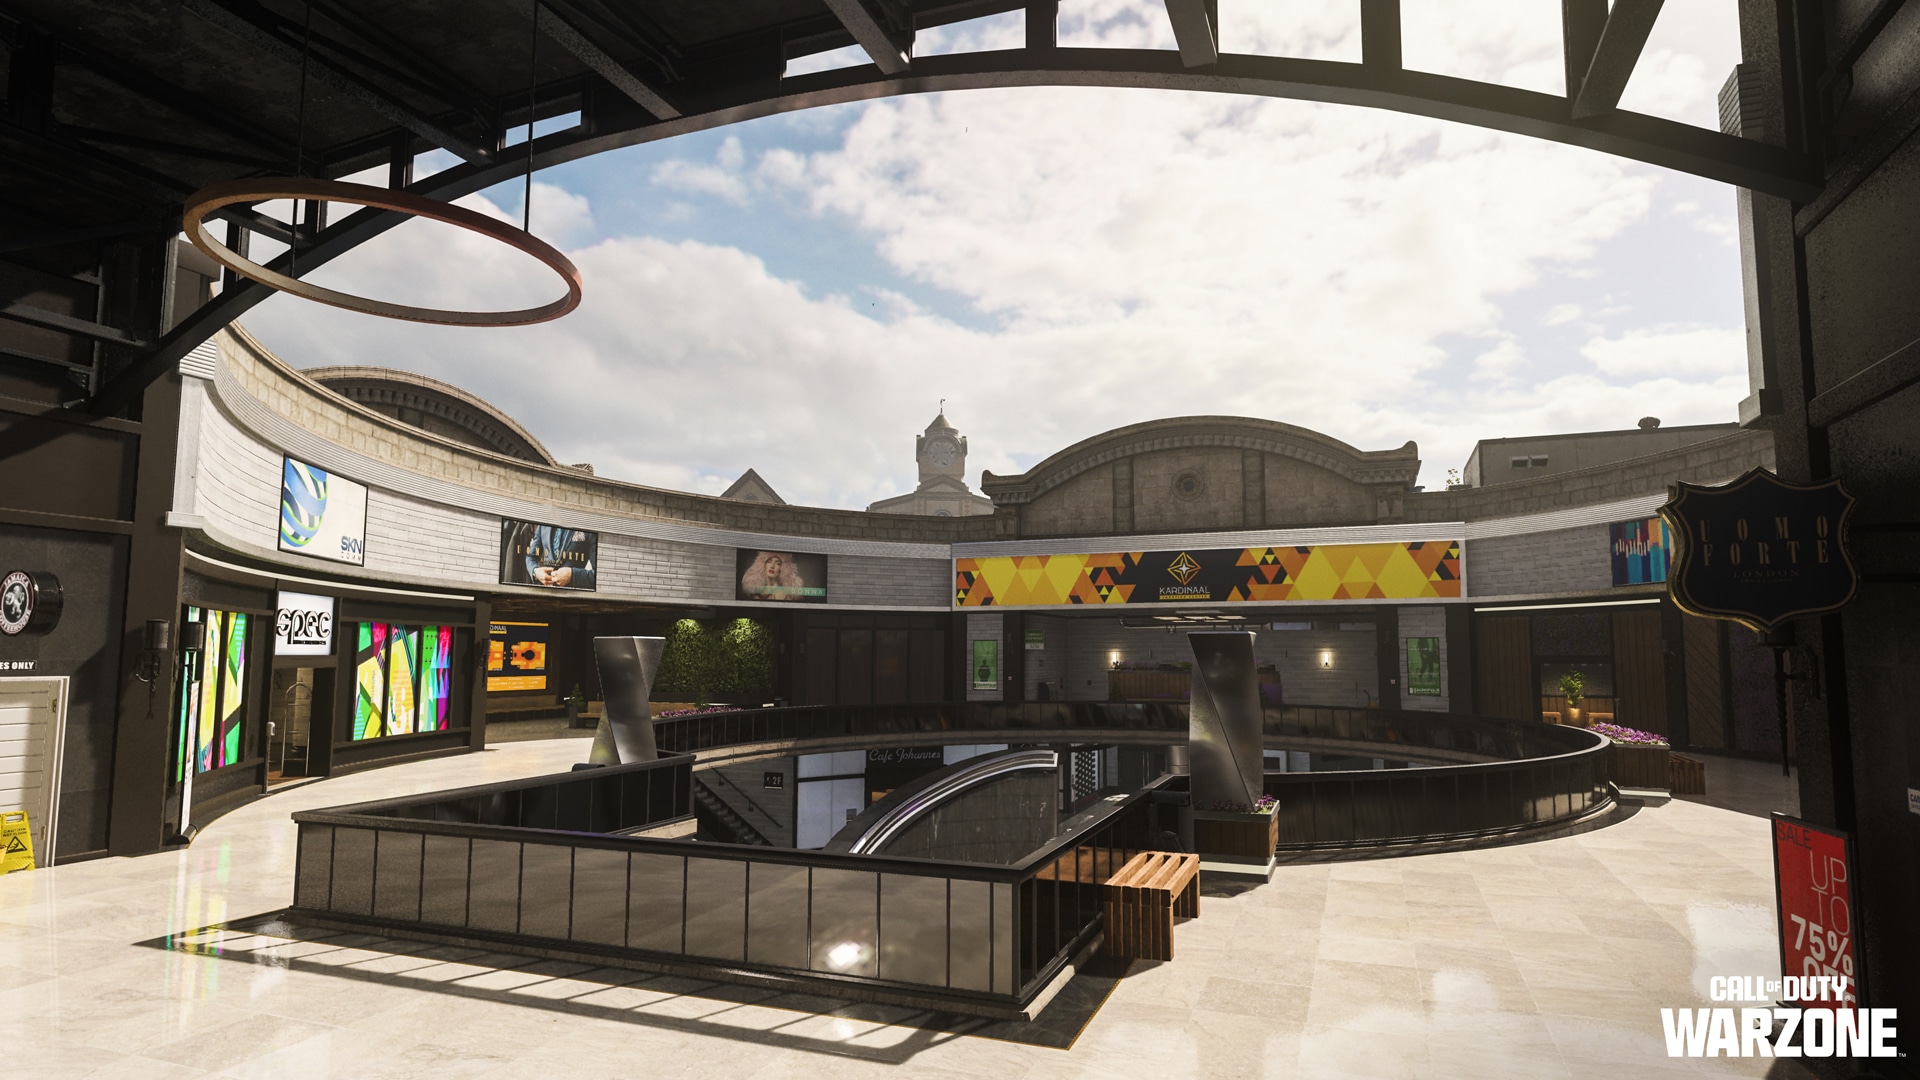
Taking up two whole city blocks, the Kardinaal Shopping Center consists of an older, Baroque Revival structure and a sprawling outdoor market of abandoned shops — all connected via a walkway over a bus drop-off.
The two-story main Mall building is easily marked by its outdoor fountain. Both interior floors have a variety of smaller stores to investigate, from a bookshop to the Caffe Johannes. This area is optimal for looting useful items, but Operators should be cautious of enemy-laid traps.
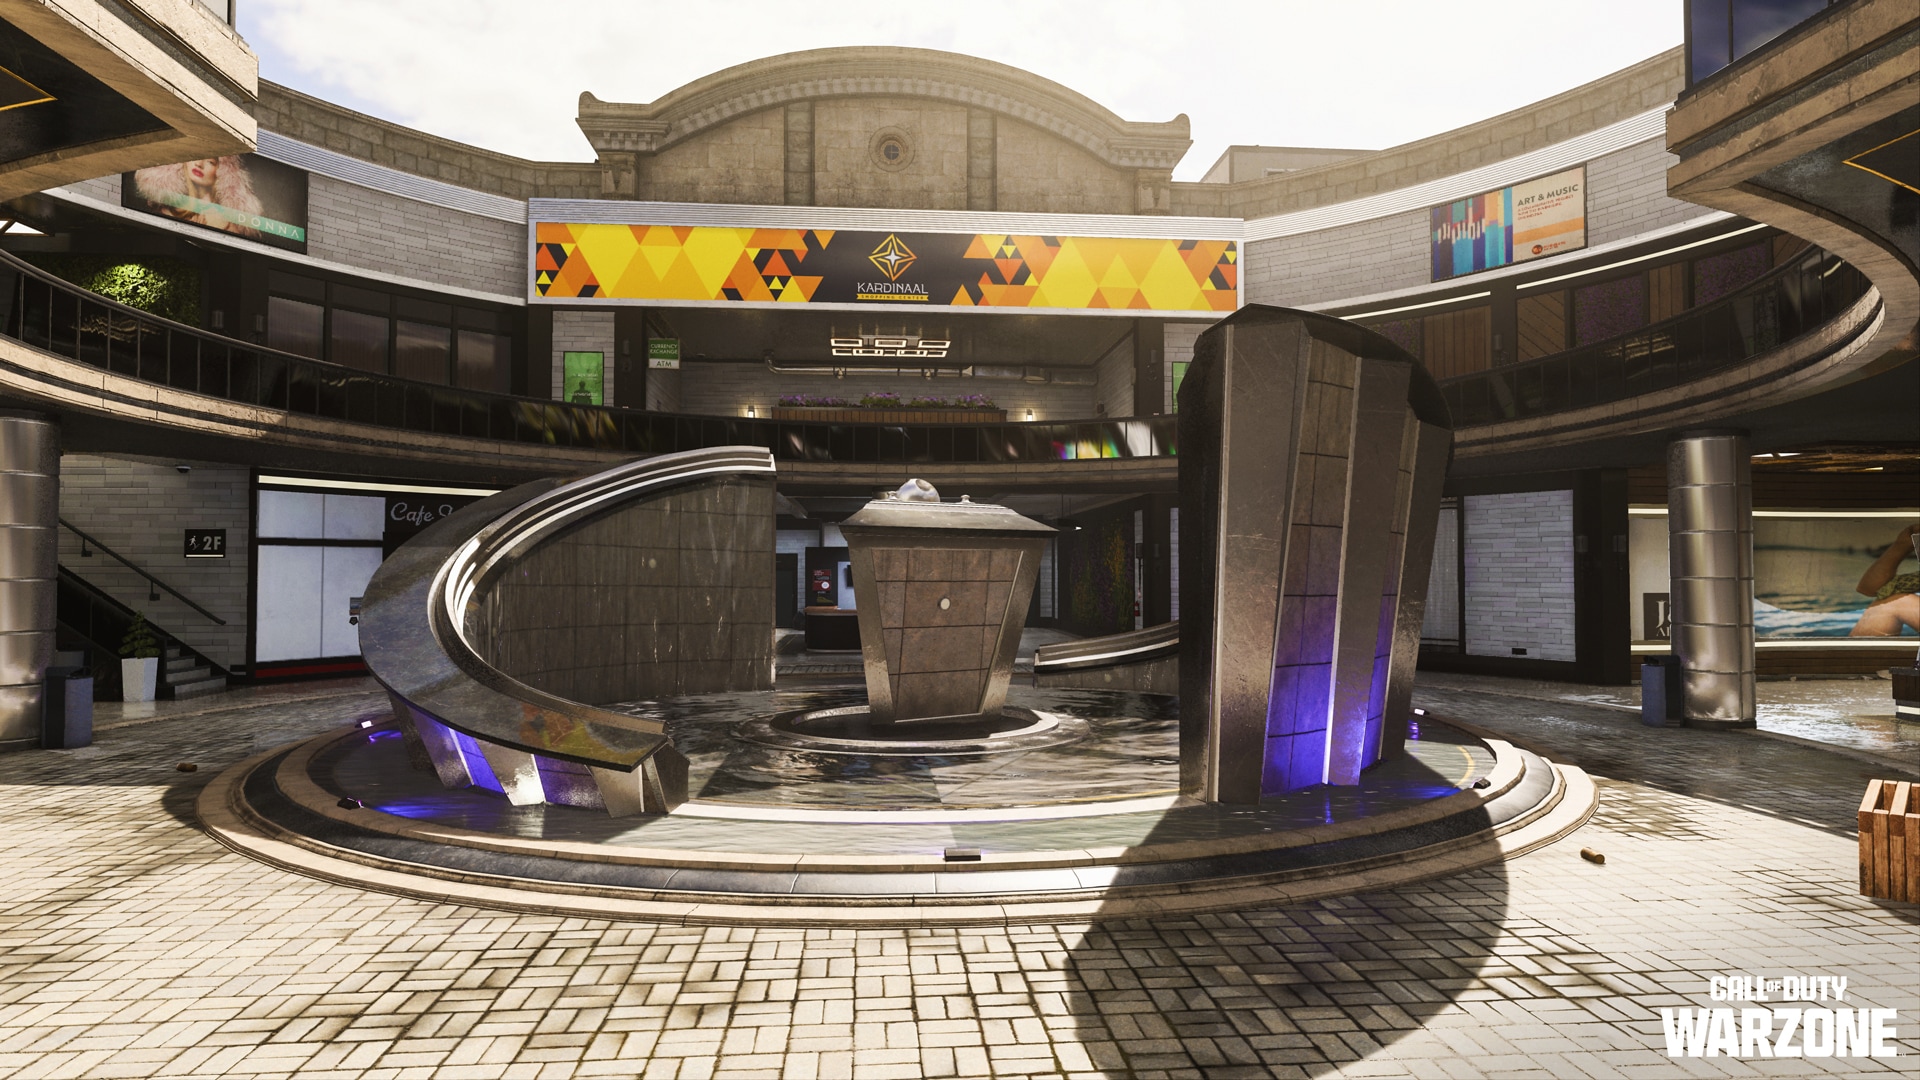
Due to this area’s open nature, aerial ordinance may be most effective in removing enemy squads or other hostile forces. Otherwise, expect close-quarters combat. Operators are advised to use this area as a rendezvous point before rotating to the Market, Central Station, or Police Station.
This area appears ideal for an amphibious approach, particularly when field-testing the new and versatile TAV. Operators can access either of the two ramps on the east bank, as well as the one on the north and any of the three near the Central Station.
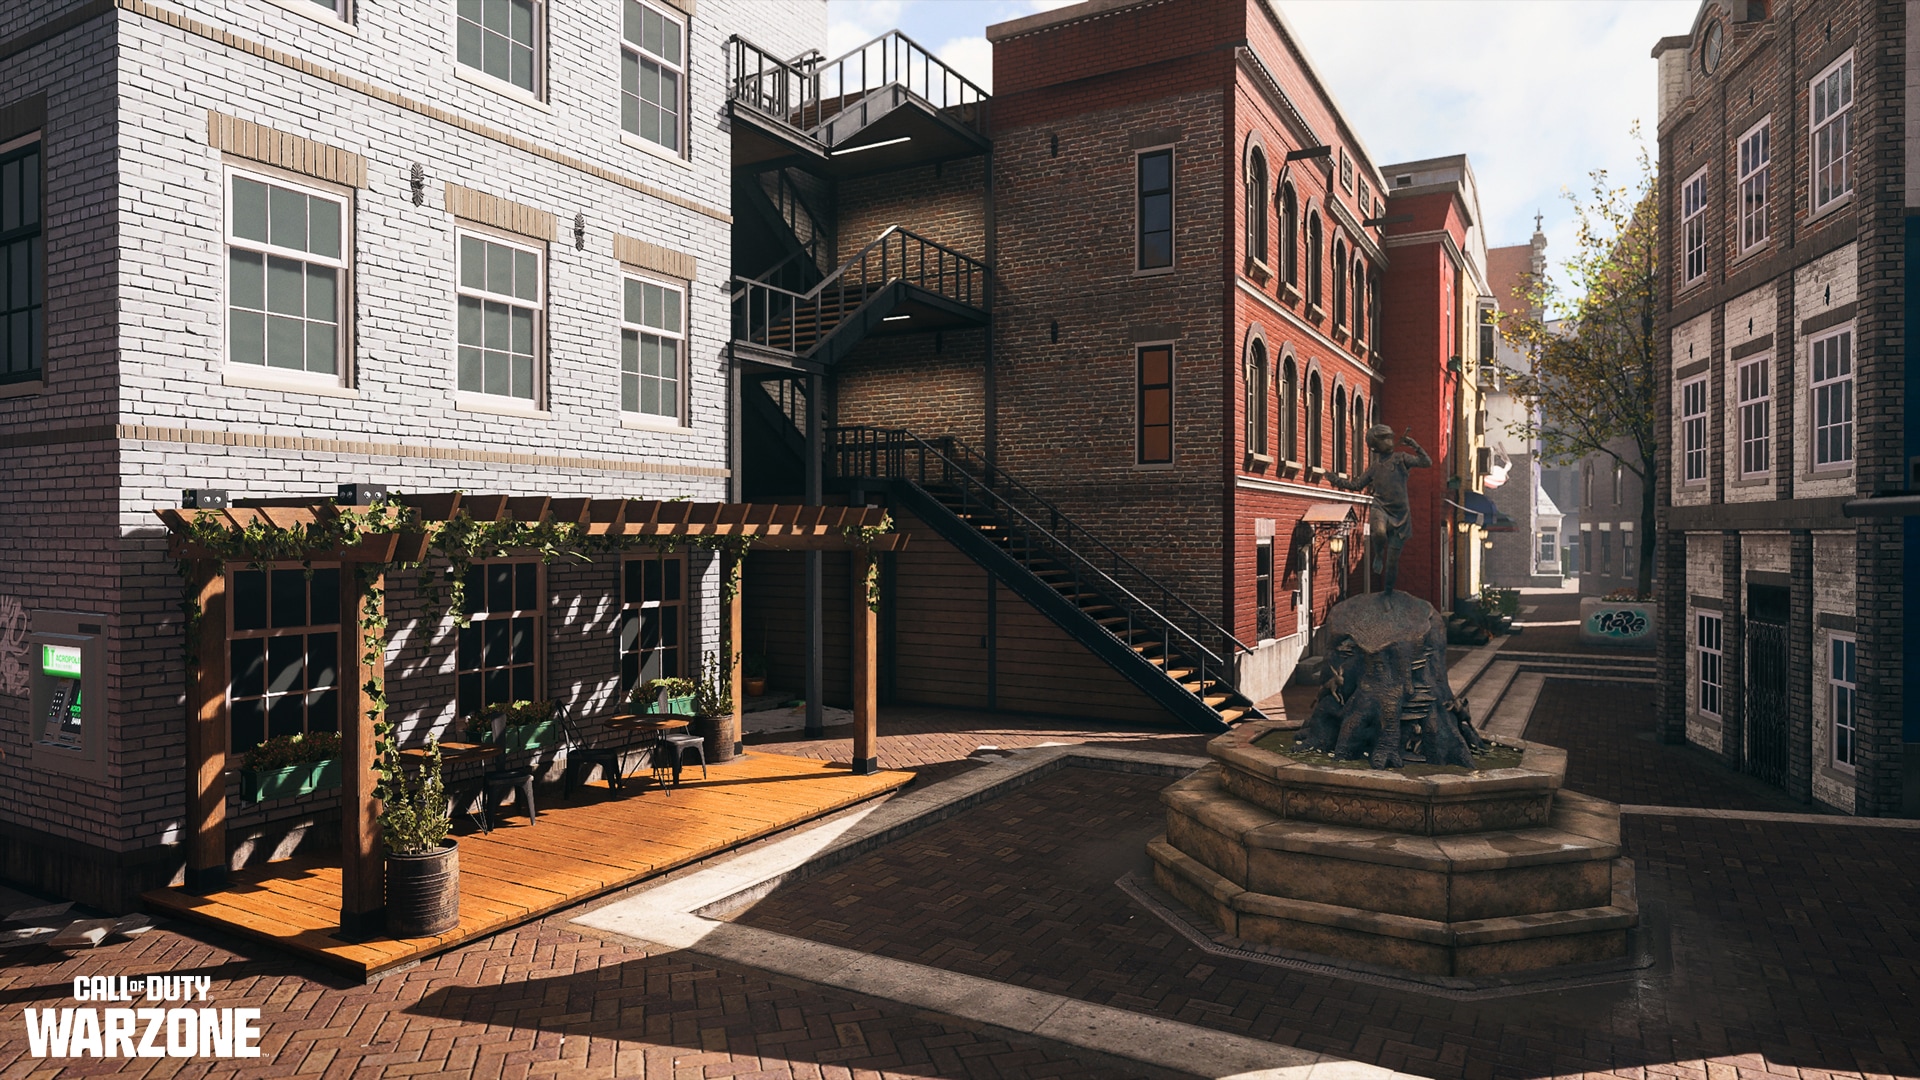
Souvenirs District (Unmarked)
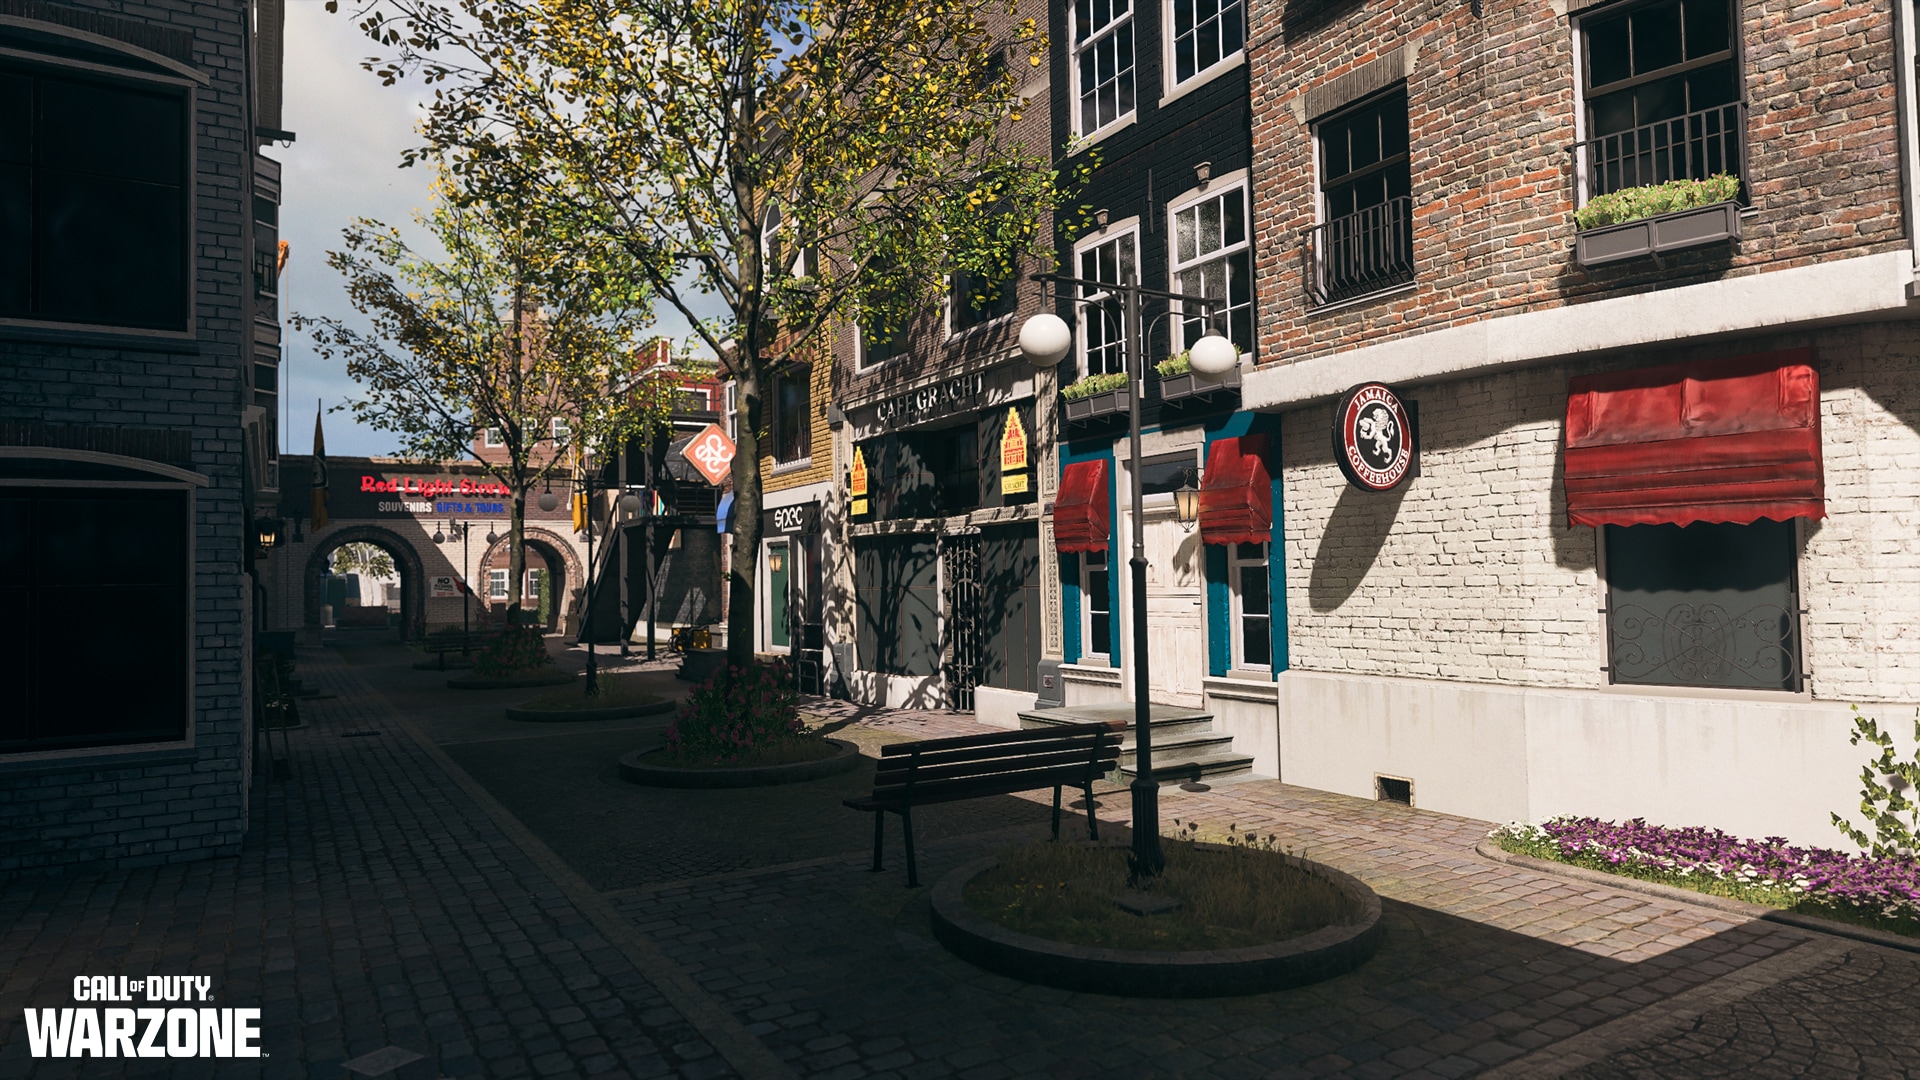
This unmarked POI comprises three clusters of townhomes — the majority of residential structures along Vondel’s northern sector.
Operator Chuy reported some tenement buildings being internally accessible, as well as fire escapes and exterior ascenders providing pivotal access to the linked roofs. The ground floors are occupied by a variety of abandoned cafes, pubs, and tourist shops.
The easternmost townhome cluster is situated north of the Market, earmarked by a “Red Light Stories” sign. It is the largest of the three clusters and contains two distinct wooden stairwells to the rooftops.
The second, central cluster is a triangular collection with one block facing the canal and another block angled between the two other blocks.
The third, western cluster is L-shaped and adjacent to the Graveyard. Outside of a small alleyway with an exterior ascender to the eastern section, these homes are all interconnected and offer solid sightlines to the Castle and University areas.
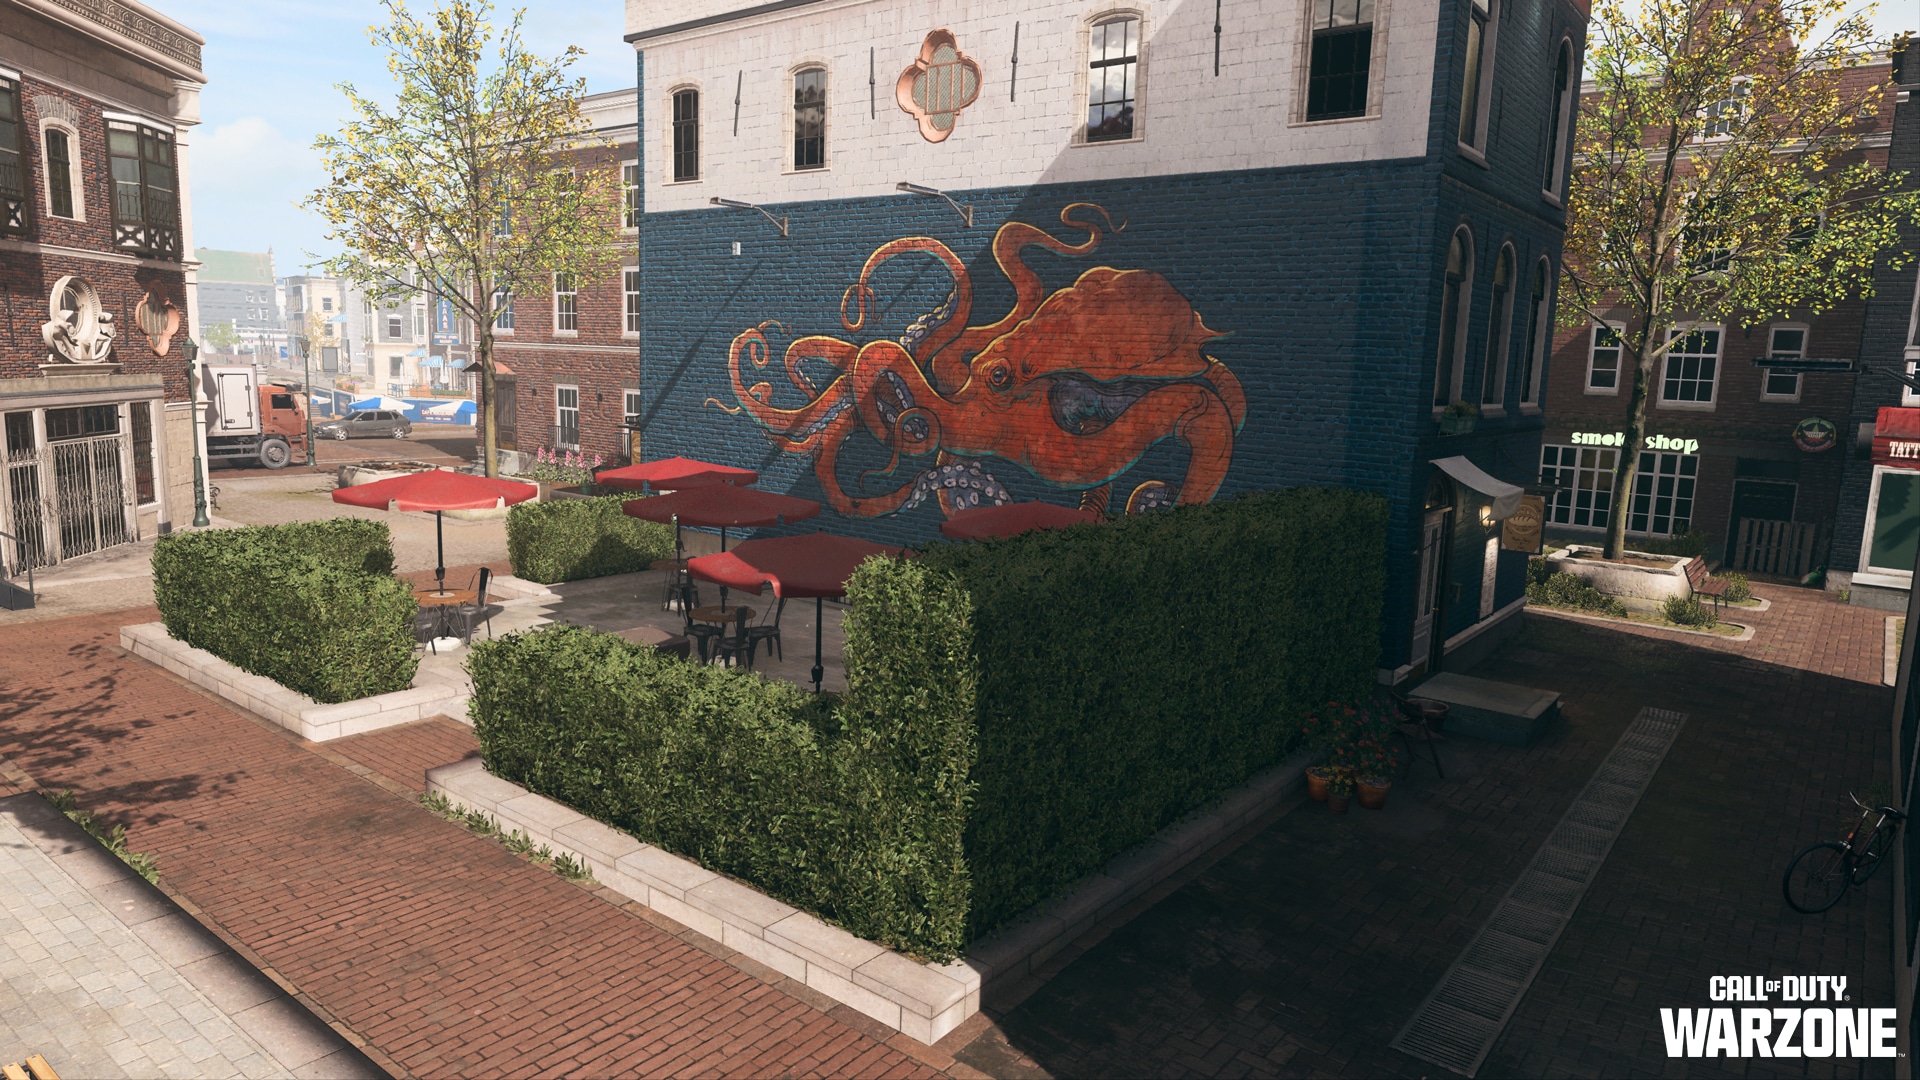
Operators should take note of the various building colors and wall murals to orient themselves within the complex tenement design. Operator Reyes notes the south side of the eastern cluster is marked by a purple tiger mural, and the north side with a blue mural with what appears to be multiple birds. The rooftops can easily be traversed for better visibility of nearby POIs.
This area has two UAV towers — one in the main block and another in the L-shaped block. The former appears to provide coverage of the modern Mall section only, without any overlap from adjacent towers. The latter is vital for gathering intel on who may be in the triangle tenement block and on the east side of the Graveyard.
The threat level here is high, and DMZ Operators should expect up to three potential Strongholds — one for each tenement block. Be advised, this area may have a Dead Drop location in [[REDACTED]].
Market
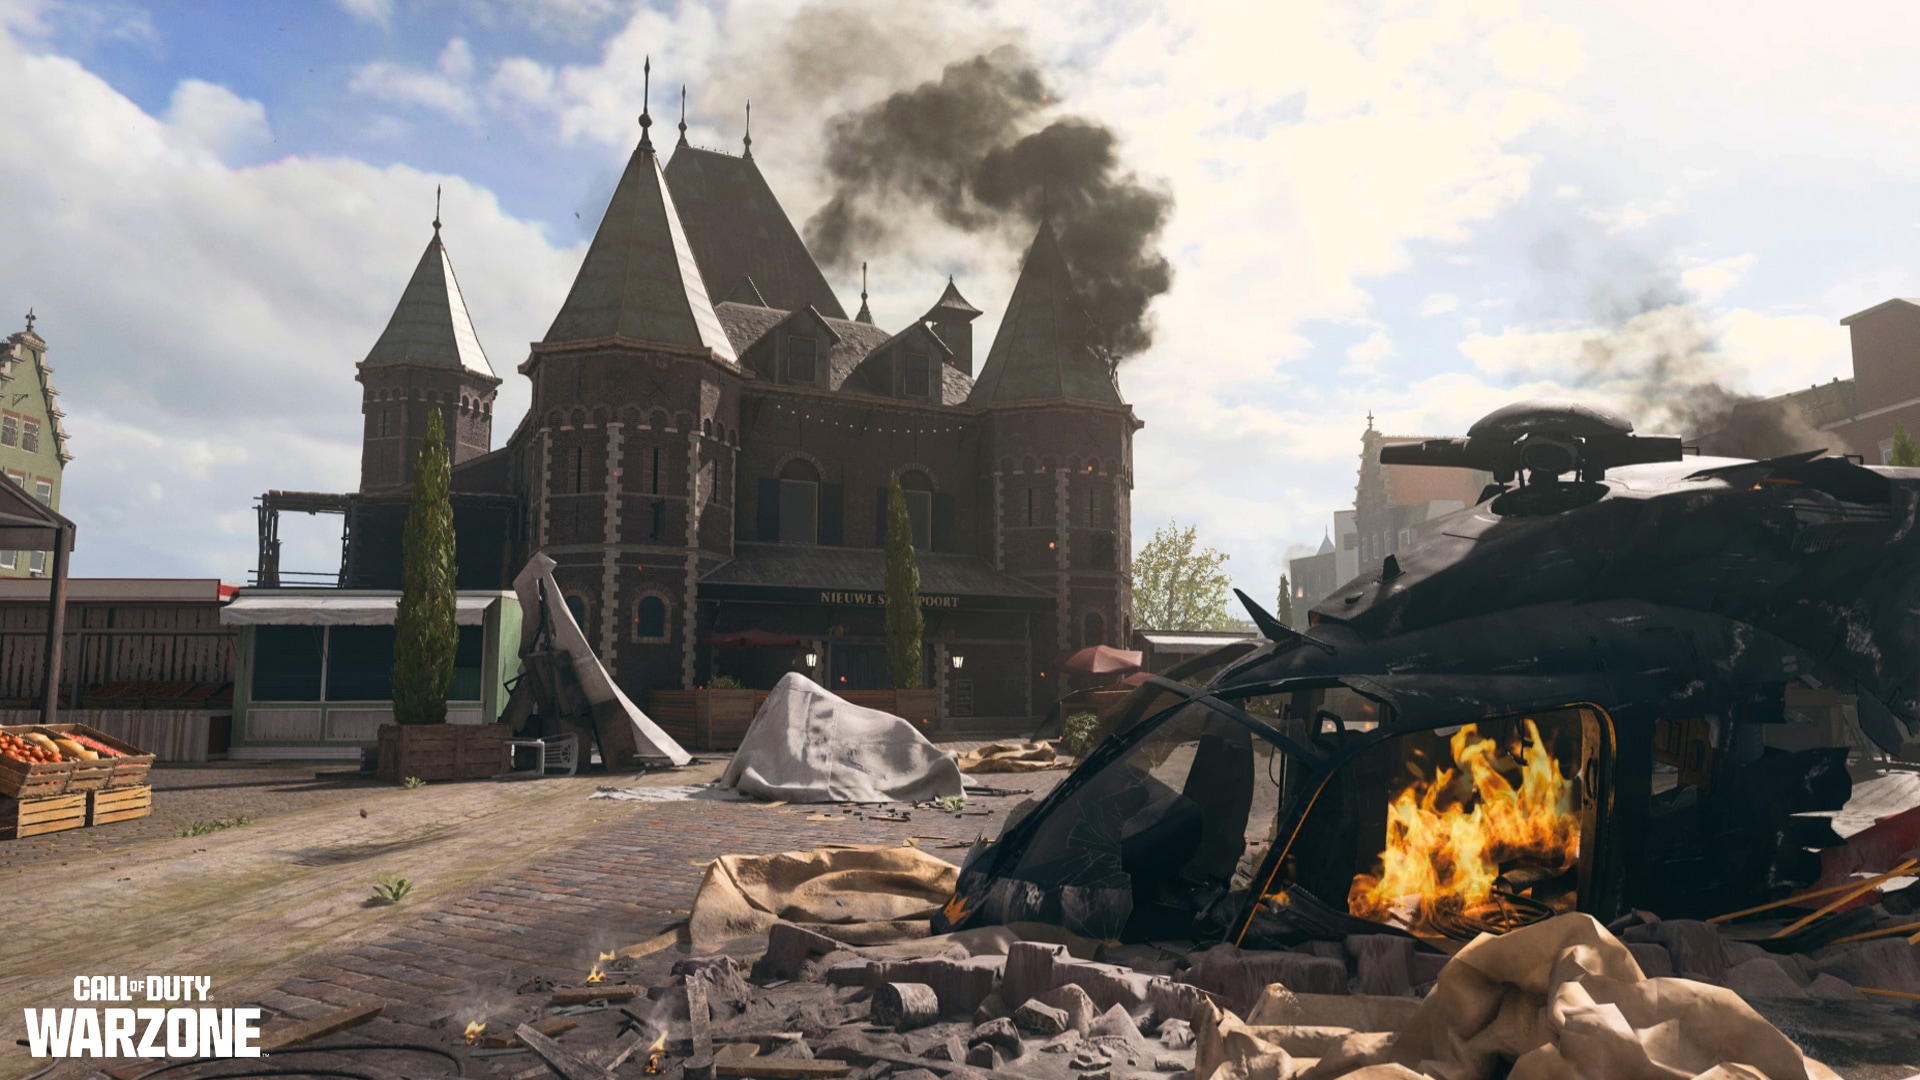
The Nieuwde Stardtpoort (translation: New Stargate) is a billiards hall and bar converted from a medieval outbuilding. It overlooks the heavily damaged Vondel Market, which provides little cover. Operators should move quickly through this exposed location.
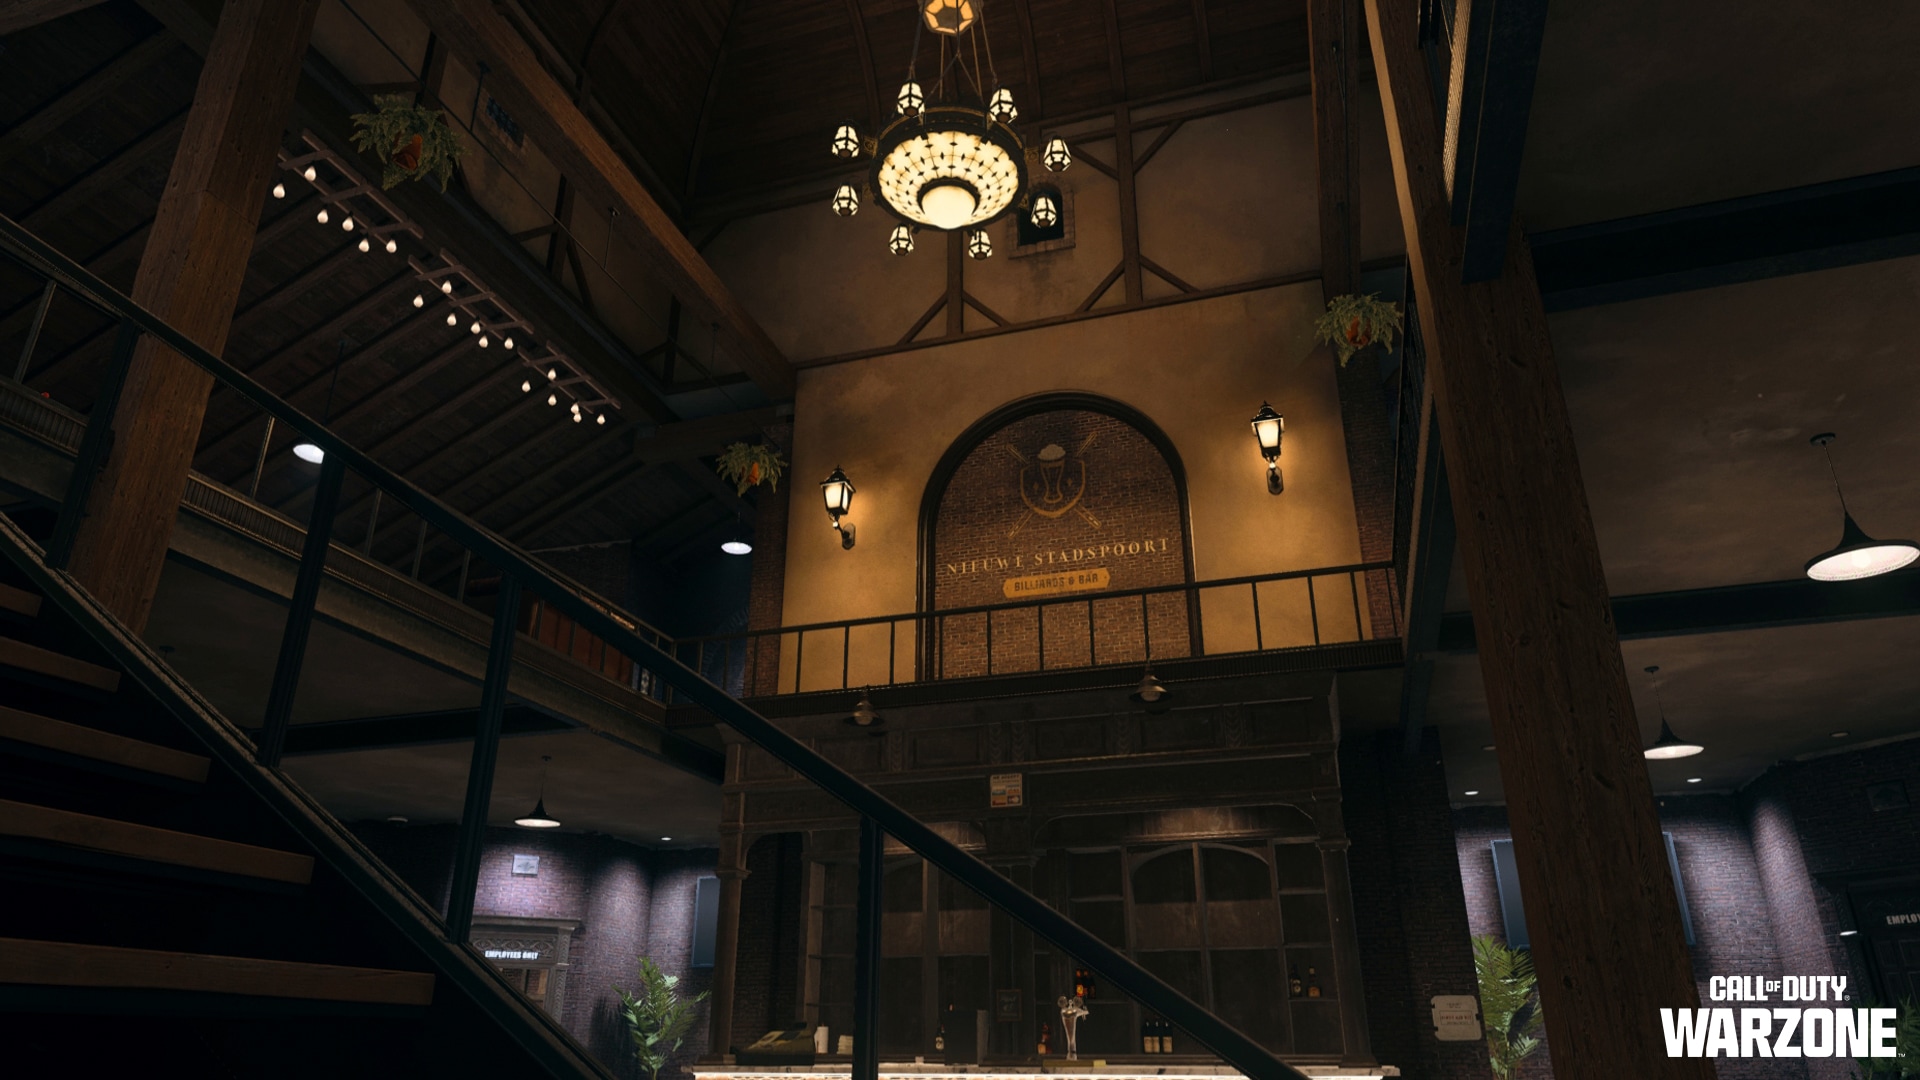
The Stardtpoort contains a two-floor interior, a ground-floor bar, an upper billiards table area with several windows overlooking the surrounding area, and two “Employees Only” entrances to the spires that have interior ascenders to the roof. Operators can also utilize the scaffolding to climb onto the hall’s exterior spires and flat roof, which provide clear sightlines over to the Mall and river.
Operators are advised to lock down the Stardtpoort building for an impressive power position over the vicinity.
The canal to the west of the building contains one of Vondel’s main tunnels, allowing for a more stealth-focused approach to the canal bordering the University and City Hall.
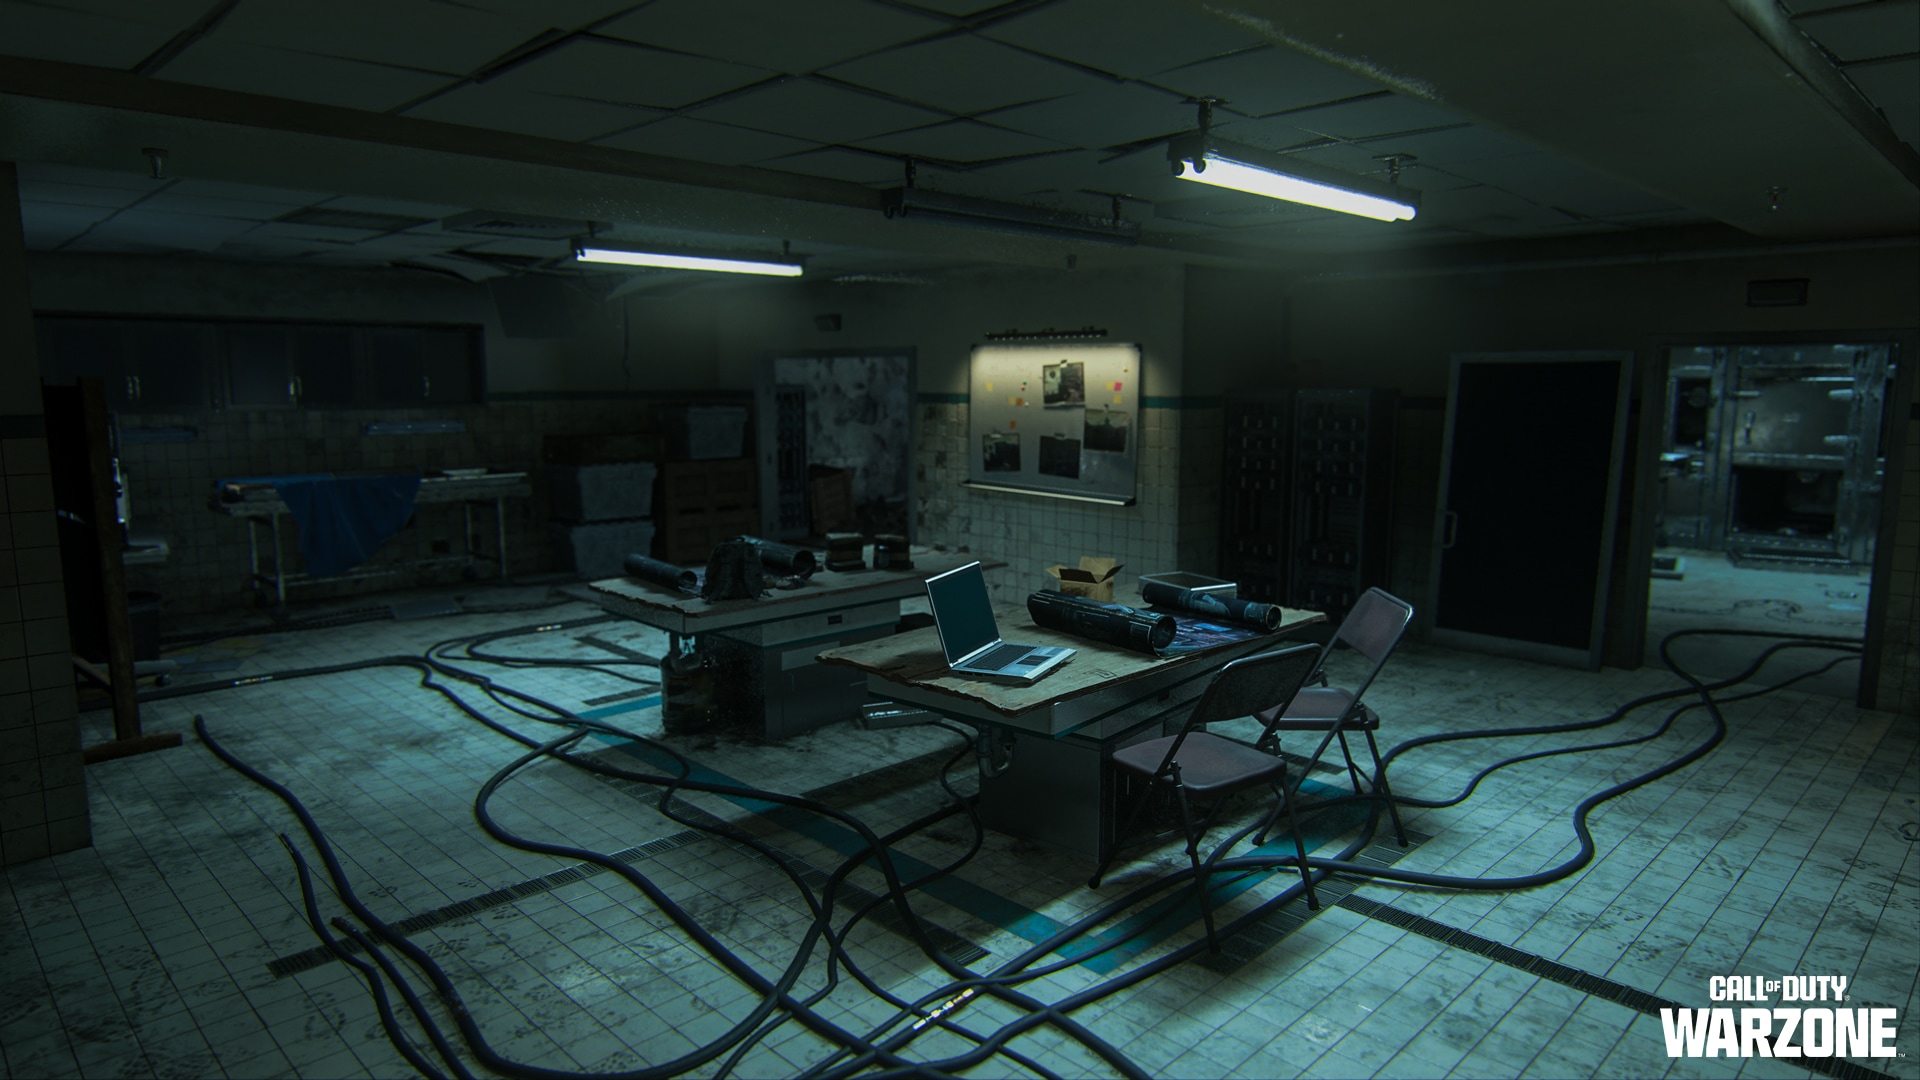
Graveyard
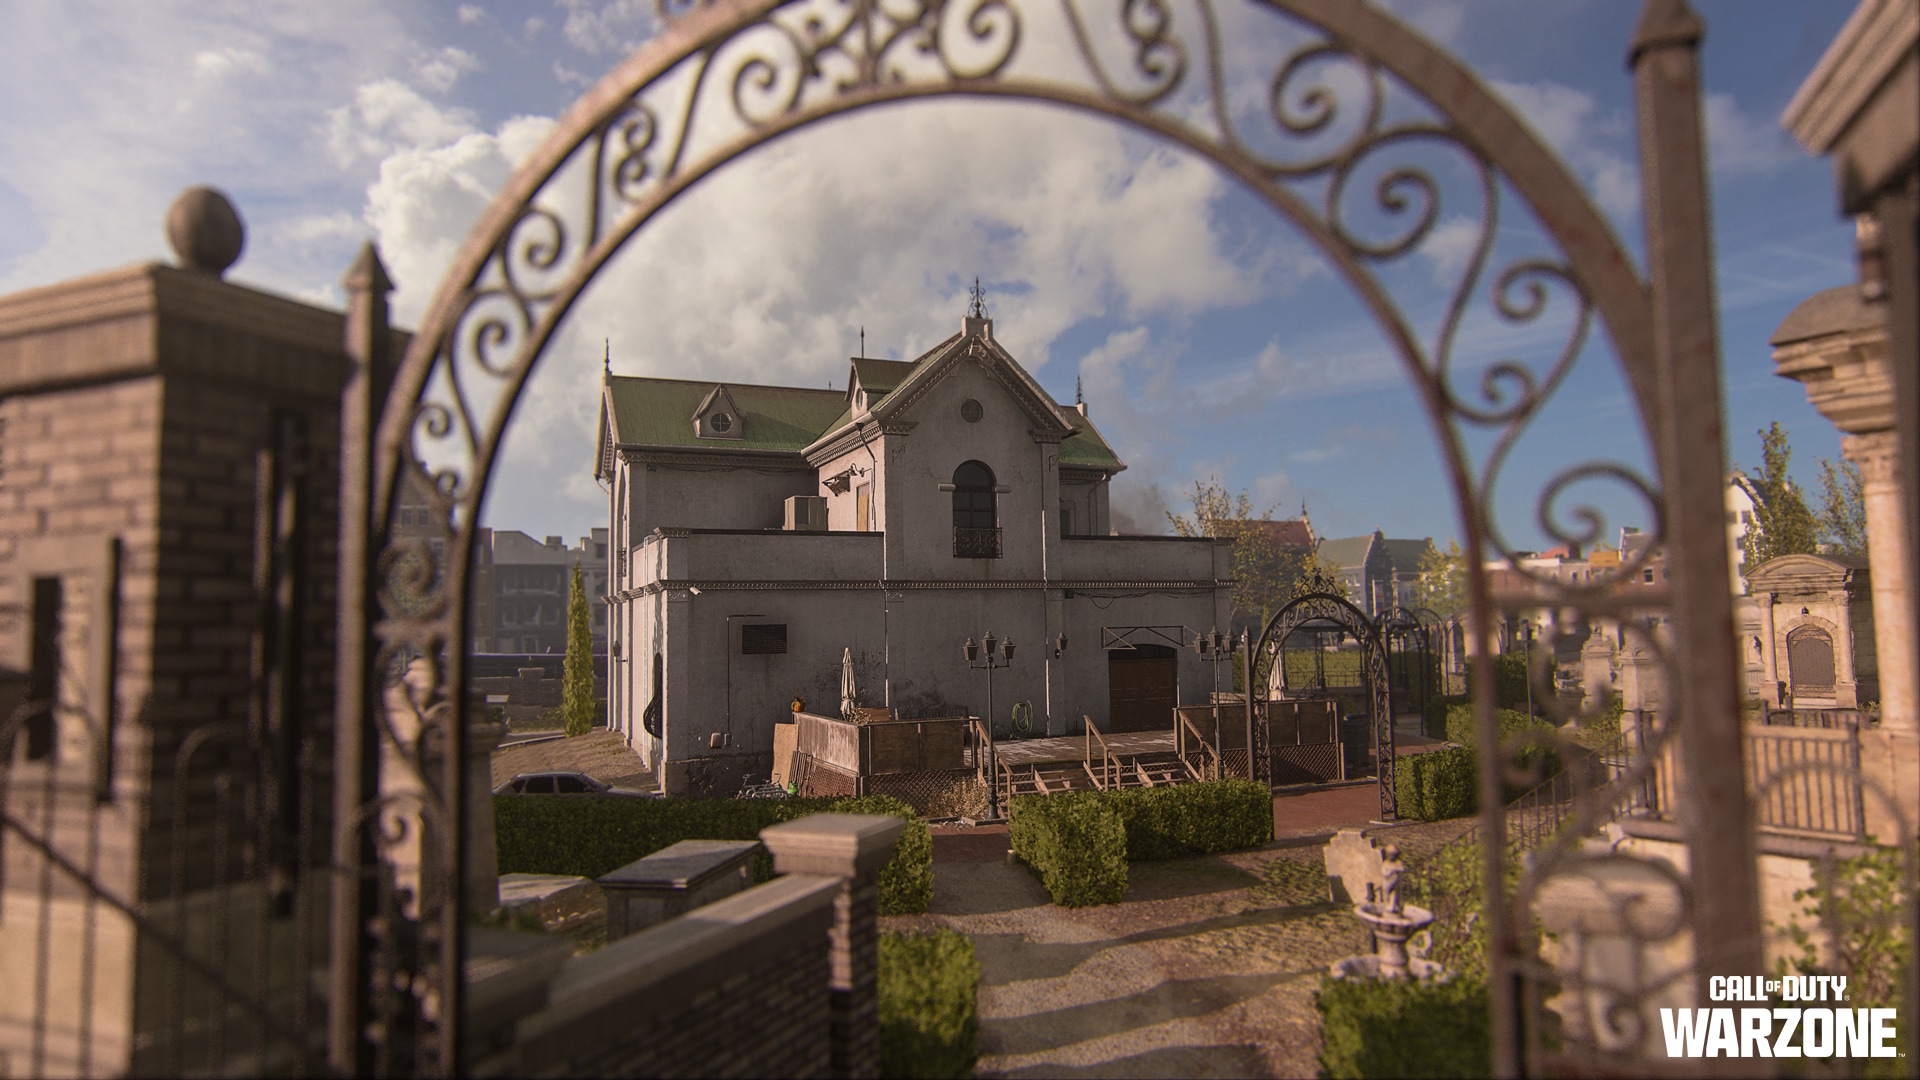
Operator Chuy reports that the Graveyard has a central funeral parlor and crematorium. Intel suggests that [[REDACTED]] is active within the underground morgue. The main two-floor building has enough roof space for reconnaissance or countersniping.
Expect a heavily armored enemy presence. Scatter that [[REDACTED]] may be traversable west of the Graveyard after it originates from [[REDACTED]].
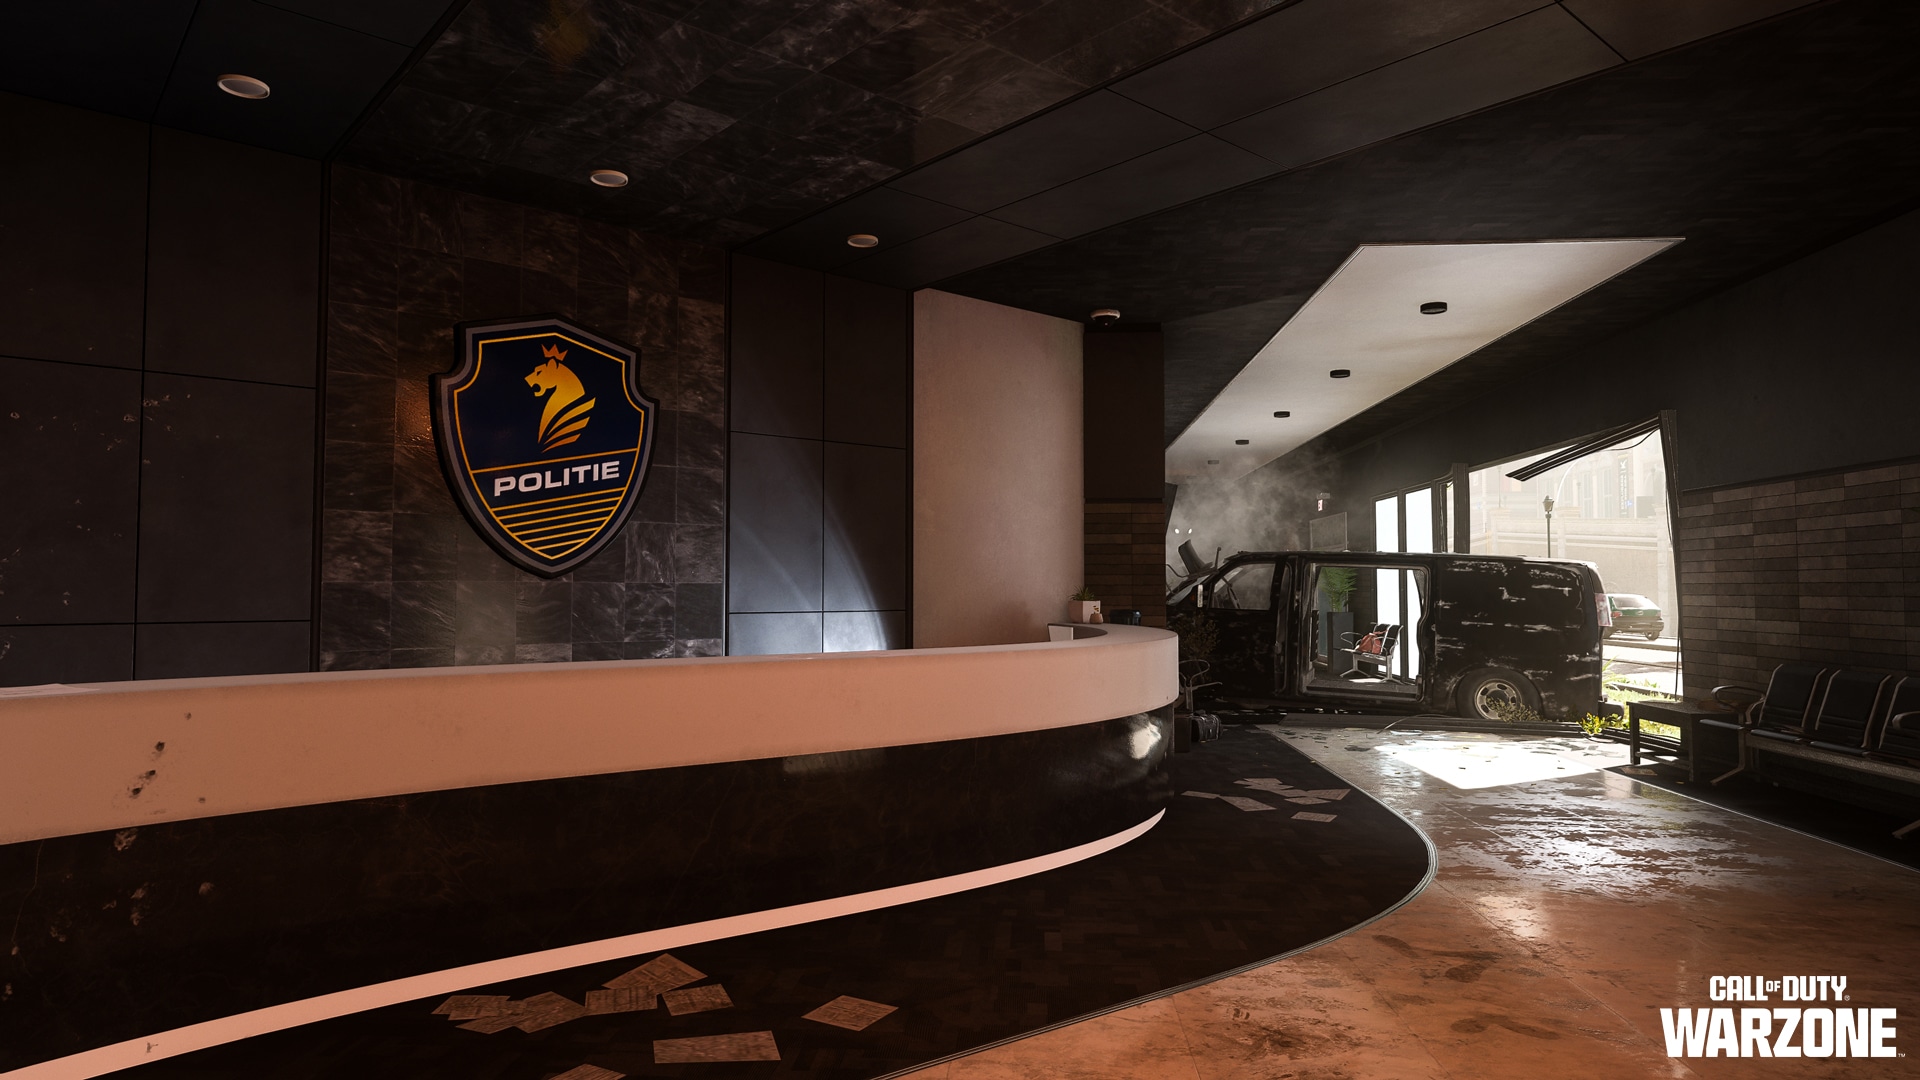
Police Station
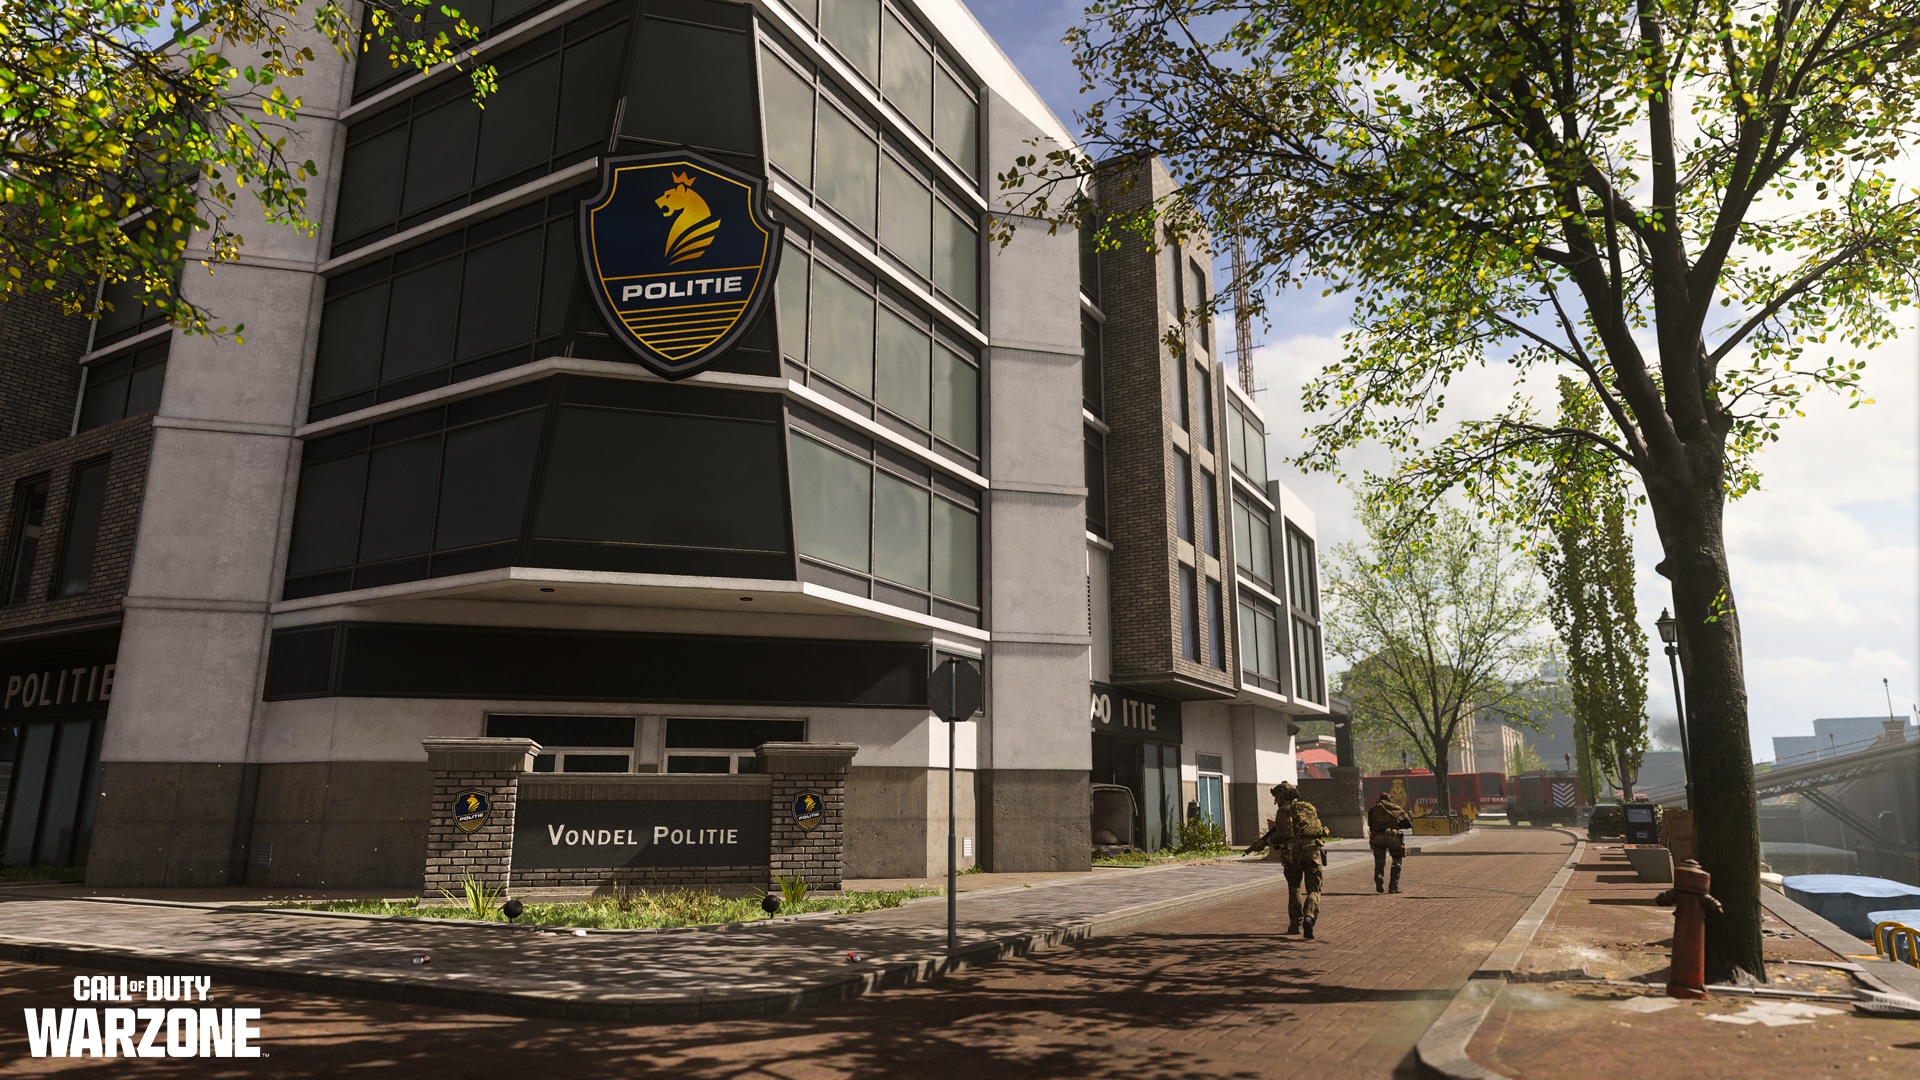
Southeast of the Market, the Police Station appears to have taken damage from recent skirmishes around the Central Station and Market areas.
The exterior of this five-floor structure has two ascenders. Inside, the ground floor consists of a reception area and hallway. To move up, Operators can use the stairs, the ladder, or the interior ascender in the elevator shaft. The rooftop offers vantage points over the Mall, Market, Museum, Stadium, and the adjacent townhomes to the west.
The cluster of townhouses west of the Police Station features rows of mixed-use buildings. Rooftops are accessible, as are the numerous abandoned dwellings and storefronts.
Operators can utilize the canal here to engage in drive-by combat within a TAV. This stretch also offers Zoo access to the west, as well as an infil point to one of the major tunnel networks where [[REDACTED]] continues operations.
The Police Station and nearby townhouses are ideal for fast-moving Operators who favor parkour and tactical sprinting to jump — not mantle — through rooftop attics or across townhouses. Back on the ground, look for fuel and vehicle repair at the gas station adjacent to the Police Station.
Courtyard (Unmarked)
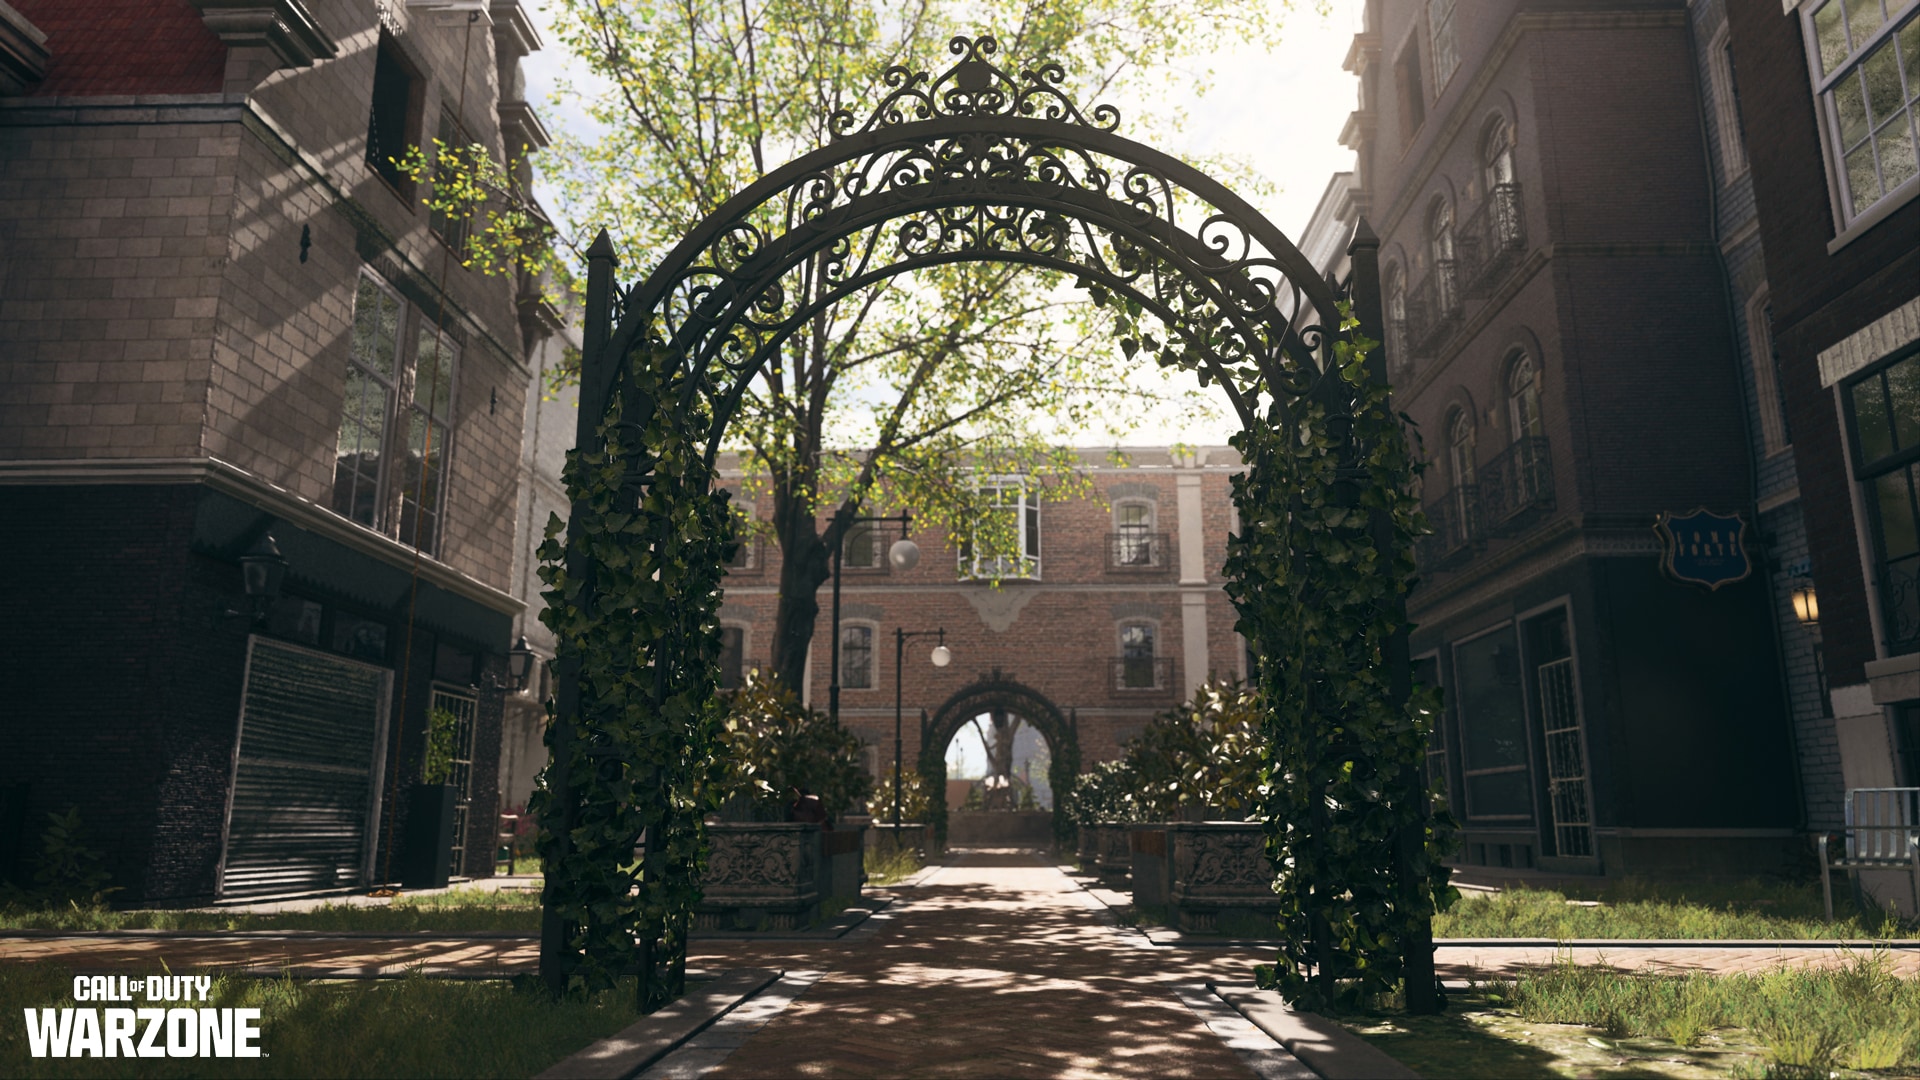
This area consists of luxury apartments and a variety of abandoned boutiques encircling a central courtyard.
Operators are advised to utilize that courtyard as a central lane, with the rooftops providing a great vantage point for fighting within and around this POI. Operator Chuy reports that several of the shops and apartments are accessible, with layouts that support tactical movement for an advantage in close-quarters combat.
Operators can also secure Loadout items via ground loot and supply boxes. This area is mission-critical and a hotbed for small-squad combat.
Intel gained by the recon team places a Stronghold at the center of the District and a UAV tower on the south side, near the bridge leading to the Zoo. Aquatic vehicles are advised when accessing the Stronghold’s perimeter.
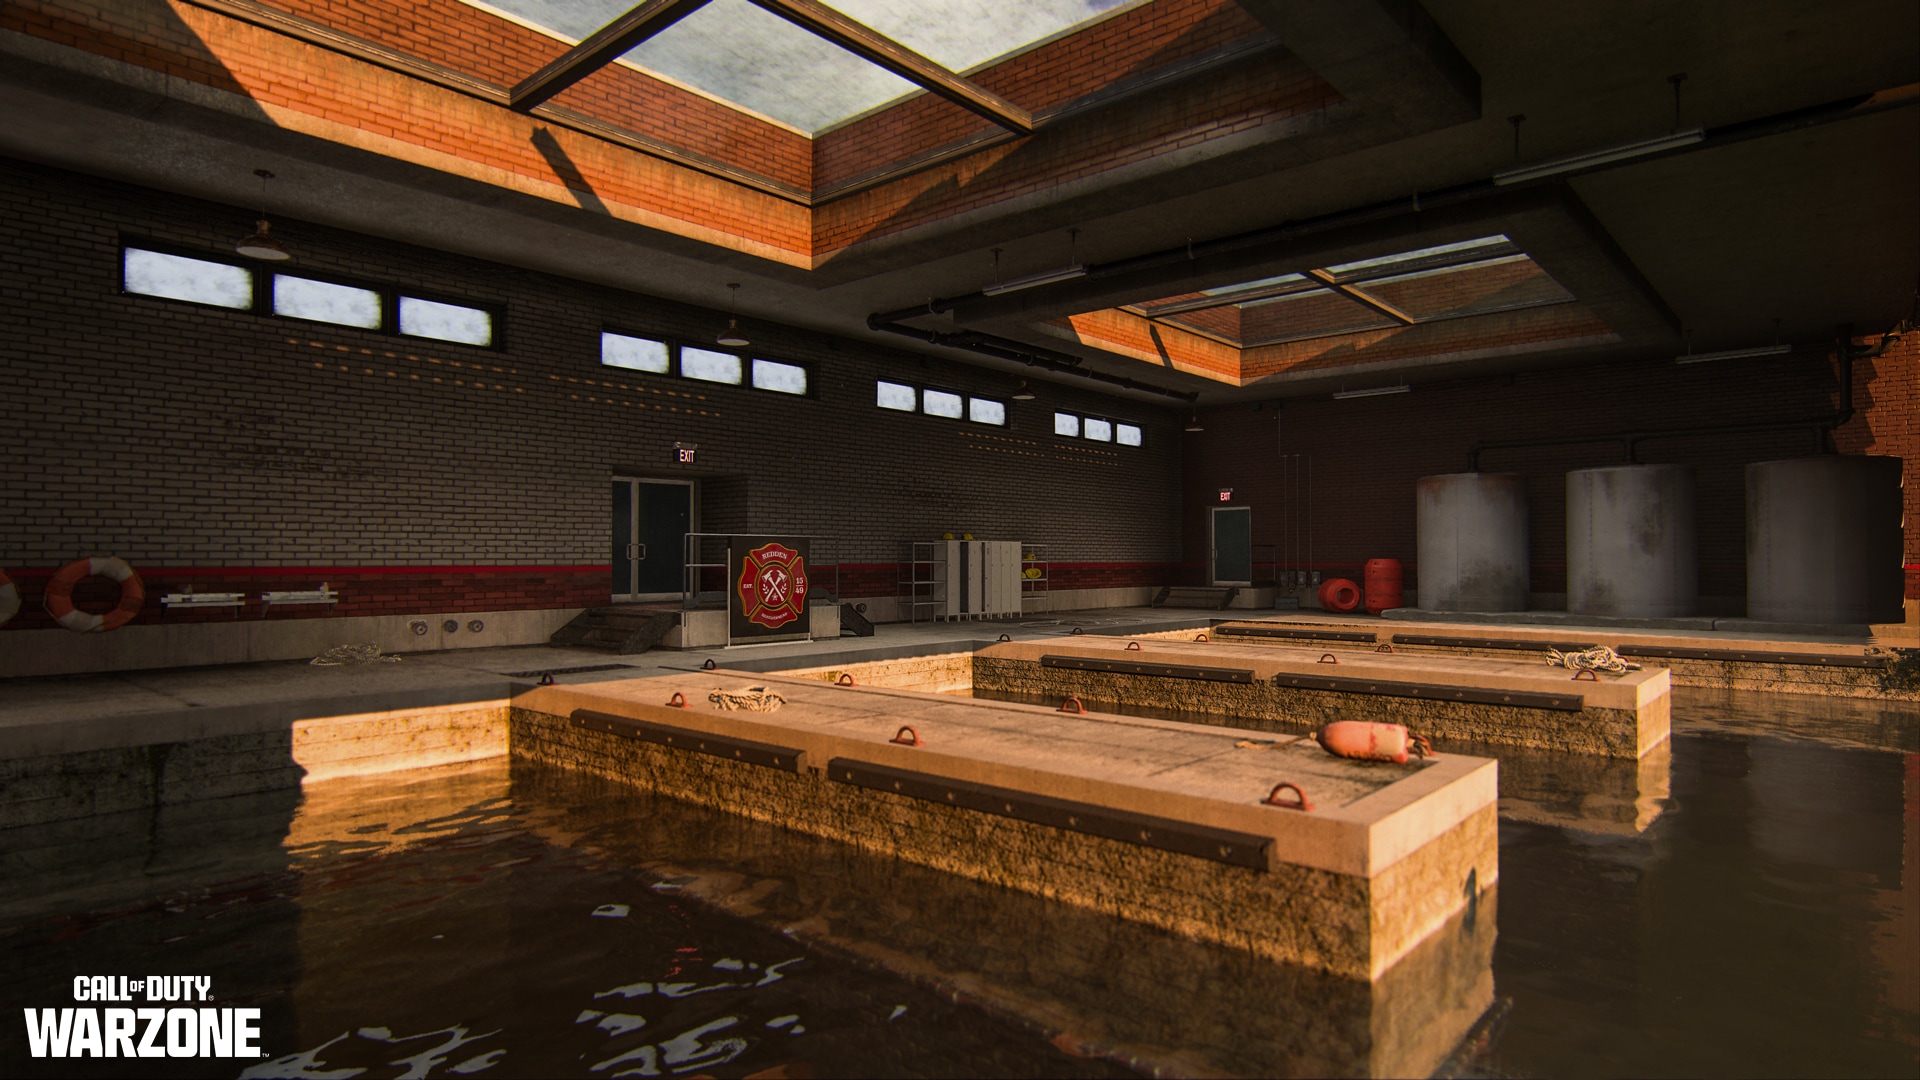
Fire Department
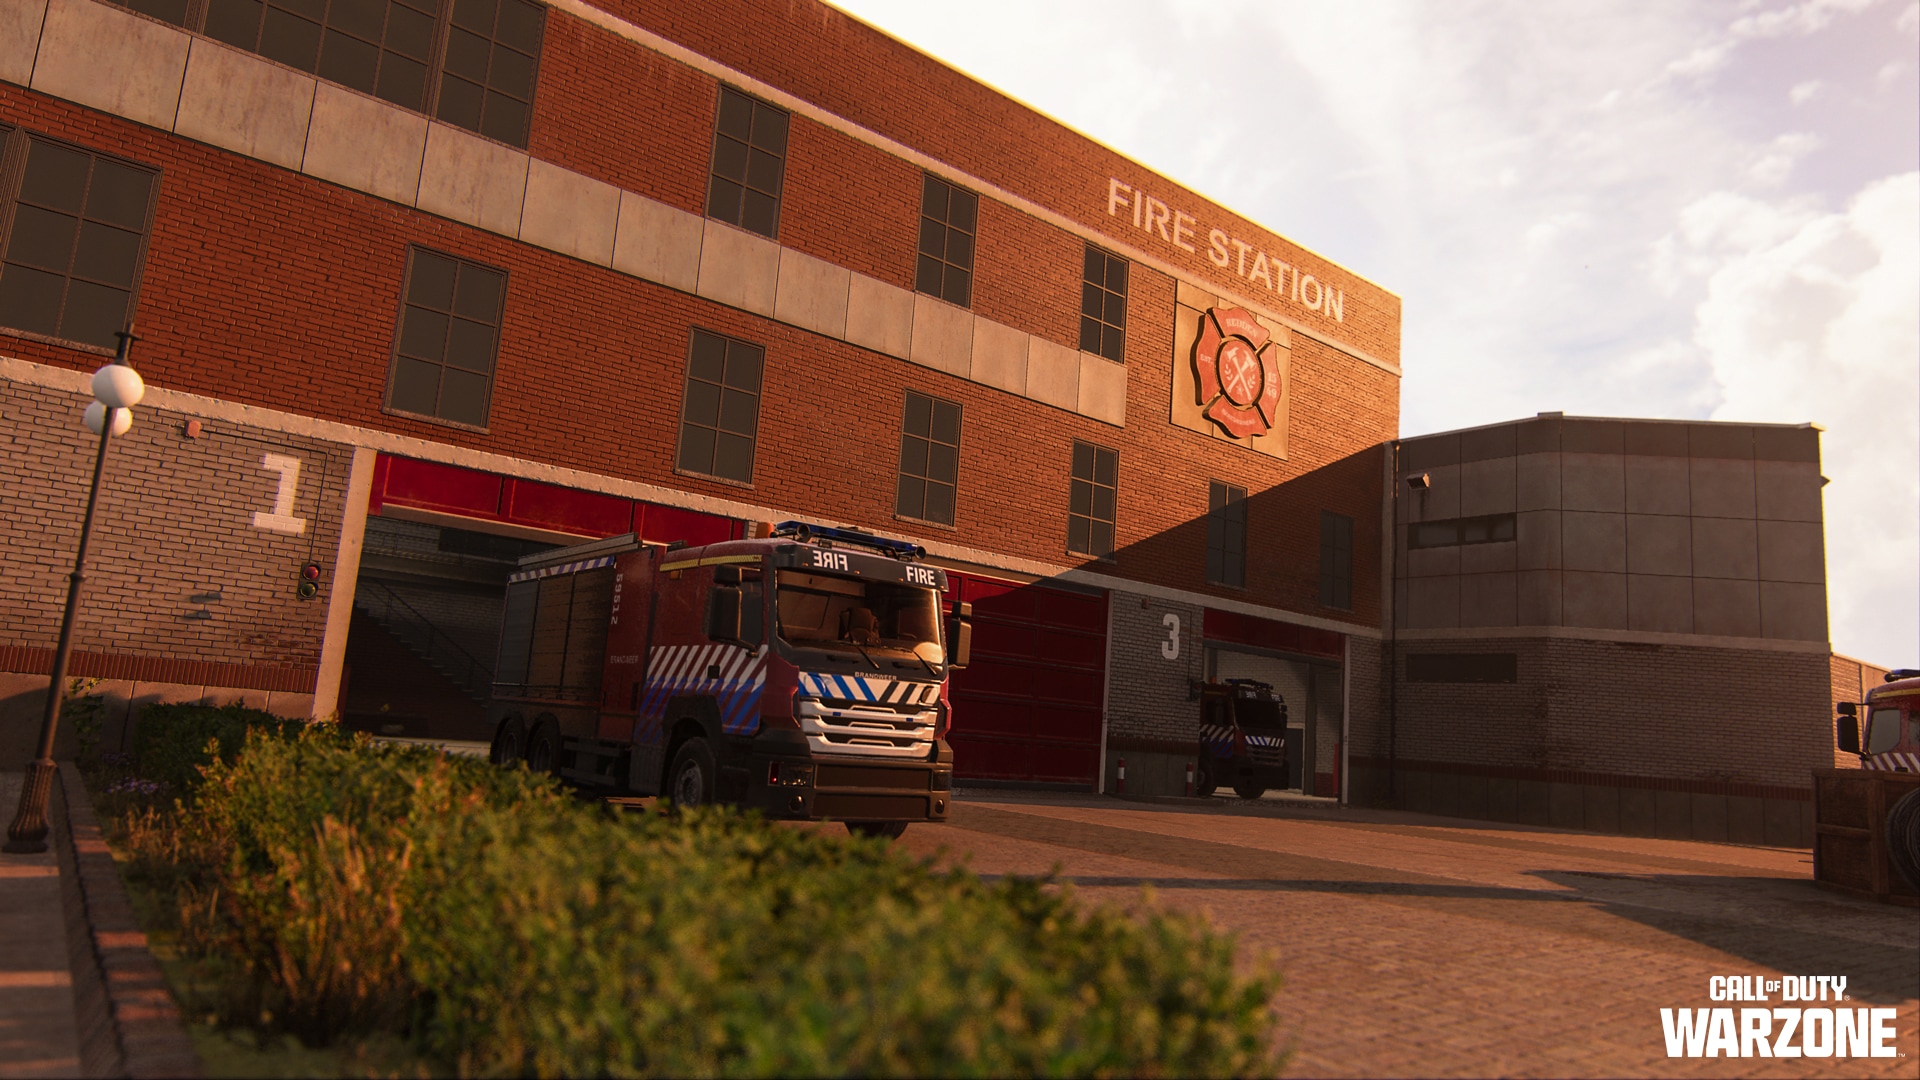
The Fire Department is located on the upper half of Vondel’s southwest island, with the adjacent Floating District being the AO’s southernmost point.
The Department itself is U-shaped. A propane tank was reported on fire next to the Helipad and represents a potential hazard. Unconfirmed reports indicate elite soldiers are locking down the Fire Station as a fortress, along with two potential Stronghold locations on the north side.
On the other side of the helipad is a boat docking area with a radio mast that provides a treacherous but impressive vantage point over the low-lying Castle grounds and Graveyard. Watch for enemy snipers from these locations, as well as from the Kunstenaar District and Zoo.
North and west of the Fire Department are more townhouses; these are highlighted by a ribbon mural (on the west side), stores, and a concert stage (at the north apartments). The latter also connects to a gas station outside.
Be advised that [[REDACTED]] runs right through this area. A secured Dead Drop location at [[REDACTED]] has also been observed.
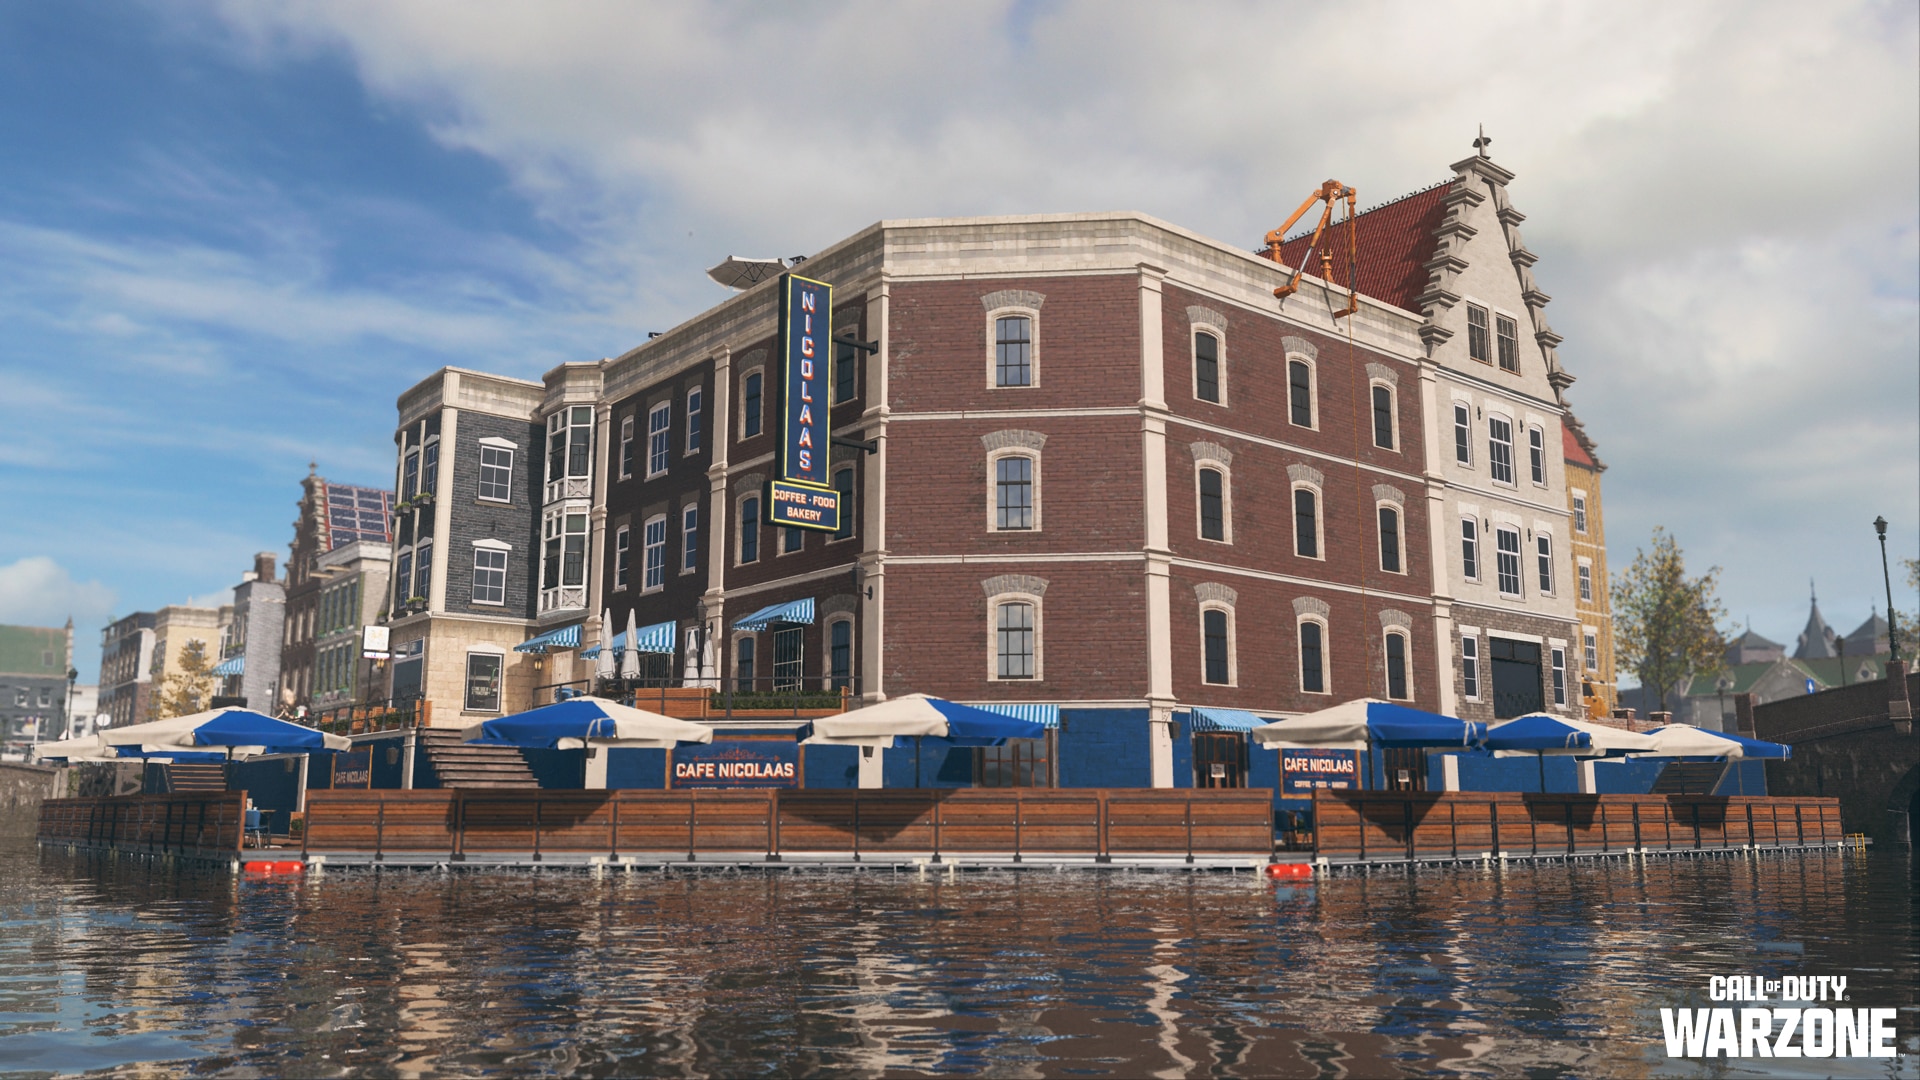
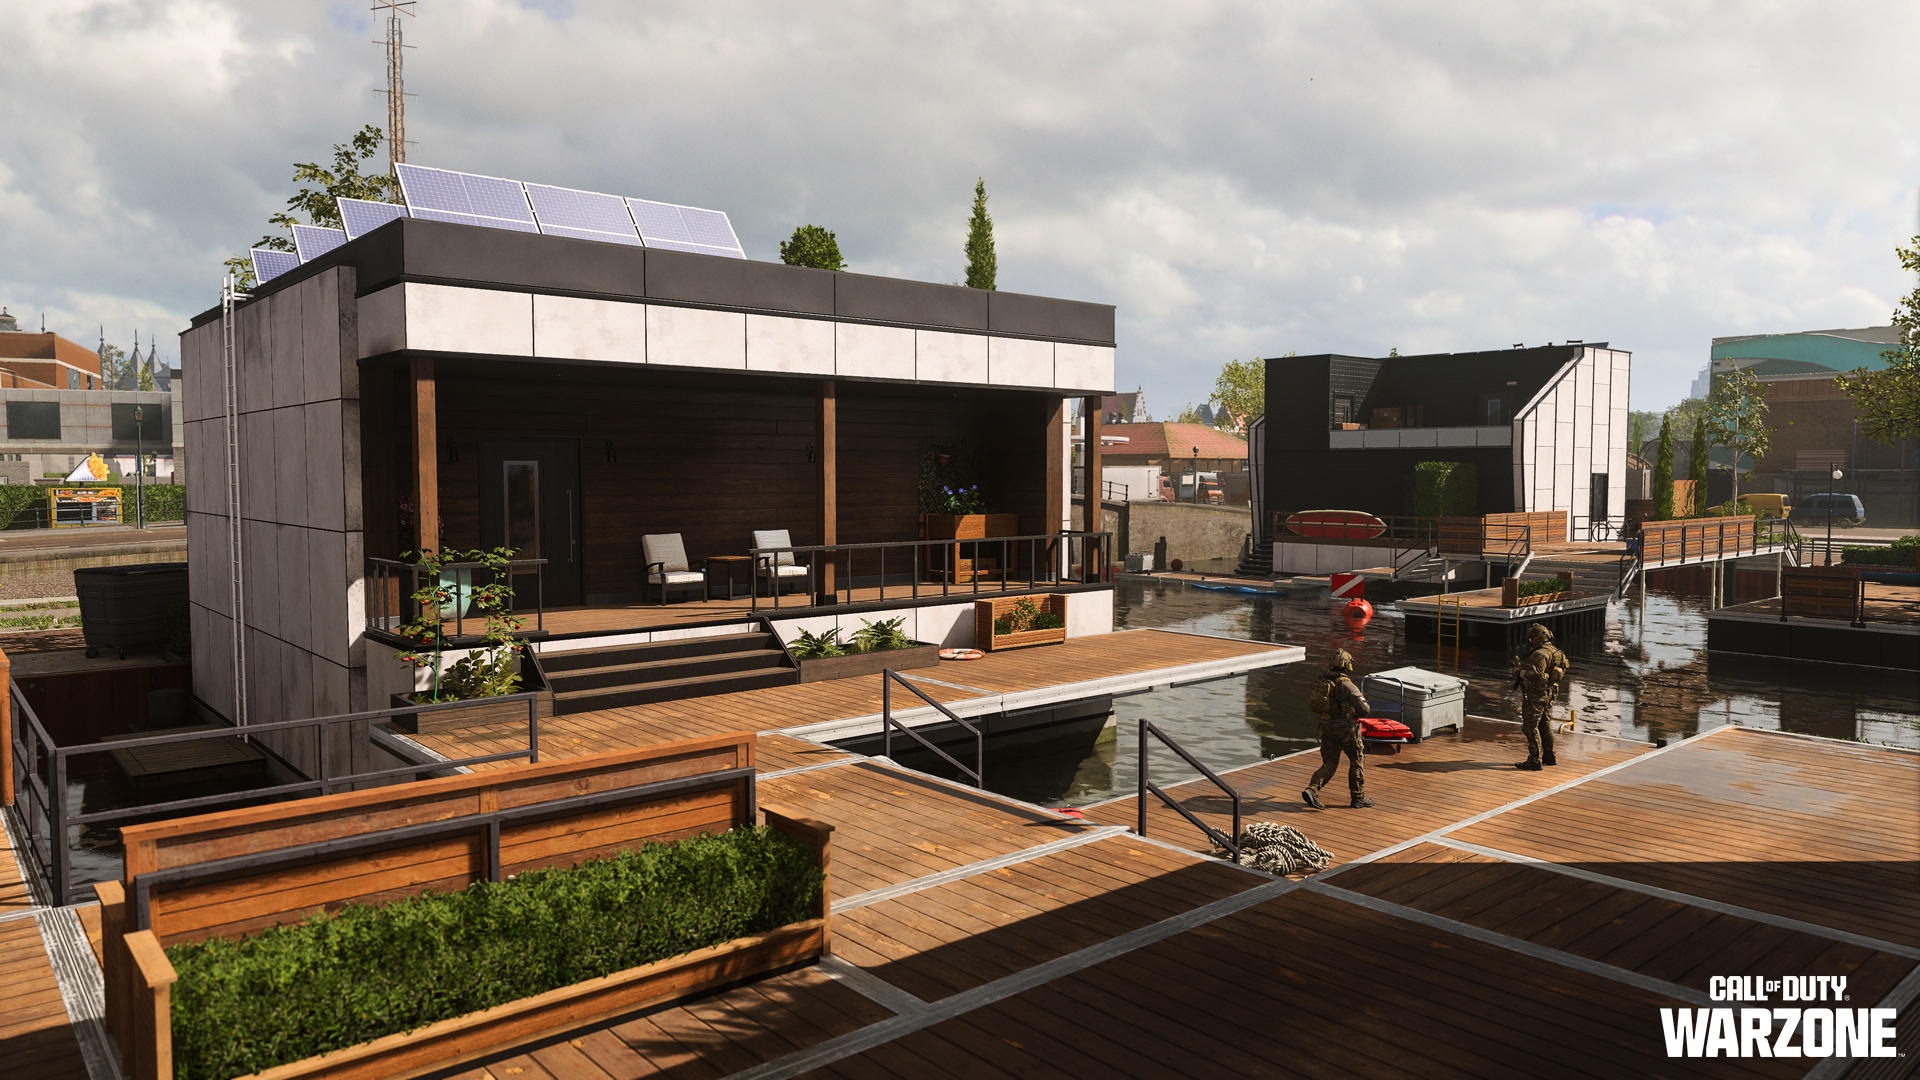
Floating District
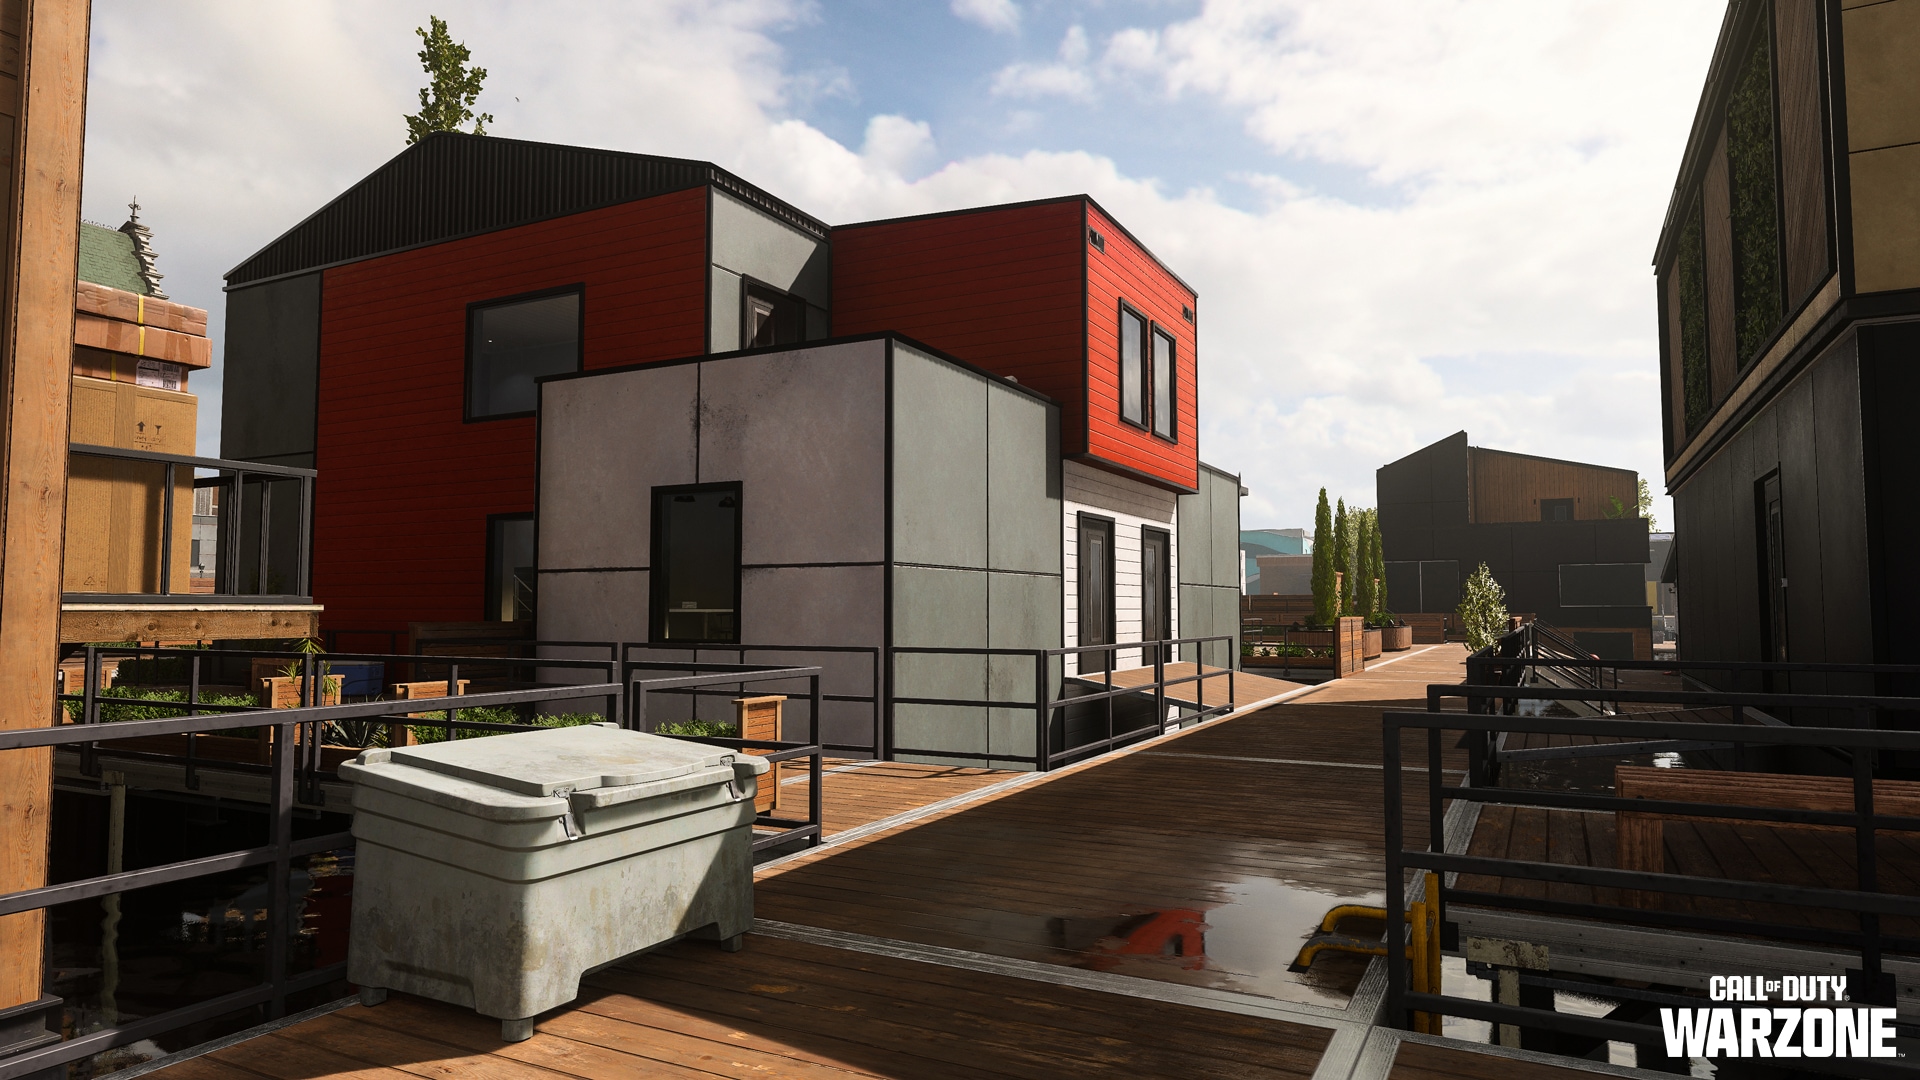
The Floating District comprises shipment containers, homes, and other living quarters built either on steel beams or concrete floats with an intricate wooden walkway connecting them. During Warzone operations, you can swim around and under these dwellings.
The Floating District is a potential hotbed for small squad firefights. Operators are encouraged to utilize sidearms and knives for more stealth-based maneuvers. Expect an enemy Stronghold in the nearby townhouse block to the north and proceed with caution given the presence of well-equipped enemy forces in the proximity.
North of the Floating District is another townhouse cluster, earmarked by “Vraag Alles” graffiti on a green building, as well as a small hedge maze where loot appears to be of significant interest.
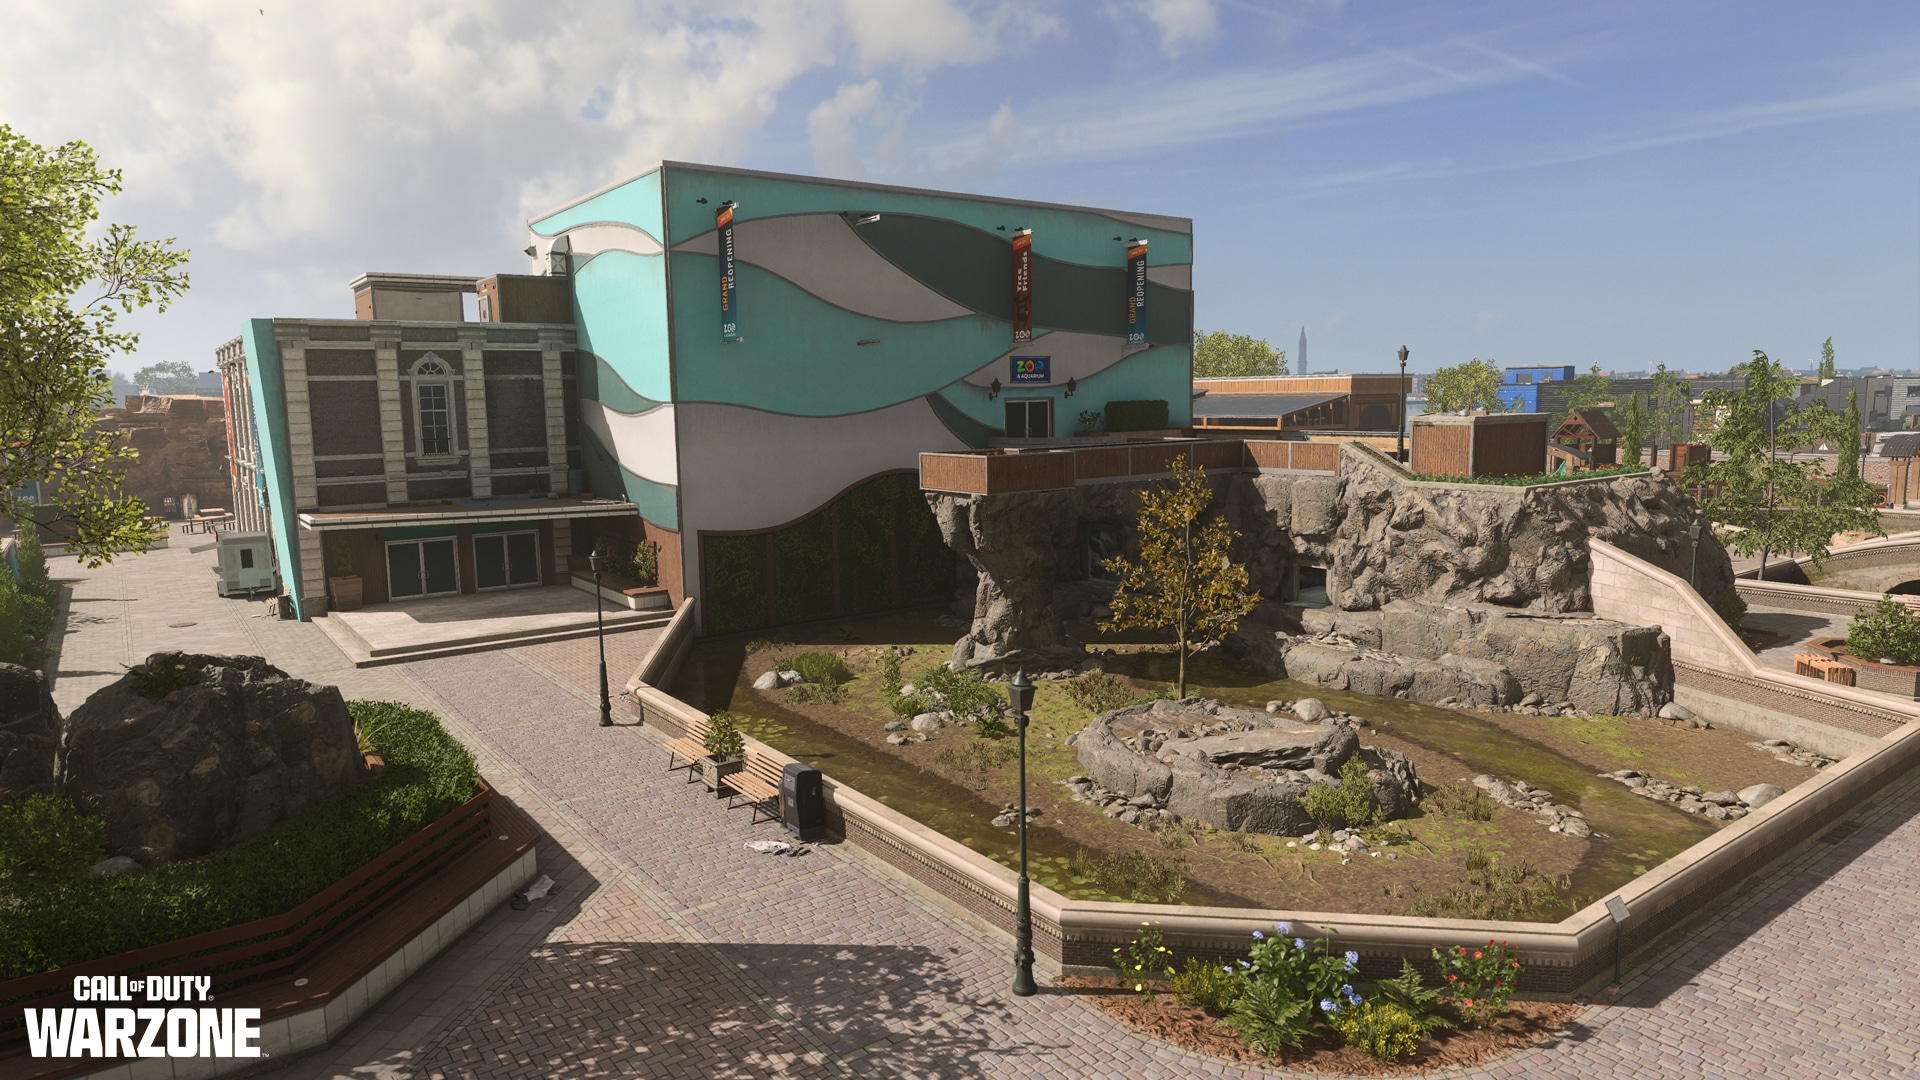
Zoo
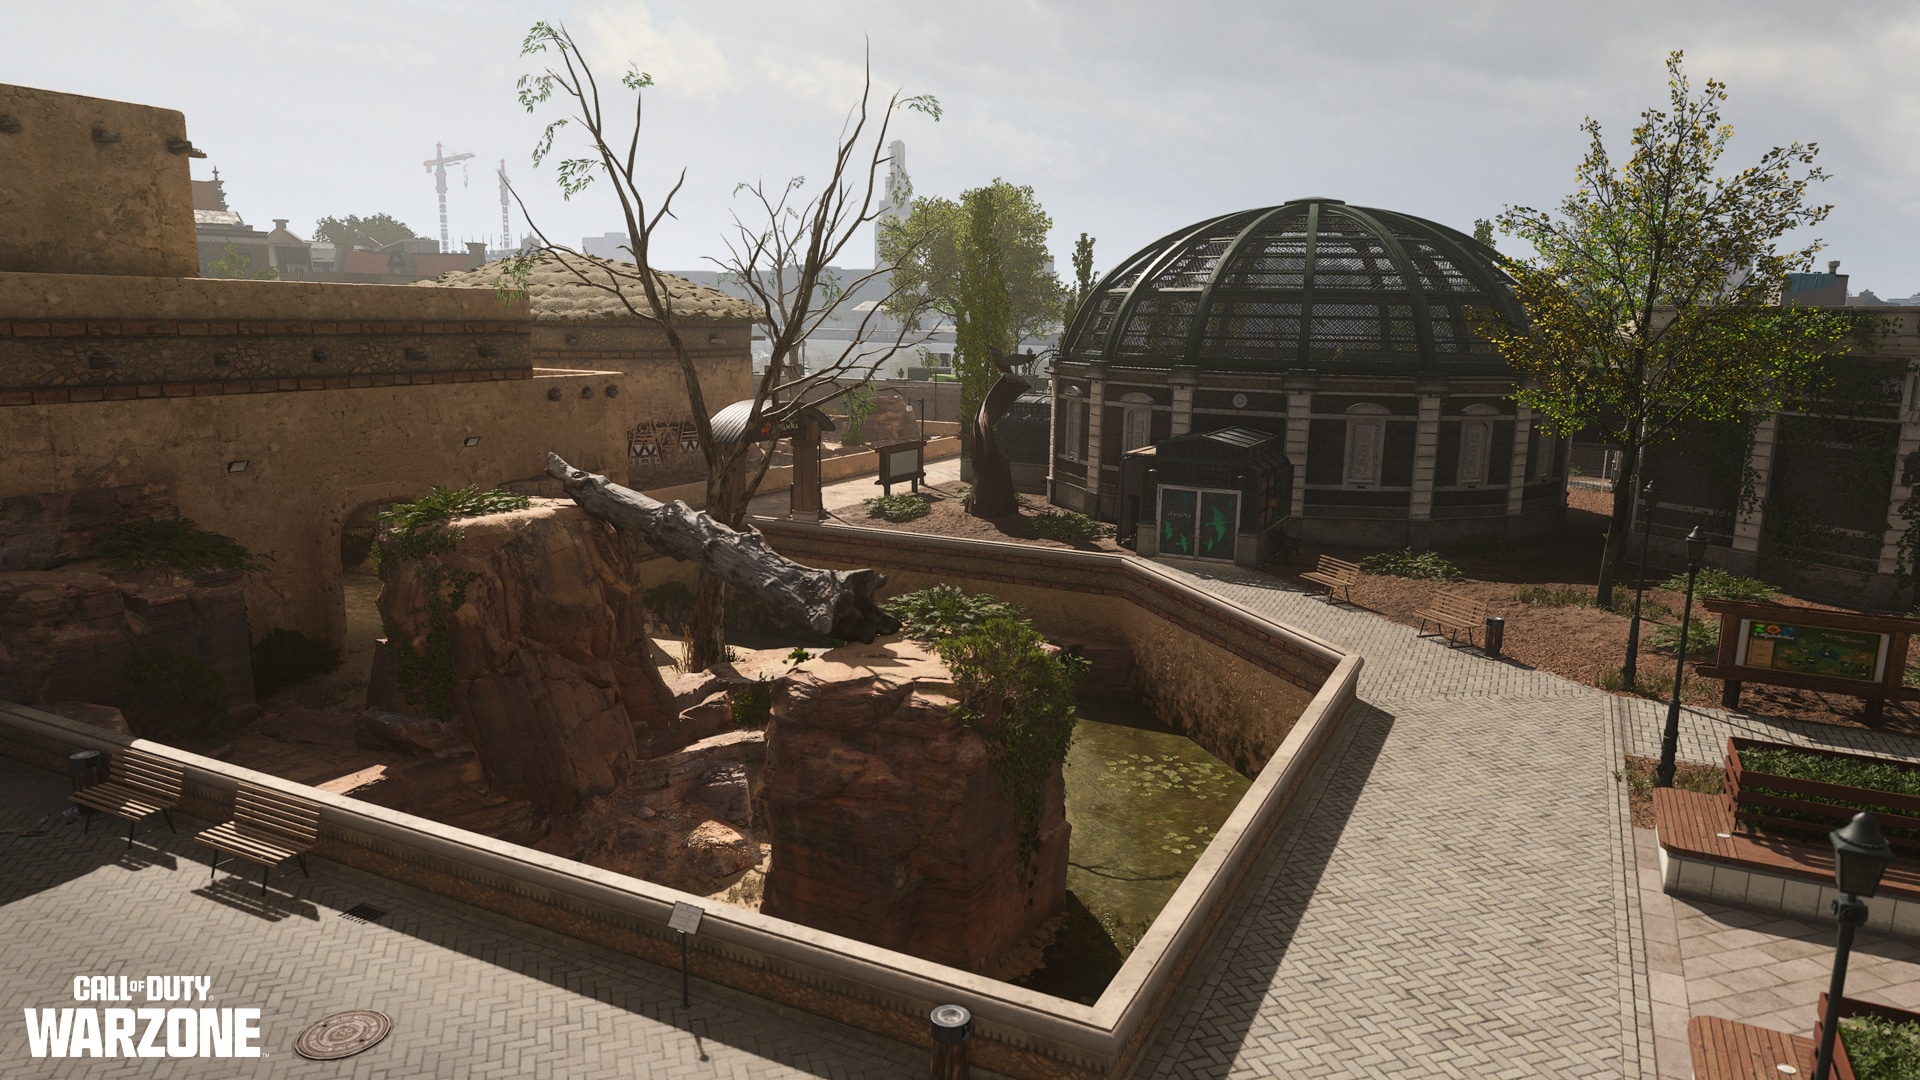
Though the land animals within the Zoo have been evacuated along with the local population, many of the exhibits can still be explored.
Traversing the Zoo from the southern boundary and heading north, there is an Animal Hospital and Aviary on the west side and the savanna hut and exhibit on the east.
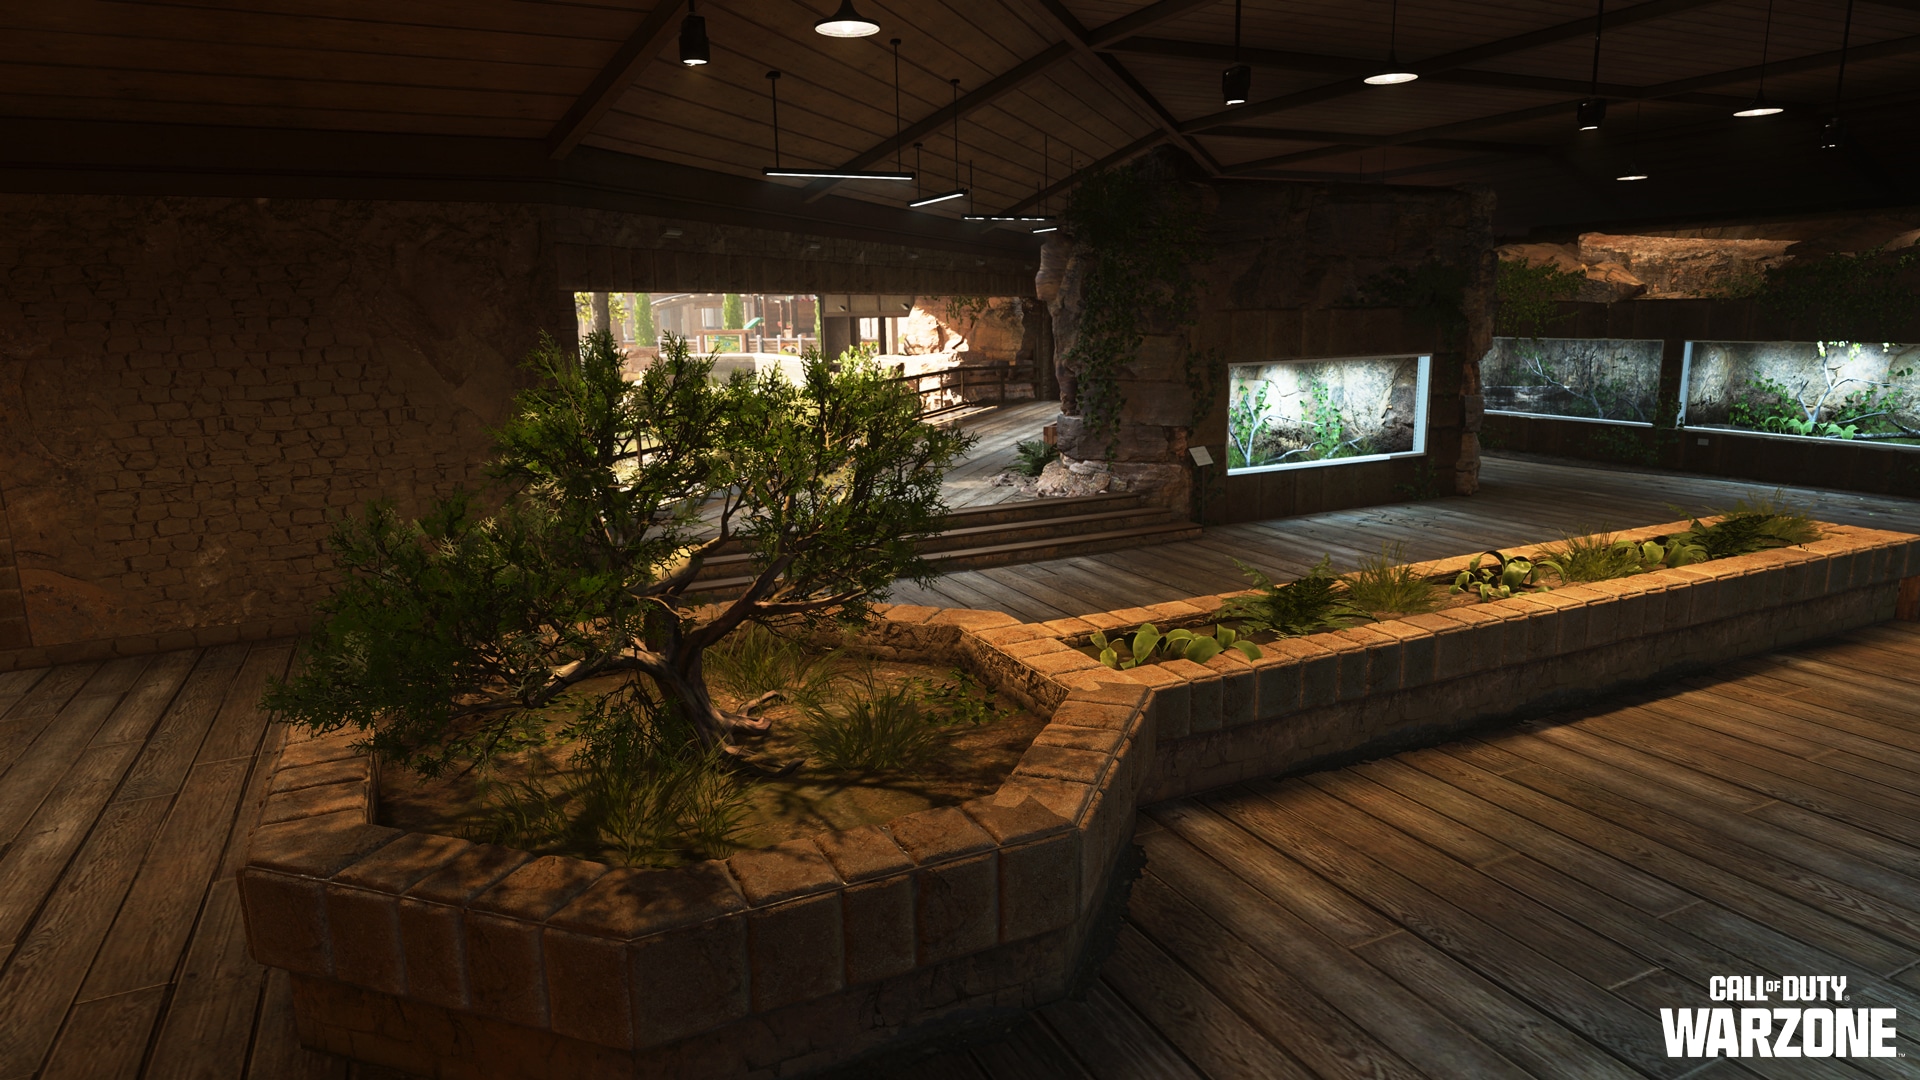
Farther north is the Zoo’s main entrance and restaurant. At the Zoo’s center is the aquarium. In this two-story structure, one can still see a leopard shark, along with a sunken ship and other aquatic life within the reinforced tanks.
The far north side of the Zoo contains a reptile house, with views out to the rest of the park, as well as the parking lot on the other side. Head east across the bridge to reach Centrium Stadium.
Adjacent to the Zoo perimeter is a gas station to the west and a bridge to the north.
All of the Zoo’s exhibits and overall design allow for a variety of engagement opportunities. The central aquarium roof can be considered the main power position, but Operators should watch for snipers from the savanna exhibit or the windmill landmark by the Stadium.
Stadium
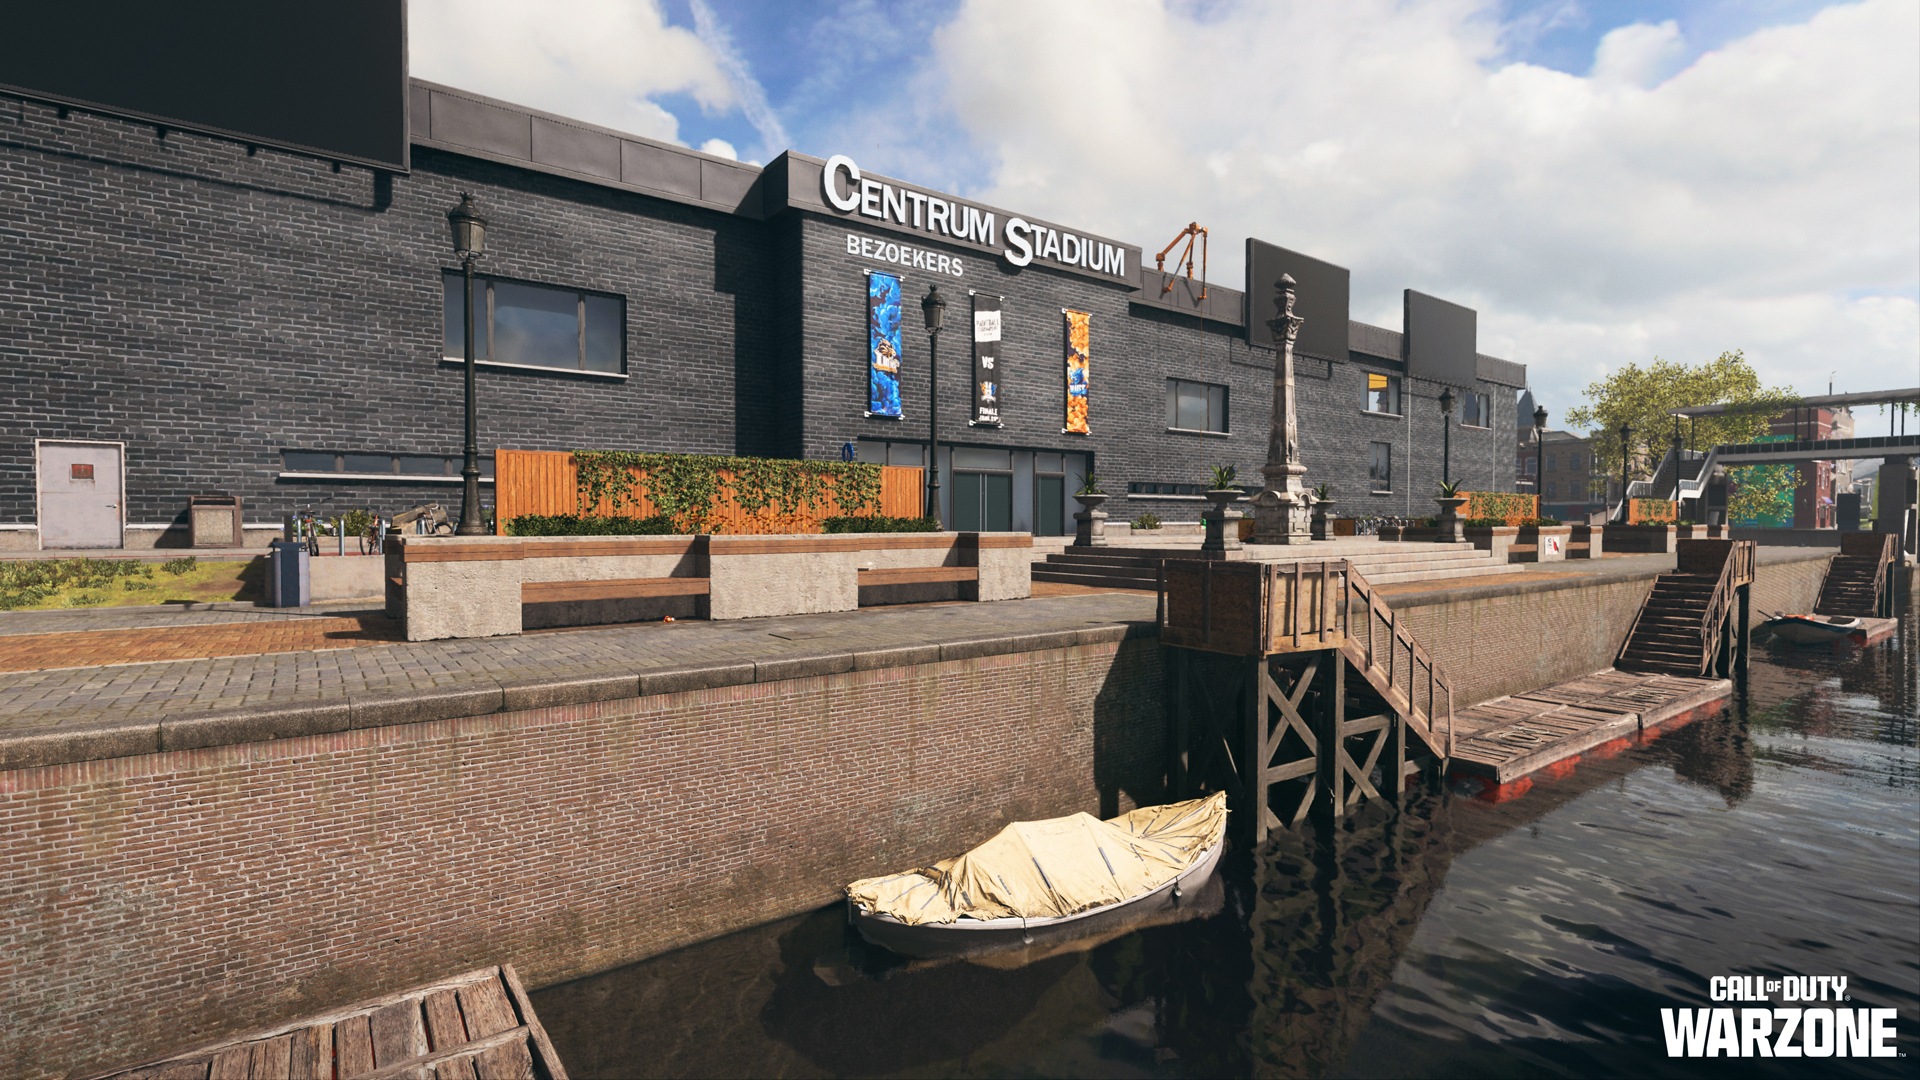
The Stadium is a roughly symmetrical setting with adequate cover on either side and a pentagonal center. Large obstacles used for a recent paintball tournament at the facility provide unique opportunities for engaging enemy combatants on the field. Suffice it to say, the premier league finale has been postponed indefinitely.
Nearby townhomes are earmarked by the “blue lady” mural and a large-scale lion painting.
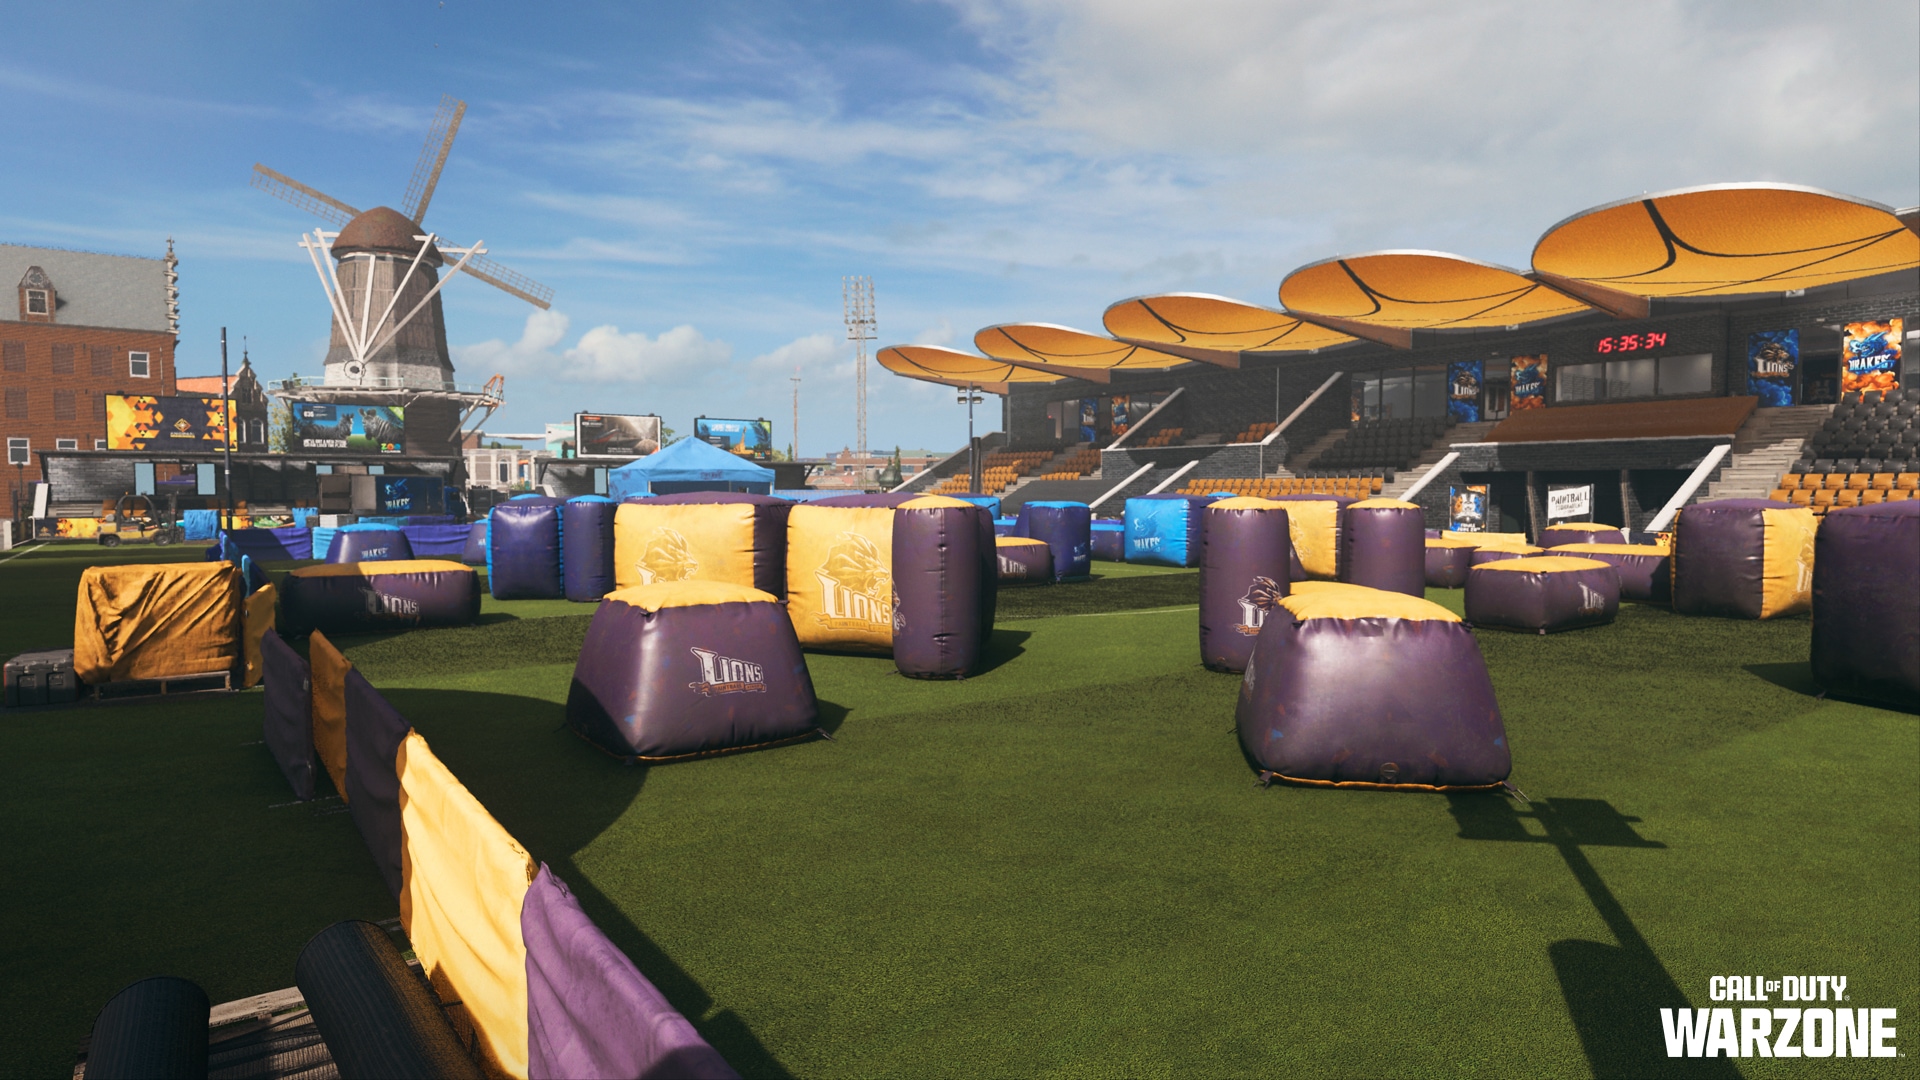
Just outside of the Stadium is the windmill, one of the tallest structures in Vondel, making it a possible power position if captured effectively. However, Operators are advised to watch for enemy Stronghold activity in its vicinity, as well as the high vantage points provided by the UAV towers at the Museum townhouse cluster.
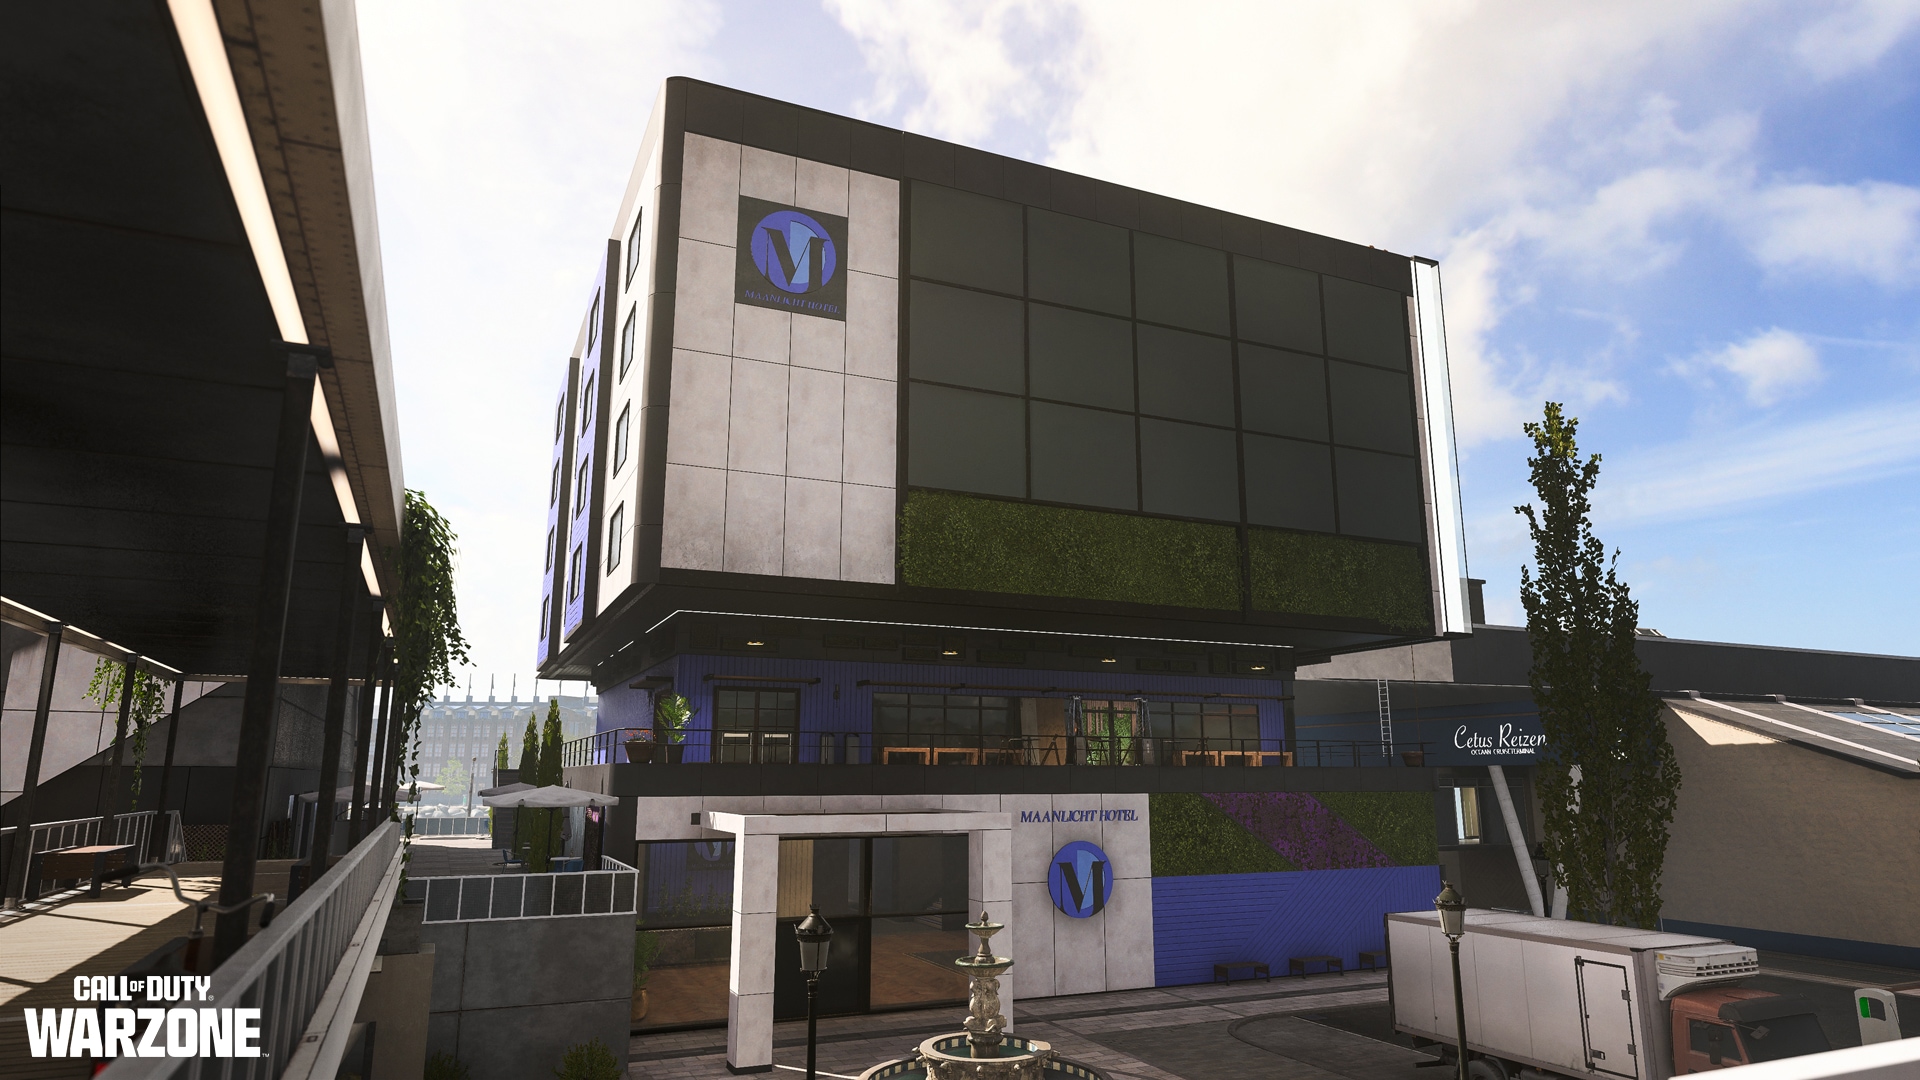
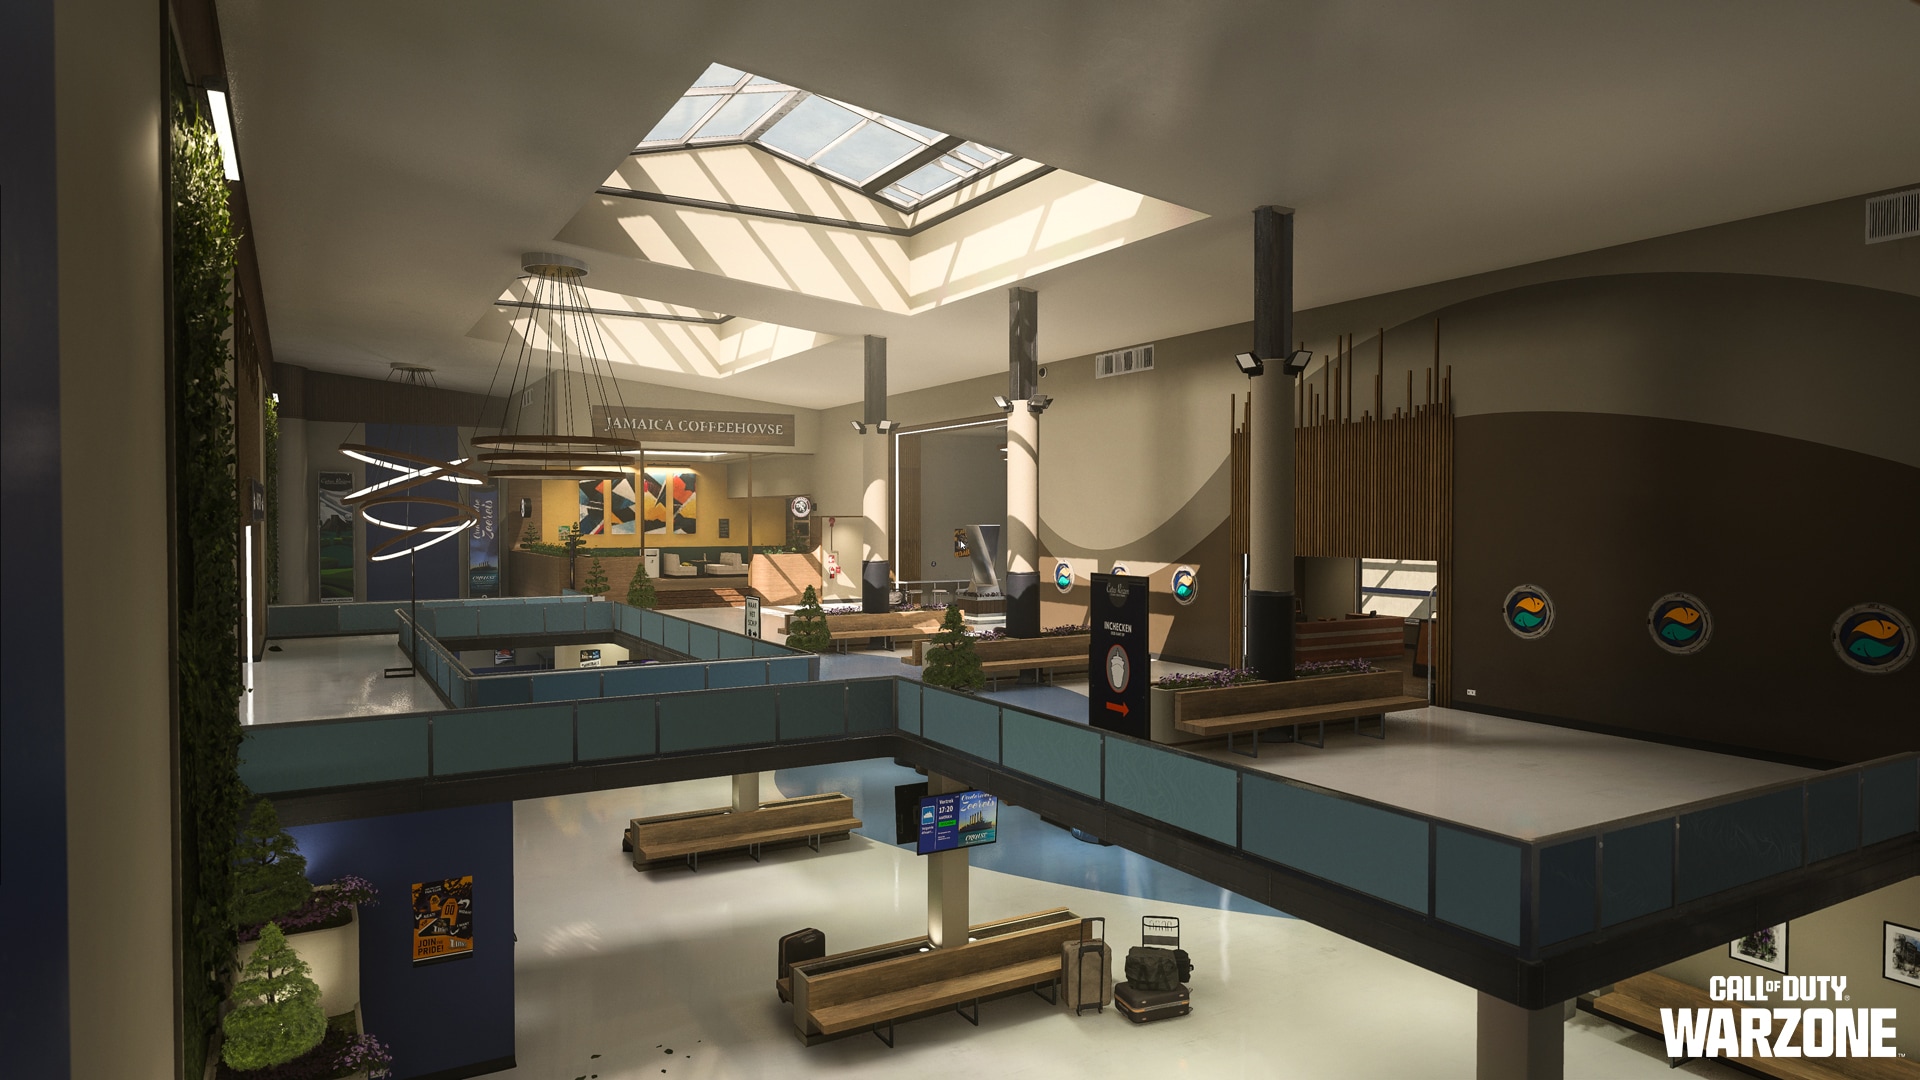
Cruise Terminal
The Cruise Terminal is composed of three main buildings.
There are two main gates and an extensive, two-floor interior featuring seating areas, restaurants, shops, and more. Operator Kleo reports that the roof is accessible from the inside via a parkour route up the elevator shaft, or by the ladder located on top of the adjacent skybridge.
The Maanlicht Hotel is composed of a first-floor lobby, two adjacent buildings via staircases on the second floor, a lobby with a billiards table and a wraparound deck on the third floor, and routes leading up to the roof helipad. There is an elevator shaft with an interior ascender, as well as an exterior ascender on the building’s west face.
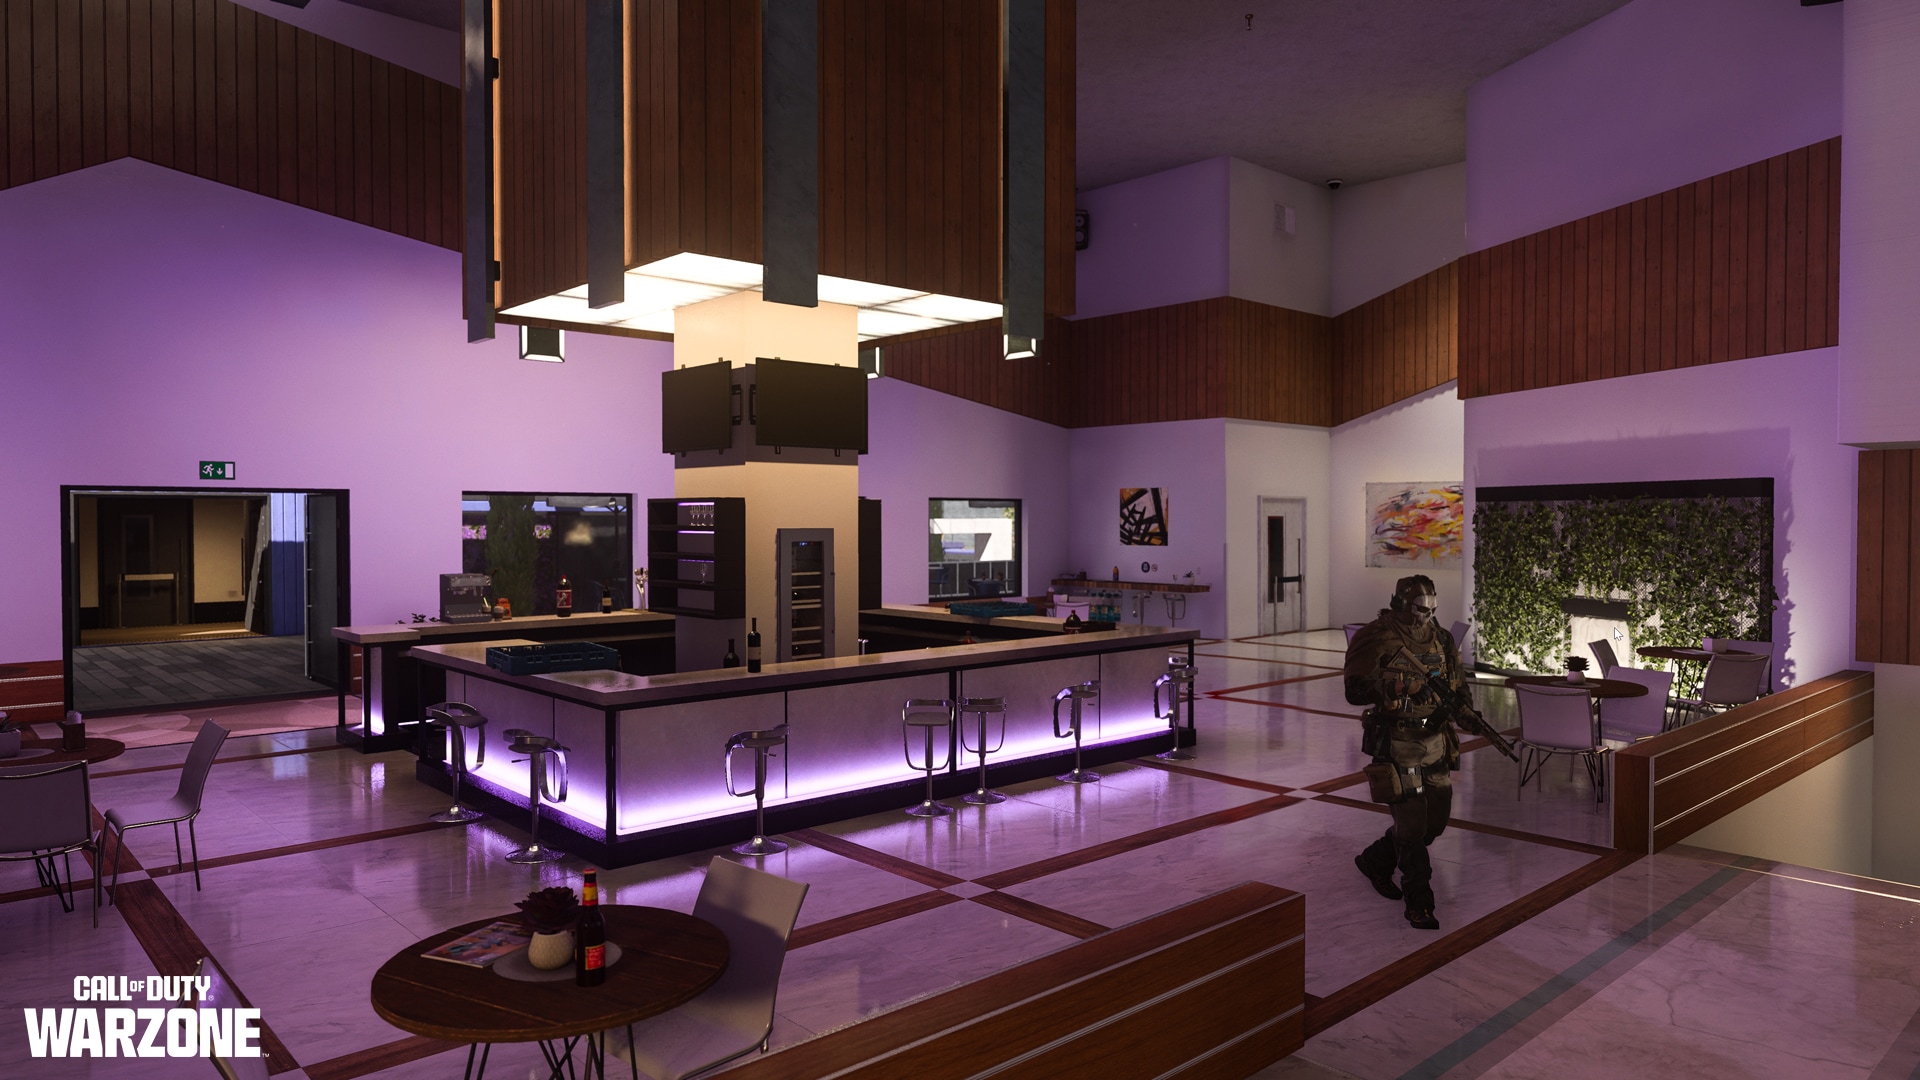
Finally, connected to the Hotel via a deck, which has a lengthy skybridge over to the Central Stadium, is the Vithzey Food and Wine eatery. Outside the ground-floor reception area is the main square bar, along with a smaller bar on the second main floor in a red velvet lounge, which has a staircase on one side that wraps back to the main bar. Operators can continue up the staircase to reach the solar-paneled roof, or take the south-facing exterior ascender for a faster route.
A Ronan Oil waterfront gas station sits adjacent to this building, as well as the old drawbridge, which is slightly raised for water vehicle traffic, allowing access to the Museum. On the opposite end is another row of townhouses across from the Stadium block, earmarked by a small park right on the ocean.
Maneuvering between the three main structures could be pivotal for Operators with short- or medium-range weapons. Snipers can head up to the rooftops to countersnipe those at the Museum or Stadium.
Expect increasingly heavy enemy reinforcements throughout this location, especially within the Hotel, Vithzey building (which also houses a UAV tower), and townhouse cluster. Fierce combat is also likely in and around the waterways of this POI, due to its quick access to the canals, the main river, multiple amphibious access points at the park, and the waterway gas stations near the old drawbridge.
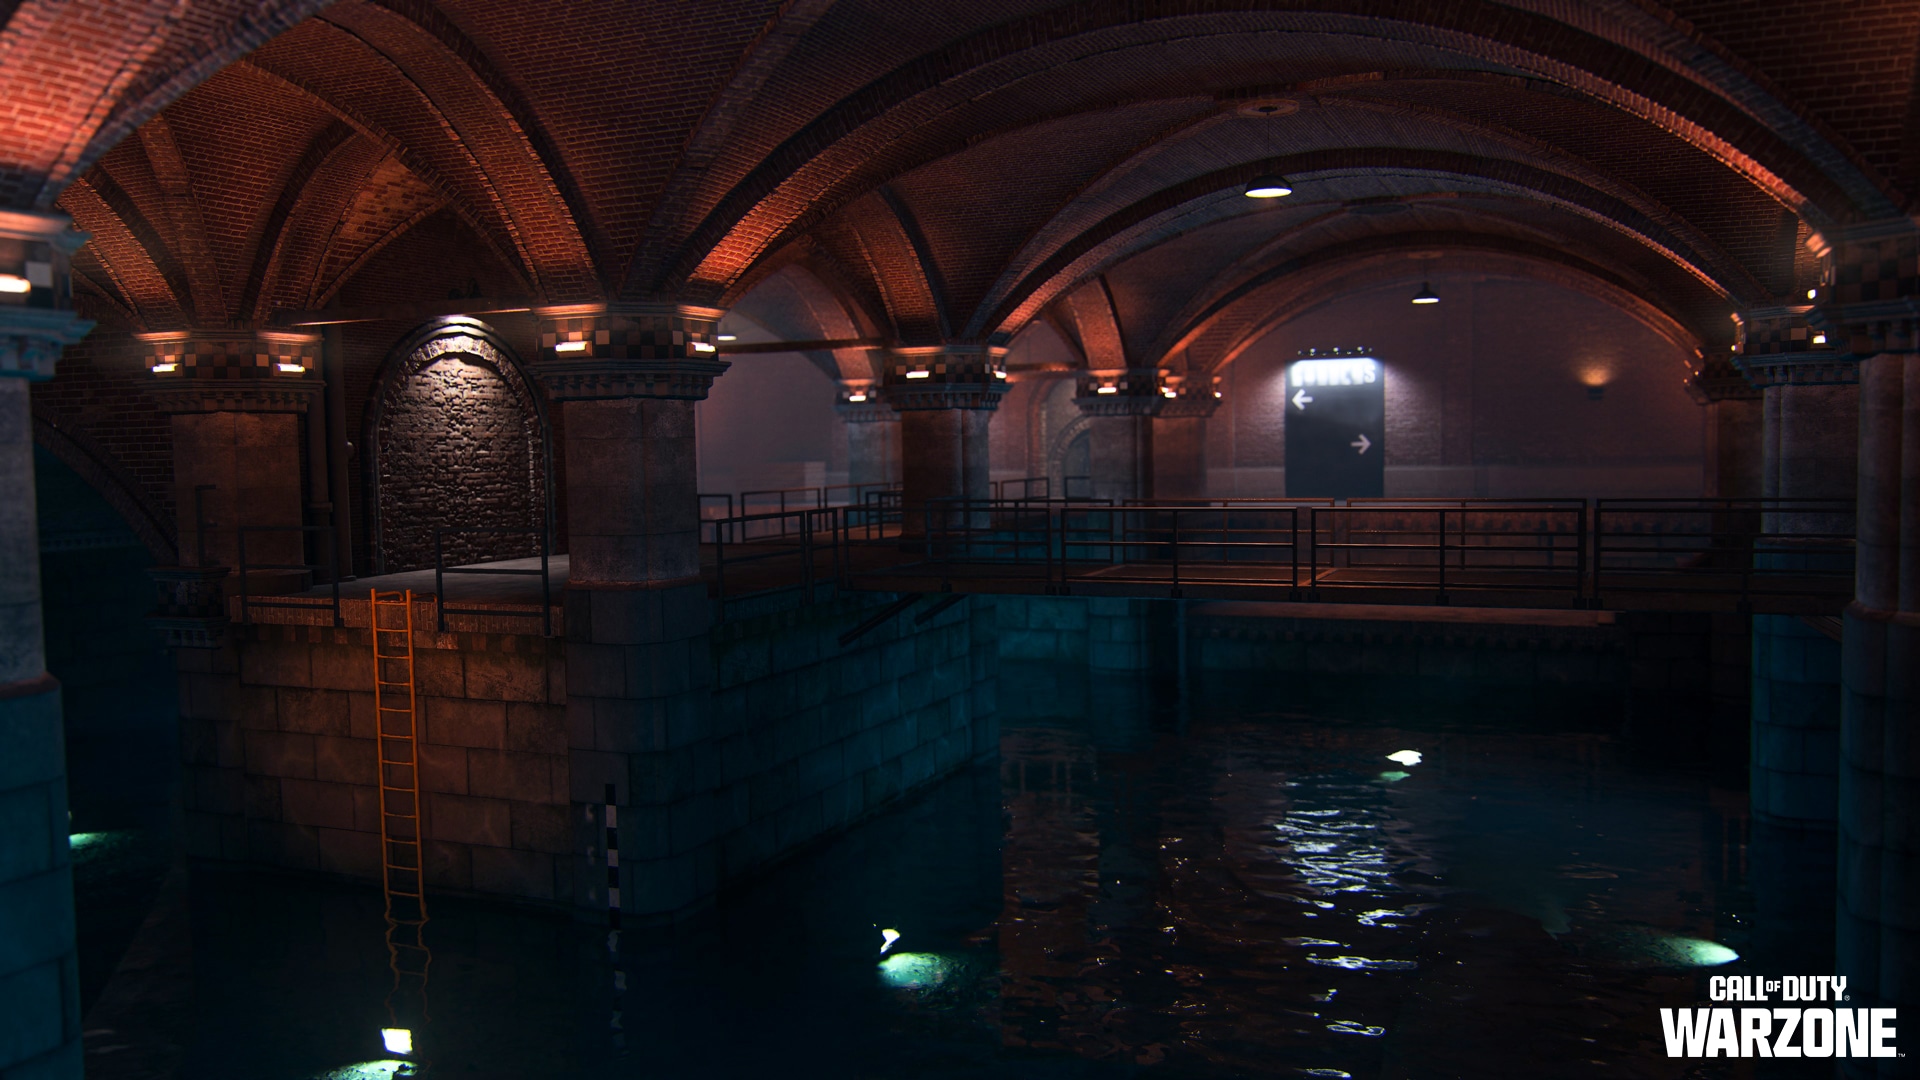
Museum
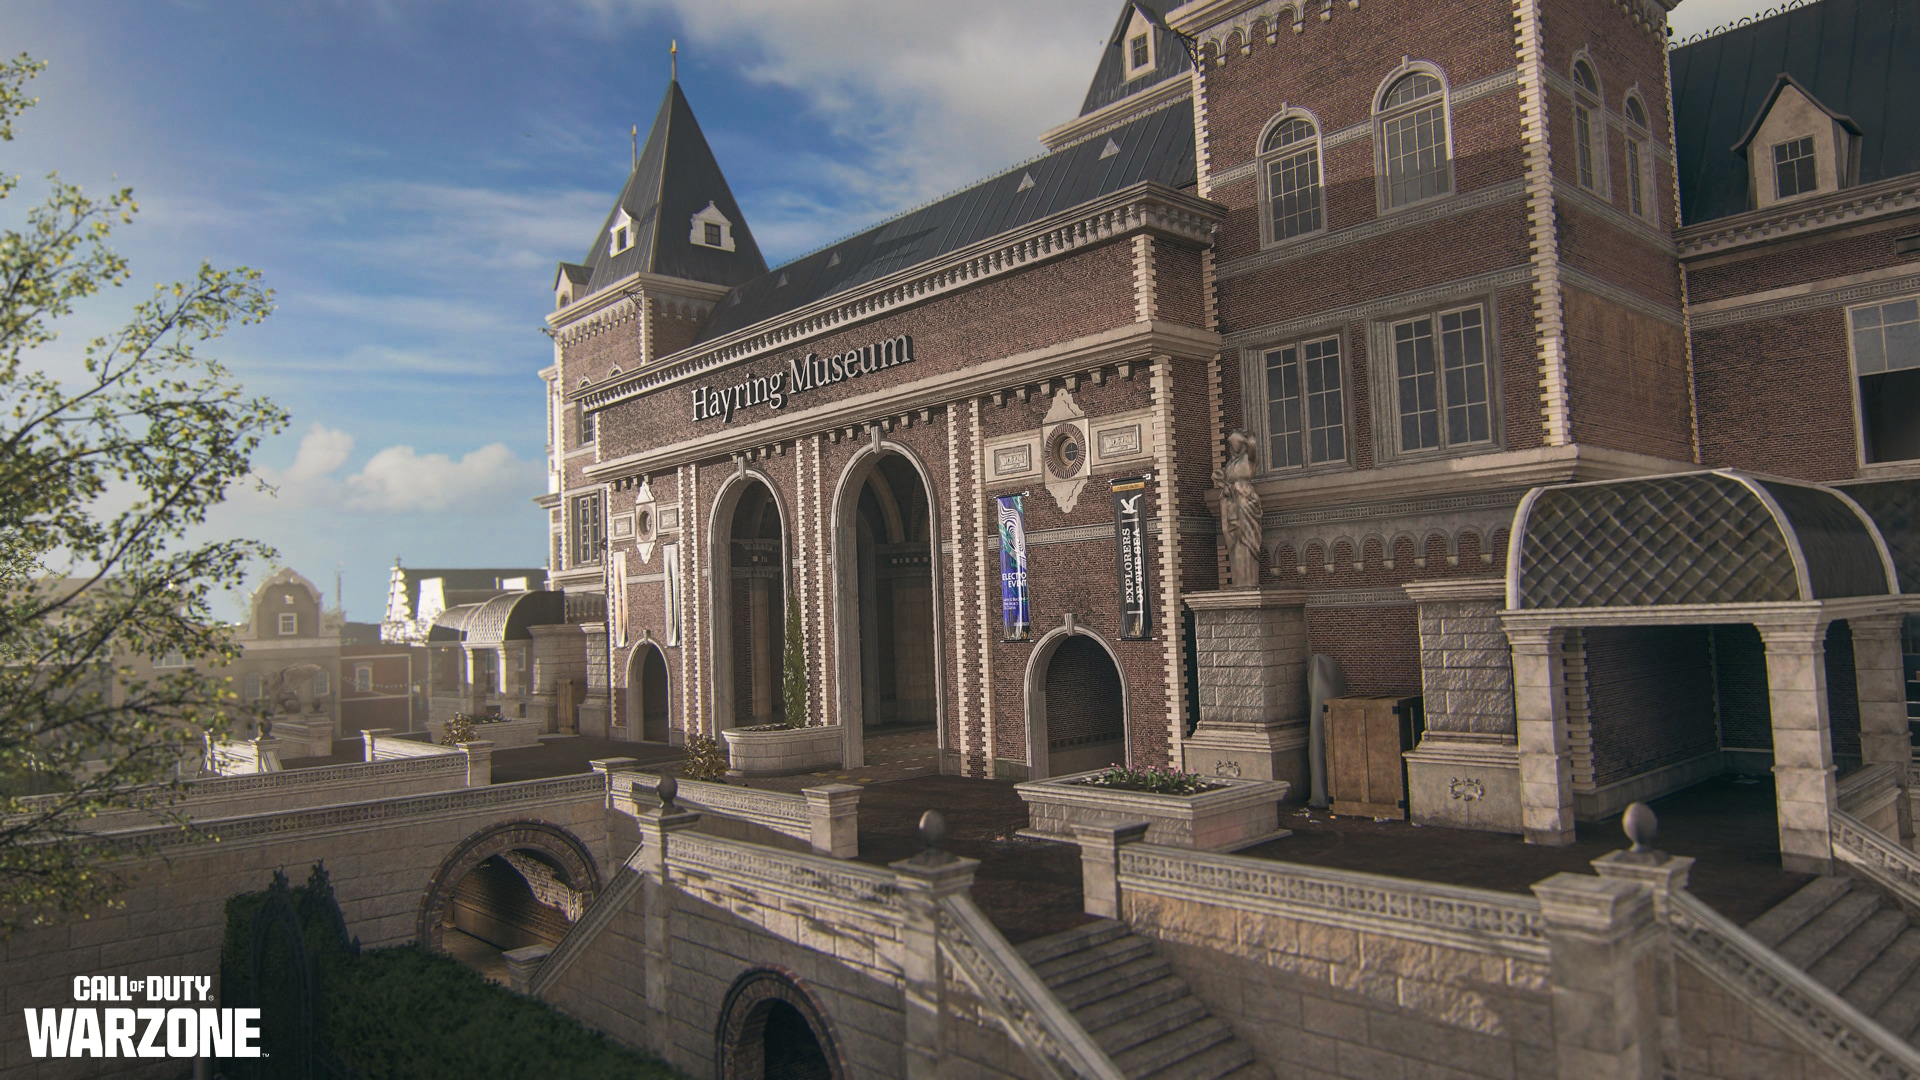
The Hayring Museum is an ornate, centuries-old structure featuring two formal gardens, a subterranean reservoir, a bar, a concert stage set in a flooded crypt, and an escape route to the canal on the north side.
There is enough space in the Museum grounds and even through the Museum’s center for a vehicle to pass through. South of the main structure are the gardens. This picturesque open area by the main waterfront is close to the Exhibit and contains several courtyards and a chessboard landmark. Operators favoring land combat are advised to hold down this location.
The Museum itself is large enough to use midrange weapons indoors, and its roof — one of the highest points on the map — is ideal for scouting ahead or sniping enemies in the courtyard or surrounding points of interest. Anticipate the Museum to be locked down as a fortress under certain combat conditions.

West of the Museum near the Stadium is another cluster of townhouses, known to the locals as Kunstenaar District.One structure is tagged with a bird mural, but otherwise it is similar to other residential zones with accessible rooftops, exterior ascenders, and mazelike interiors. The cover afforded here allows squads to rotate with favorable win conditions, but expect heavy resistance, as this is a known Stronghold. One of the two UAV towers is positioned within the townhouse cluster (on the north side); the other is in the Museum’s east courtyard.
The recon team discovered a Dead Drop [[REDACTED]]. . . .
Exhibit
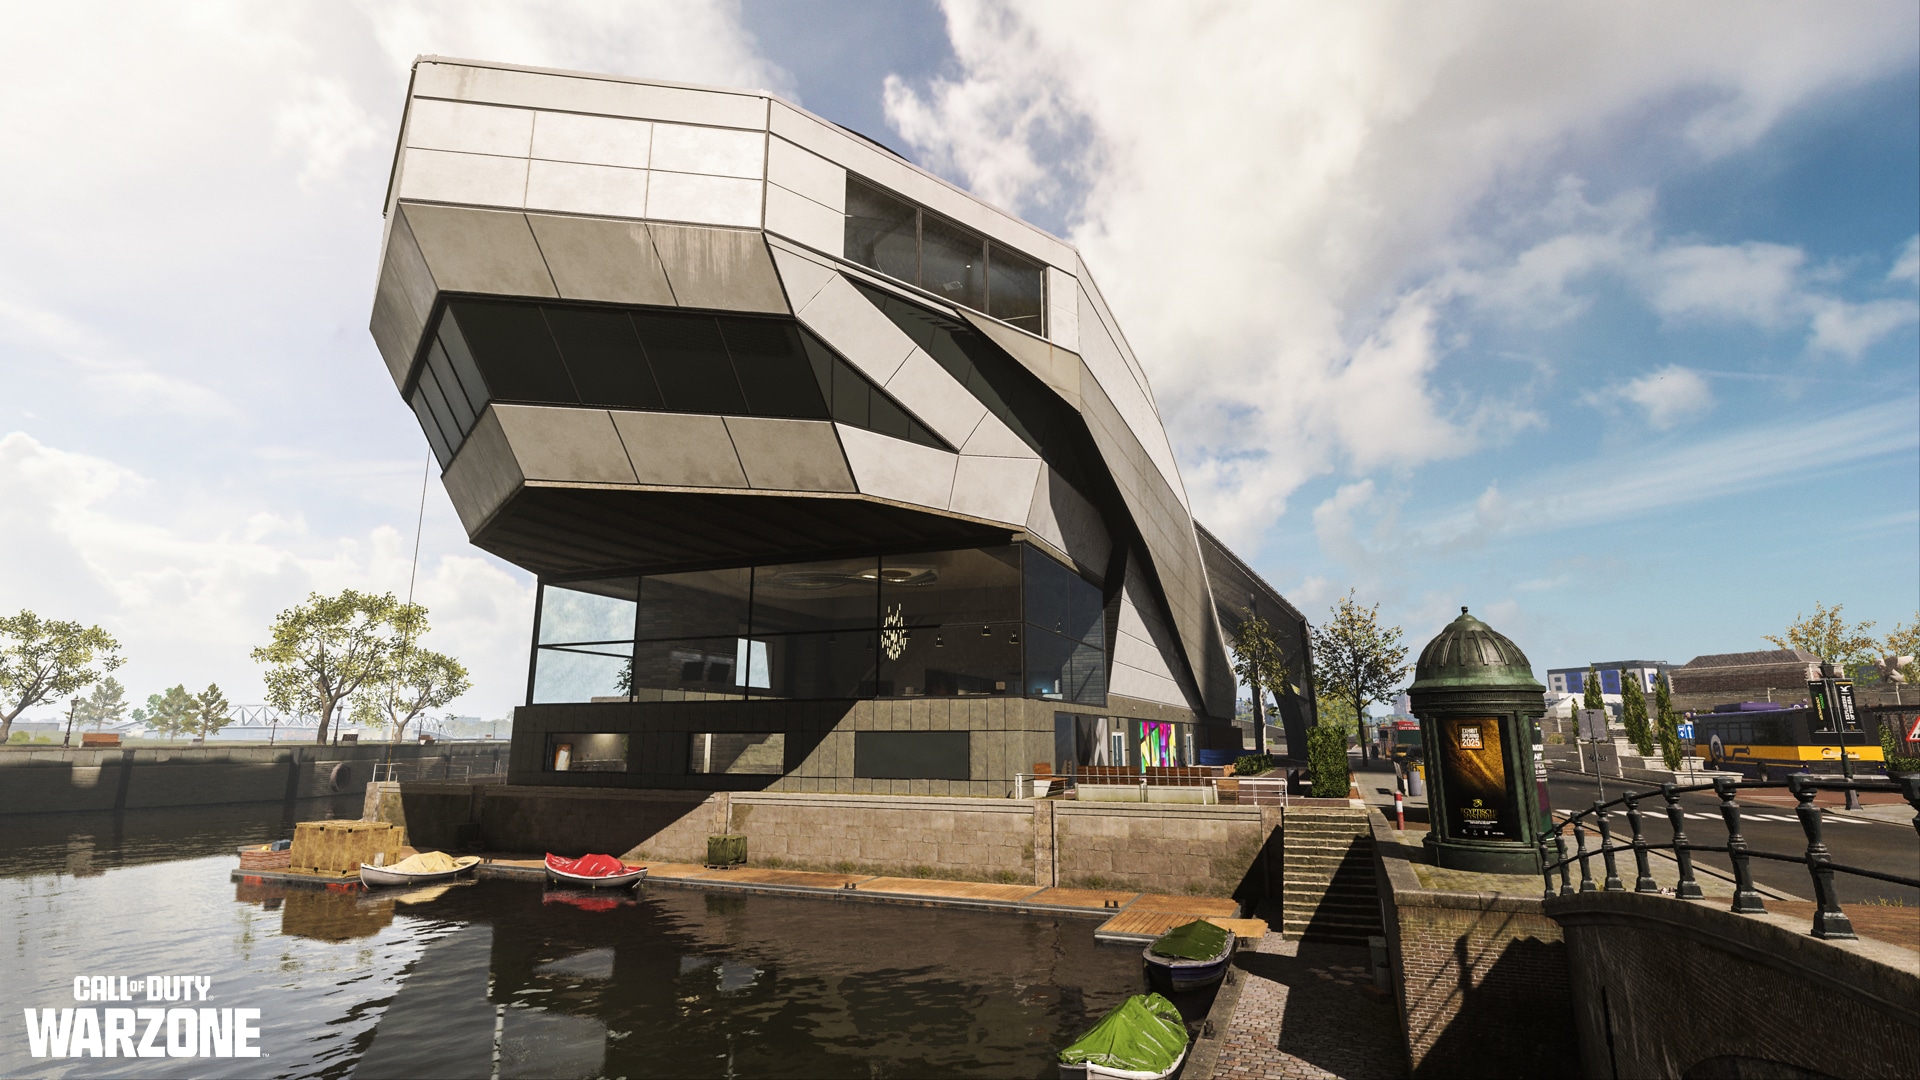
The second, more modern Nieux Museum on the southeastern extremities of the Vondel perimeter appears to be modeled after an ocean liner. This houses a collection of modern art and has a main spiral staircase leading up to a sloped roof garden. The roof offers sniper lines to the Museum and parts of the Central Station.
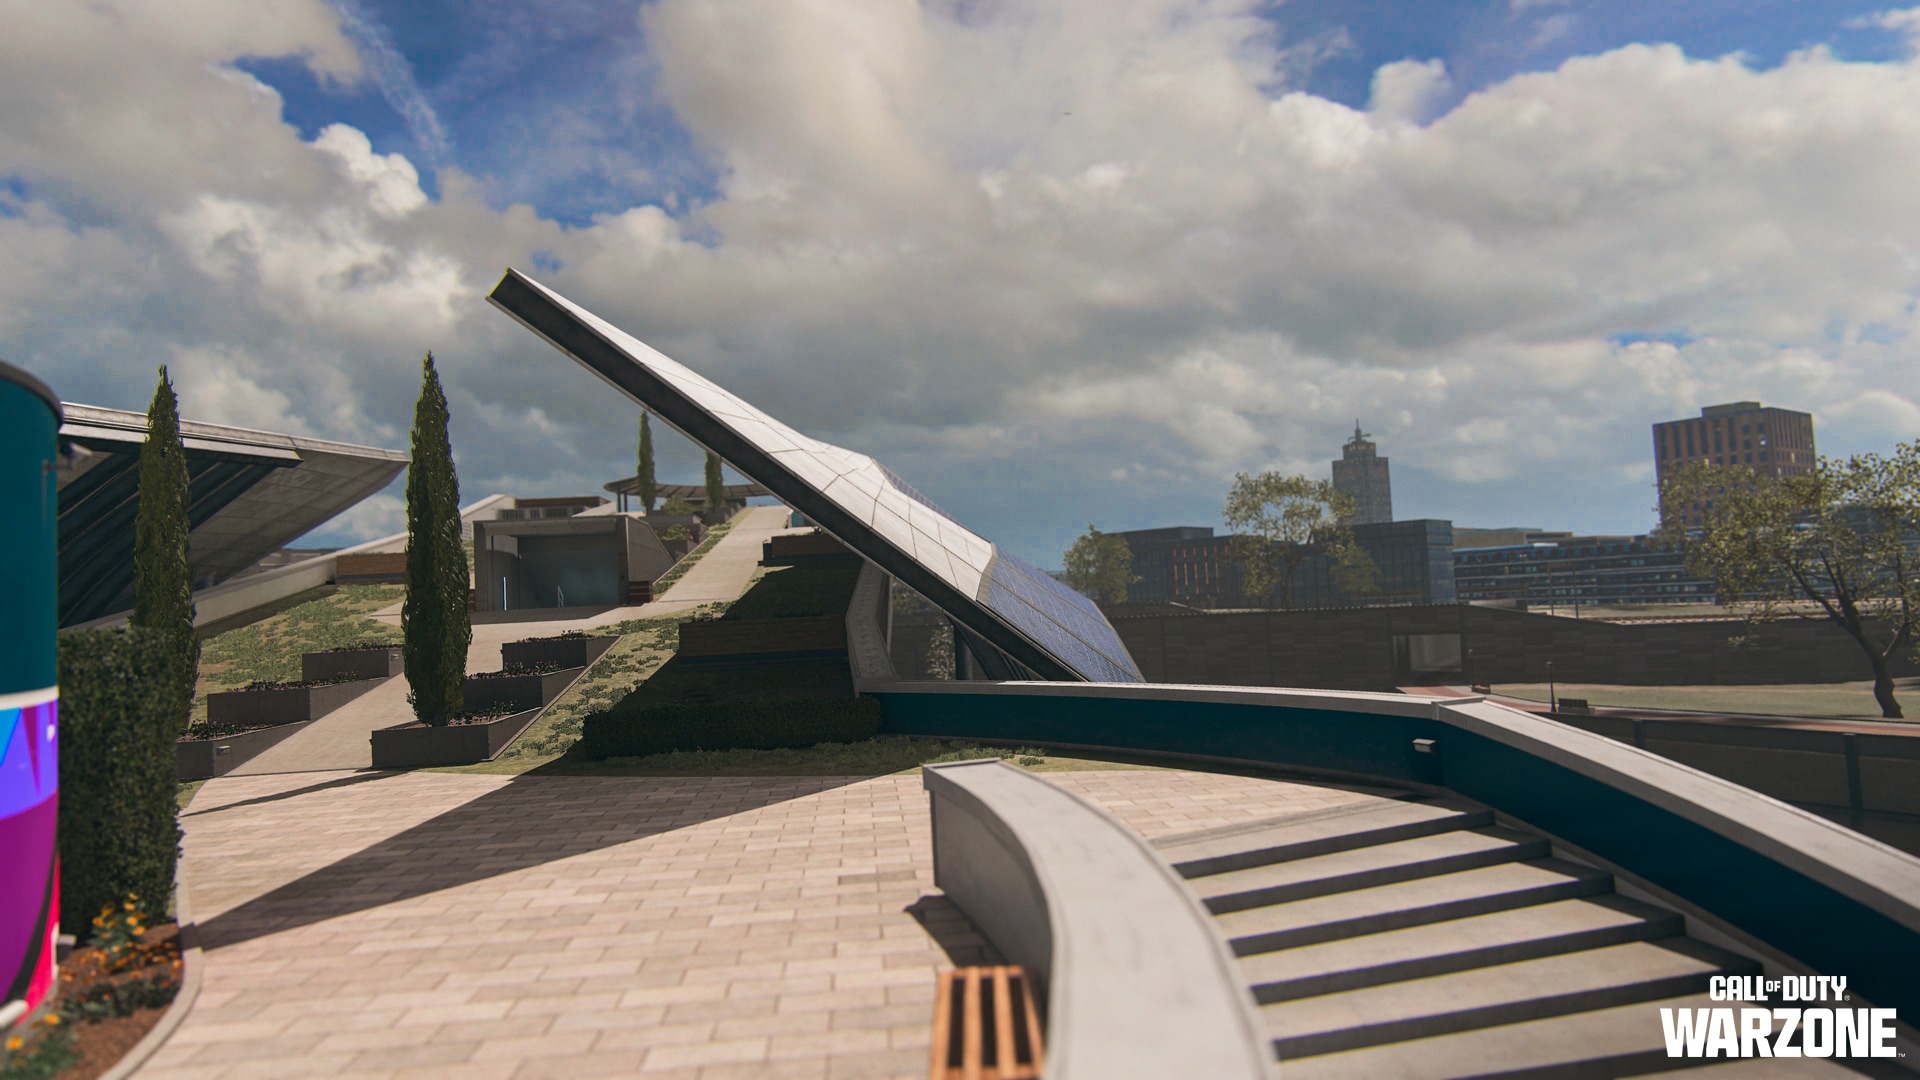
Be advised: Combat within the various galleries of the Exhibit building favor CQB weaponry. The exterior has enough open space to use long-range rifles, which can aid in the elimination of foes using the canal network, as well as those close to the Central Station and within the vicinity of the waterway gas station (all due north). The Exhibit is being treated as a fortress for certain combat operations.
DEBRIEF
Attention all Operators.
Due to recent reports of KorTac Operator Nikto and additional [[REDACTED]] forces breaching the [[REDACTED]], the SpecGru Recon mission has been aborted, effective immediately.
Refer to the above Tactical Overview prior to any subsequent deployment to ensure your full operational readiness in Vondel.
Be ready to drop on June 14.
Stay frosty.
© 2023 Activision Publishing, Inc. ACTIVISION, CALL OF DUTY, CALL OF DUTY WARZONE, and MODERN WARFARE are trademarks of Activision Publishing, Inc. All other trademarks and trade names are the property of their respective owners.
For more information, please visit www.callofduty.com and www.youtube.com/callofduty, and follow @Activision and @CallofDuty on Twitter, Instagram, and Facebook.