Call of Duty: Modern Warfare II Season 01 - Shoot House Map Intel
The Mission:
Operation/
SHOOT HOUSE
Las Almas
Day 13, 13:00
Factions Deployed: SpecGru / KorTac
Needing a geographically diverse and hidden location out of which to conduct training operations, the Cartel La Red – at the time, the dominant cartel in Las Almas – constructed a place where men and women learned to become killers.
Under the direction of a mysterious military and security advisor known as “El Sin Nombre”, Sicarios were sent to the mountains to receive the same training in urban, mountain, jungle and close quarter combat as elite Mexican Special Forces operators. Utilizing the jungle and mountain coverage to hide their elaborate training facilities, the sicarios of La Red were transformed into a veritable army of assassins. Learning everything from rock wall rappelling to HALO jumping to room clearing in a PLAZA-SIZED SHOOTHOUSE, they were taught war effectively and methodically.
With secure access to the snaking Rio de Almas providing a direct route from the Gulf ports to the northern border, and the nearby mountains serving as an ideal location for overwatch, the area would have been perfect for continuing Narco operations.
If it wasn’t haunted.
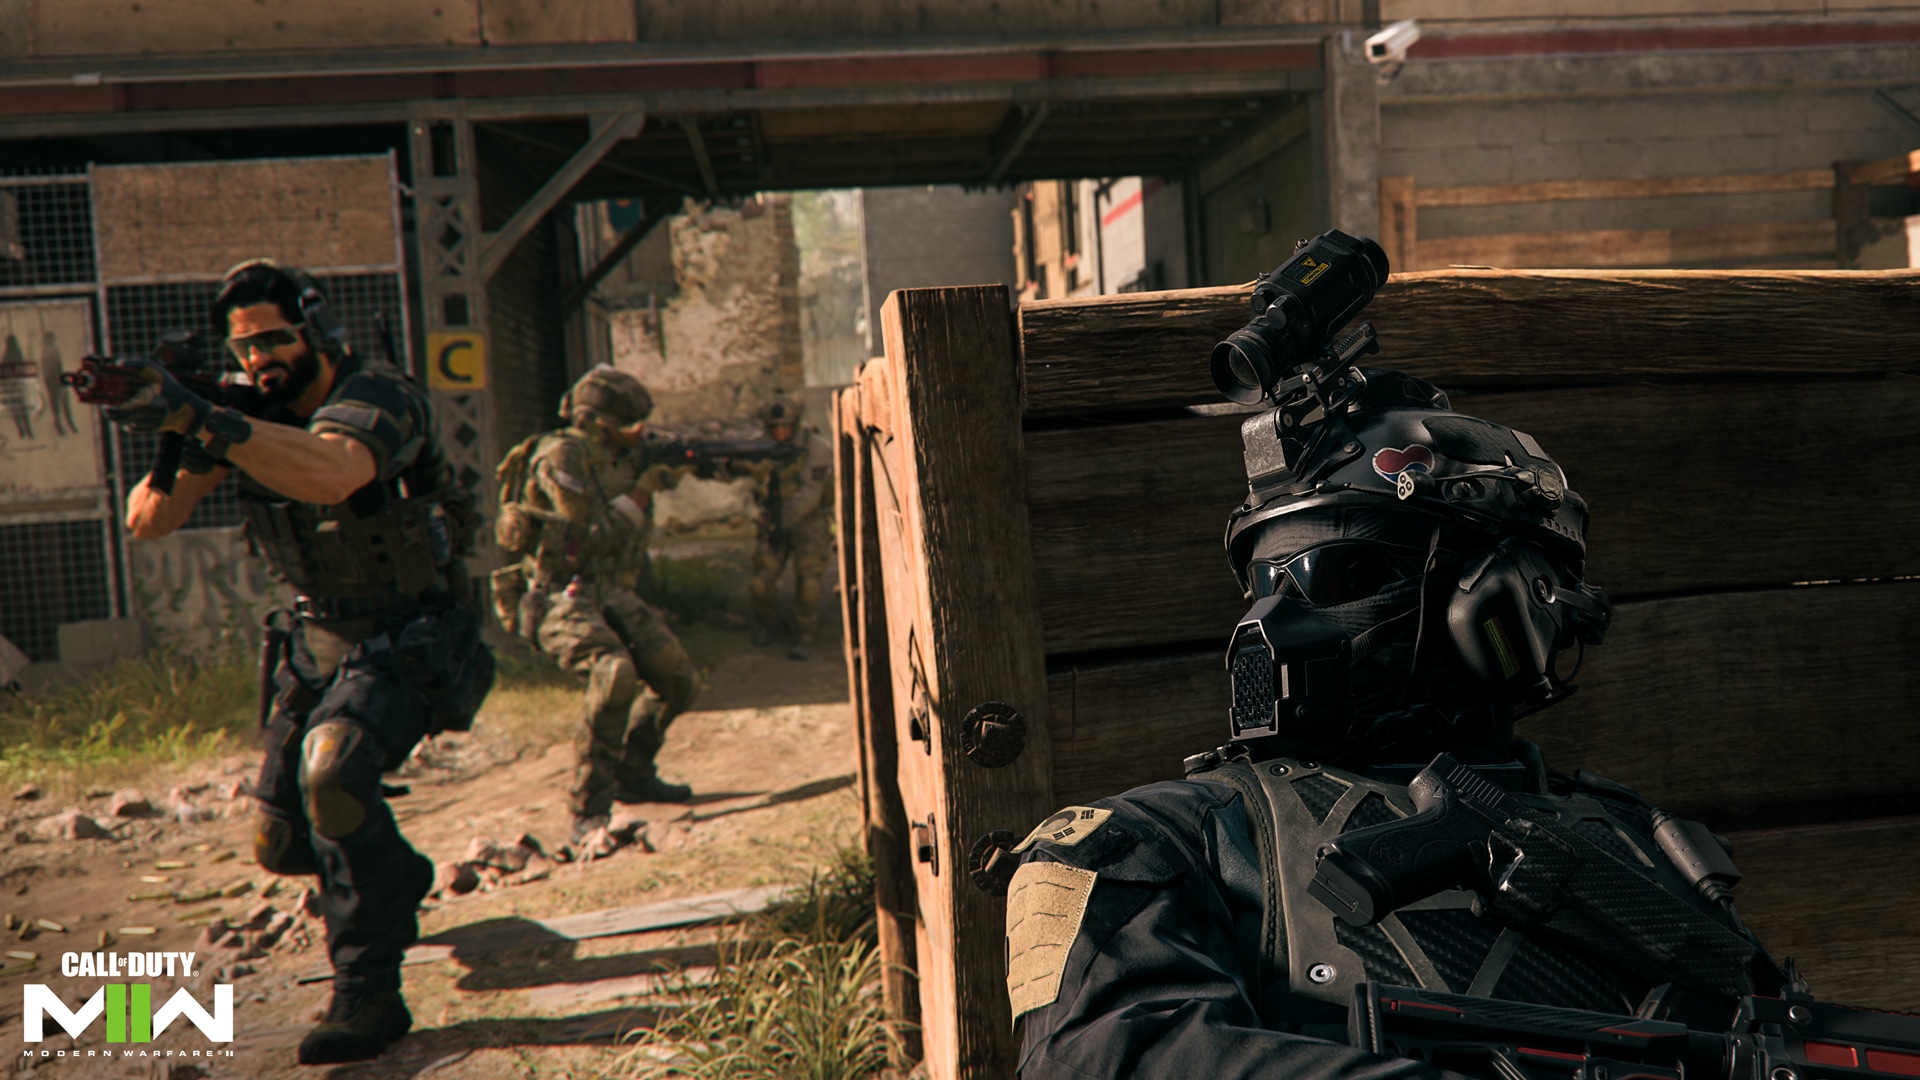
Shoot House provides the ideal setup for SpecGru and KorTac forces to exercise their combat and movement abilities in an intimate, remote tactical environment. Operators who perform well here will be more than prepared for the further challenges ahead, having proven their skills in every kind of fierce engagement.
Kortac Operators arrive on the western side of the map at the Alpha Gate, while KorTac Operators deploy on the eastern side of the map at the Bravo Gate.
MAP VIEWS:
Spawn Point: Kortac
Kortac Spawn Zone (West) – Alpha Gate, Forklift, and Courtyard
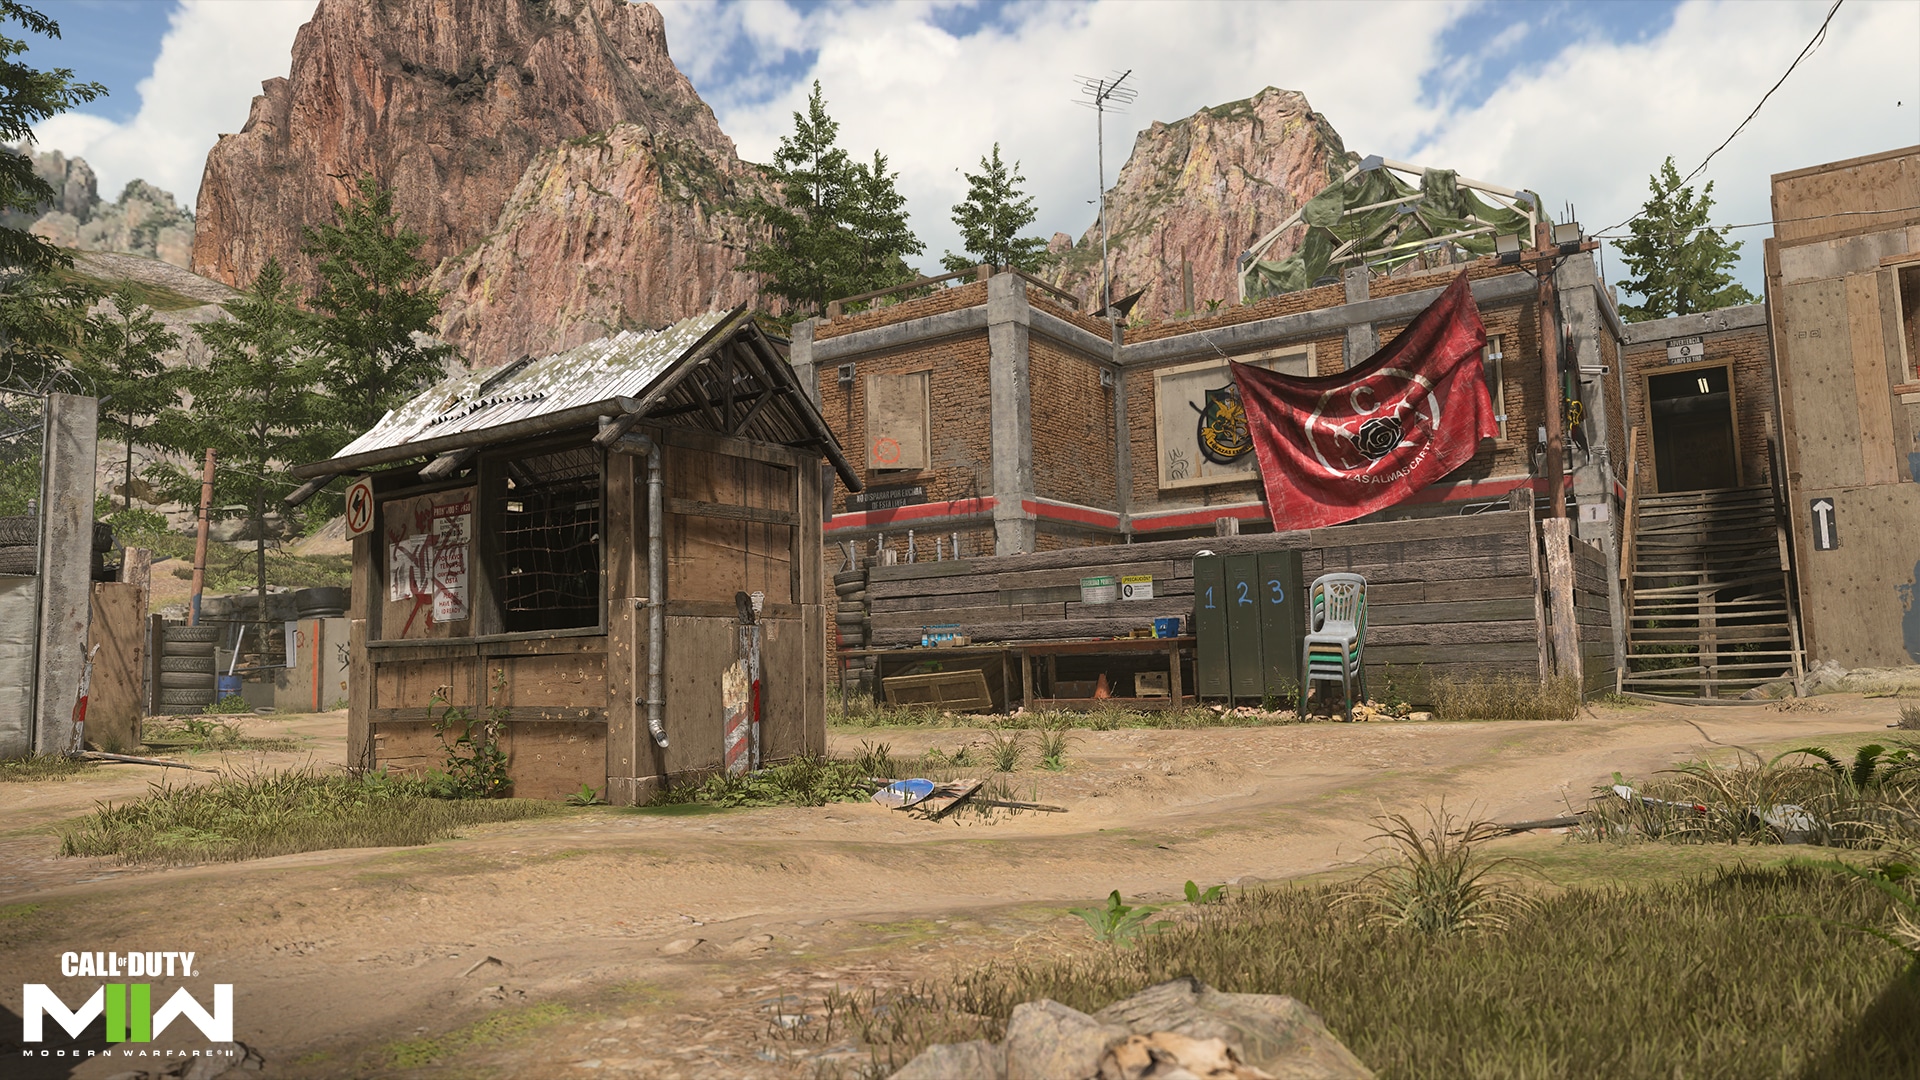 Shoot House employs a classic three-lane, near symmetrical design, so that the forces on both sides of the map at match start must determine whether to head straight toward the center lane, north toward Containers, or south toward the Junkyard.
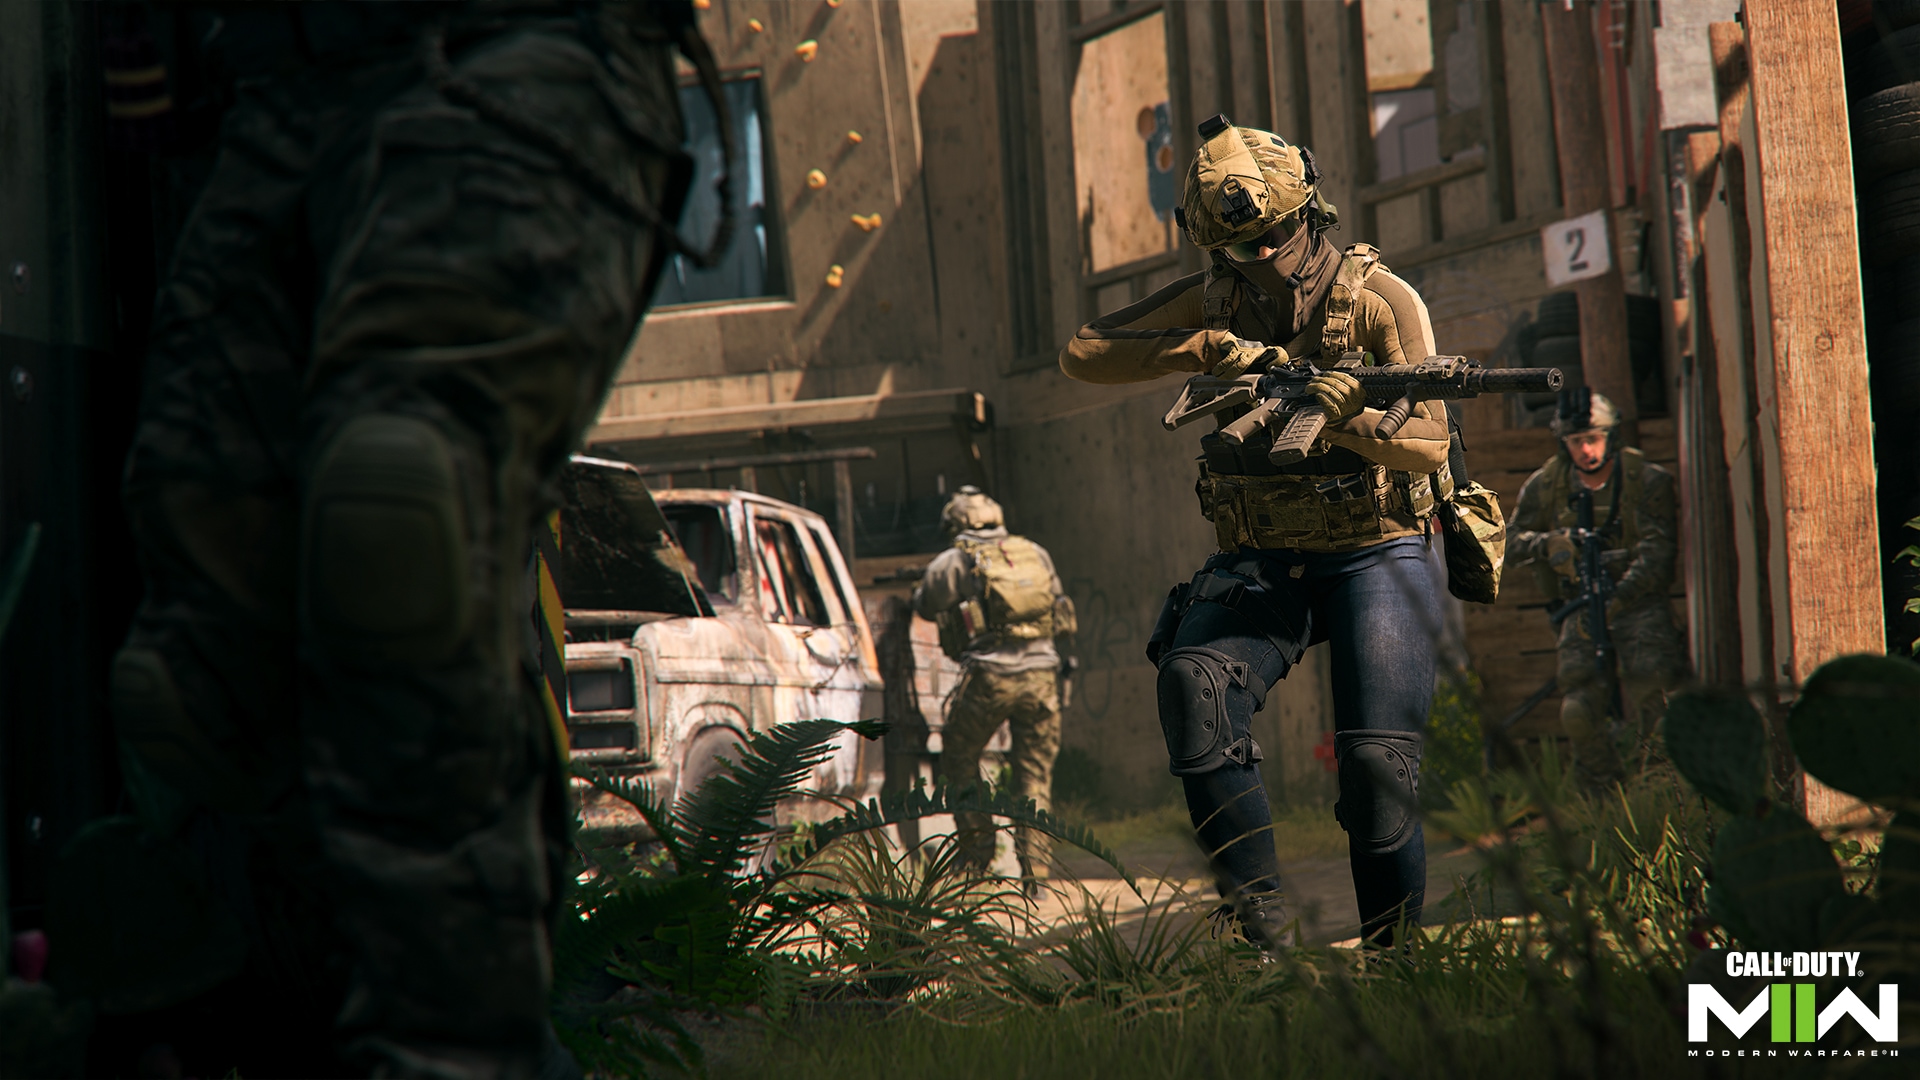
From the Alpha Gate, snipers often rush straight to the sturdy center wooden wall, mantling up onto the worktables for a clear line of sight down the middle. The stairs leading up into the Office offer another good route, though an SMG or Assault Rifle will suit you better when encountering enemy Operators on the other side of the building.
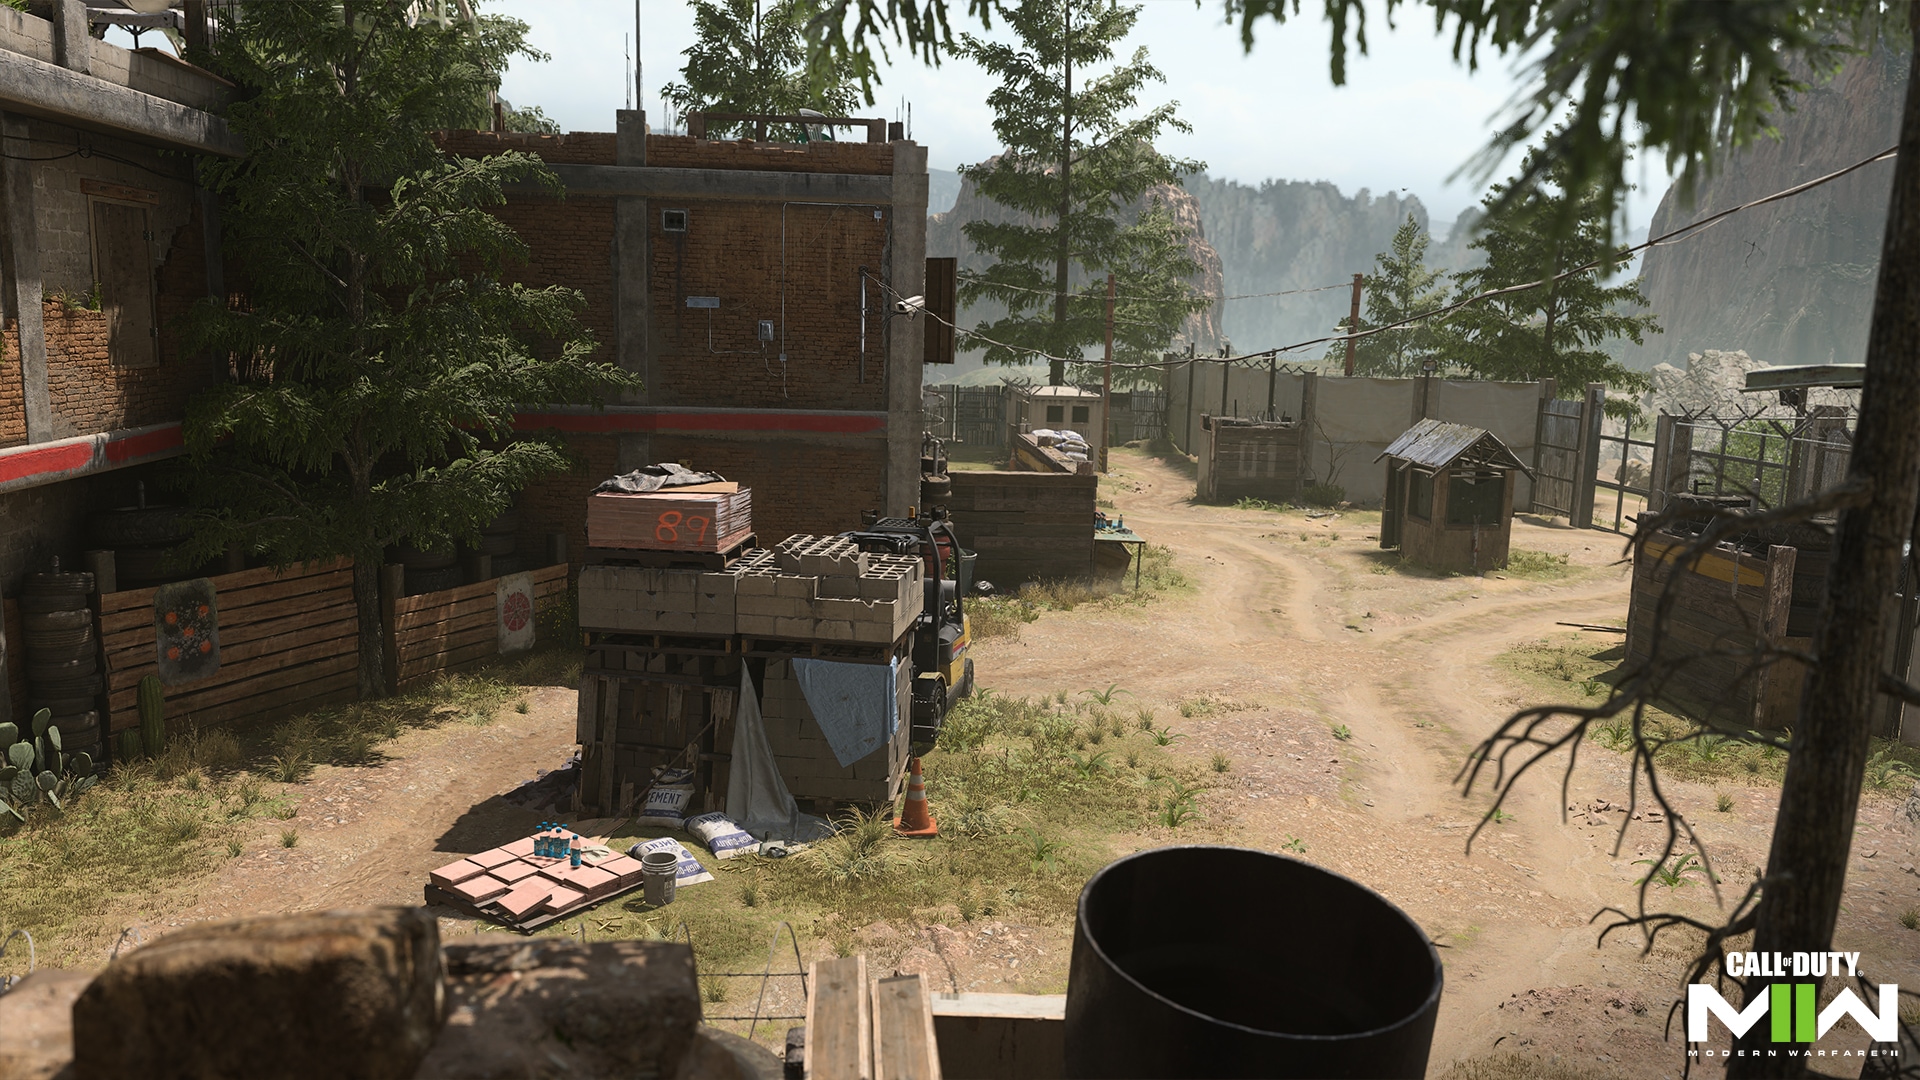
Head north to the Forklift — offering excellent defensive cover against enemies rushing into this area — to make your way to the Containers. Look for enemies racing to the stairway leading up to the Office just to the left of the stack of cement bags and wooden boards, and be ready for an engagement from either side when moving forward out of the starting area.
When navigating to the southern Courtyard, use the large cover pieces to defend against attackers rushing in from the Junkyard. Consider tossing a Tactical and/or Lethal Equipment piece amongst the scattered vehicles when pushing into the Junkyard. At the initial break, toss it over the parked SUV where you’re likely to catch incoming Operators; be prepared for them to attempt the same against you. The SUV in Courtyard is also able to be detonated, so access the violence and timing needed to prevent you being caught in a possible explosion.
Spawn Point: Specgru
Specgru Spawn Zone (East) – Bravo Gate, Back Alley, and Shanty Town
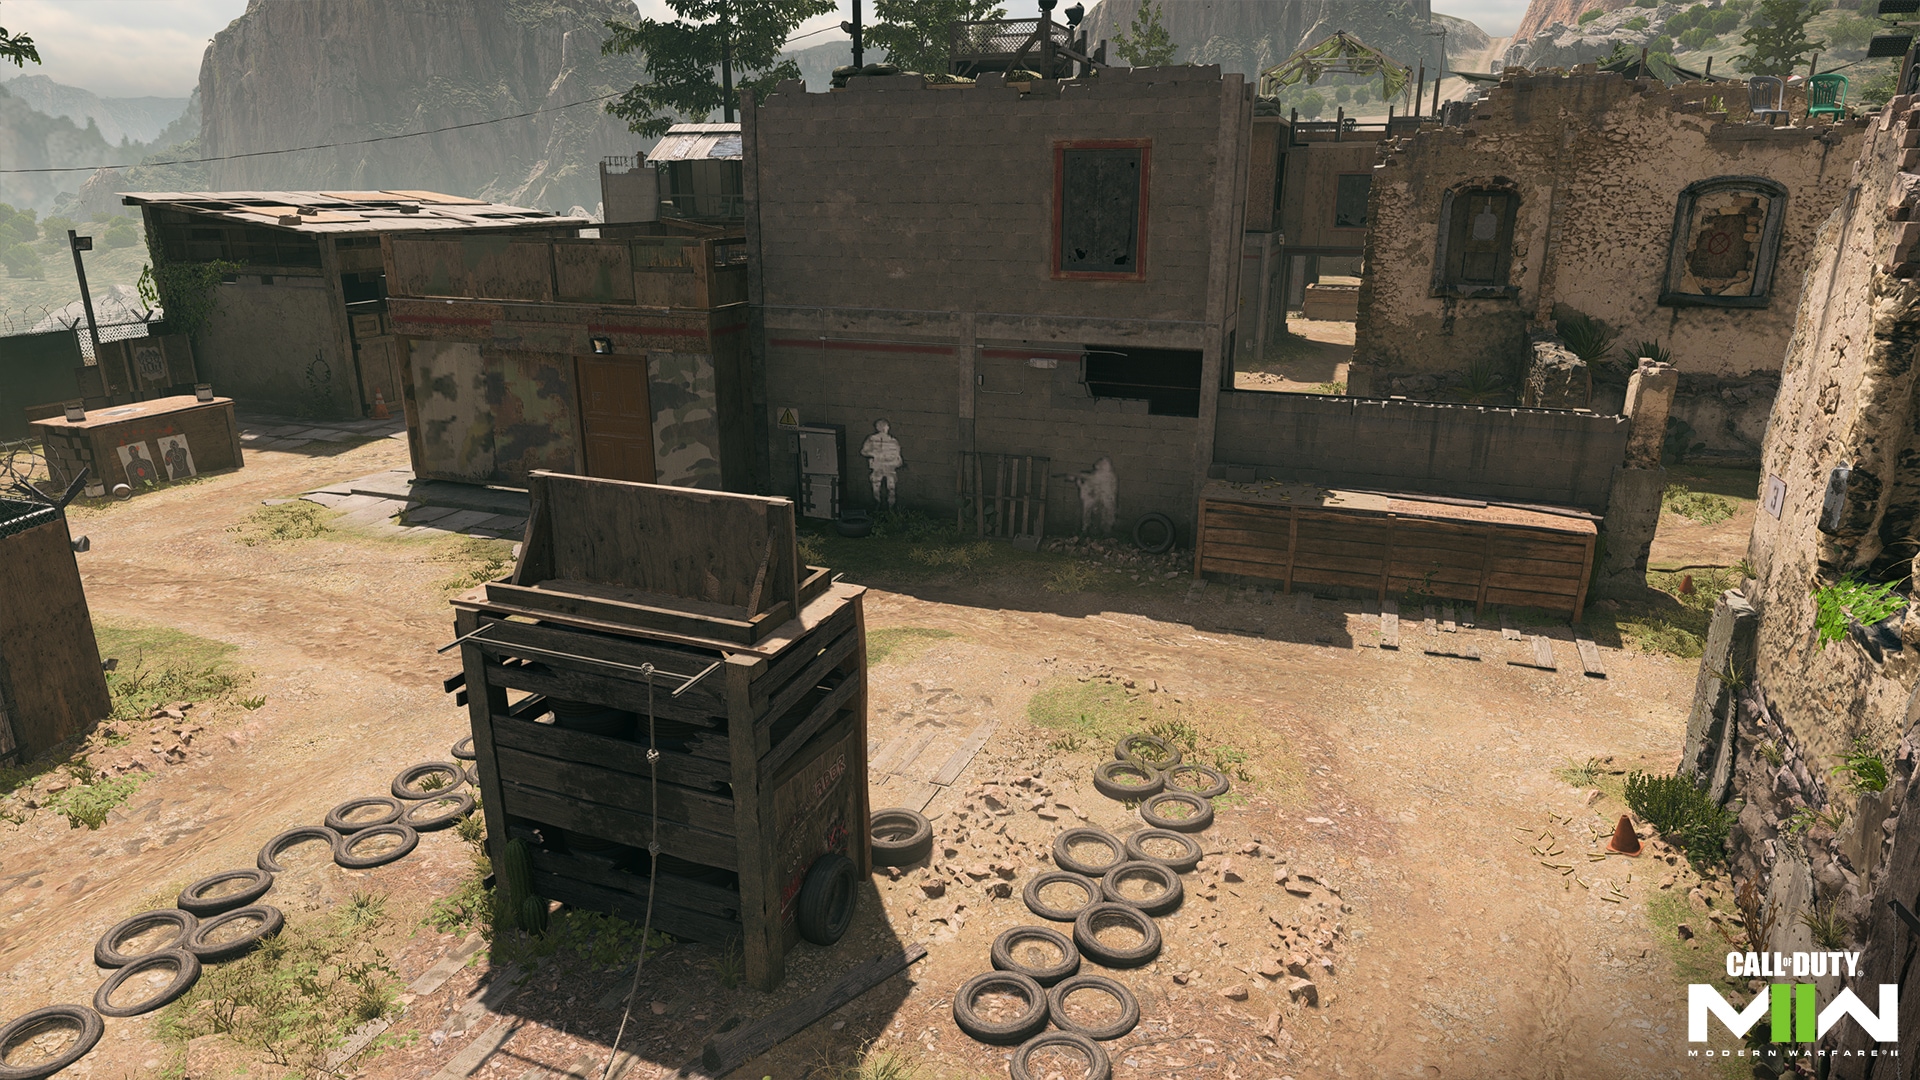 The Specgru forces begin at Bravo Gate with a similar initial layout, though there are some important differences here.
As with the Alpha Gate spawn, there’s a good chance that a sniper or two will head straight forward, mantling up for a view down the center, often initiating the match with its first battle as each side vies for dominance over the middle lane. You can also run straight into the center lane — called Main Street on this side of the map — though you’d better cross your fingers and use your Tactical Sprint to get out of view fast.
The north route leads to the Back Alley, featuring the remains of a stone archway and training obstacle much like the Forklift on the opposite side of the map. The view into Containers is much different, however, providing a more open view of the area with the added danger of enemy Operators firing down at you from the Office windows and stairwell. Approach cautiously.
To the south, the Shanty Town offers an interior and exterior path to the Junkyard. Head through the interior shooting range for close-quarters combat and remain outside for mid- to long-ranged encounters. Pay careful attention to the Junkyard when taking the outside path to prevent getting eliminated before you even have the chance to get there. Snipers and other long-ranged Loadouts should stick back and cover their forward moving teammates here when needed.
If you’d rather, you can avoid the Junkyard altogether on the initial break, instead mantling up the wall to the right for a view into the center lane and across to the shipping crates lining southern edge of Containers.
Map Maneuvers: Route Planning
Northern Route — Forklift, Office, Containers, and Back Alley
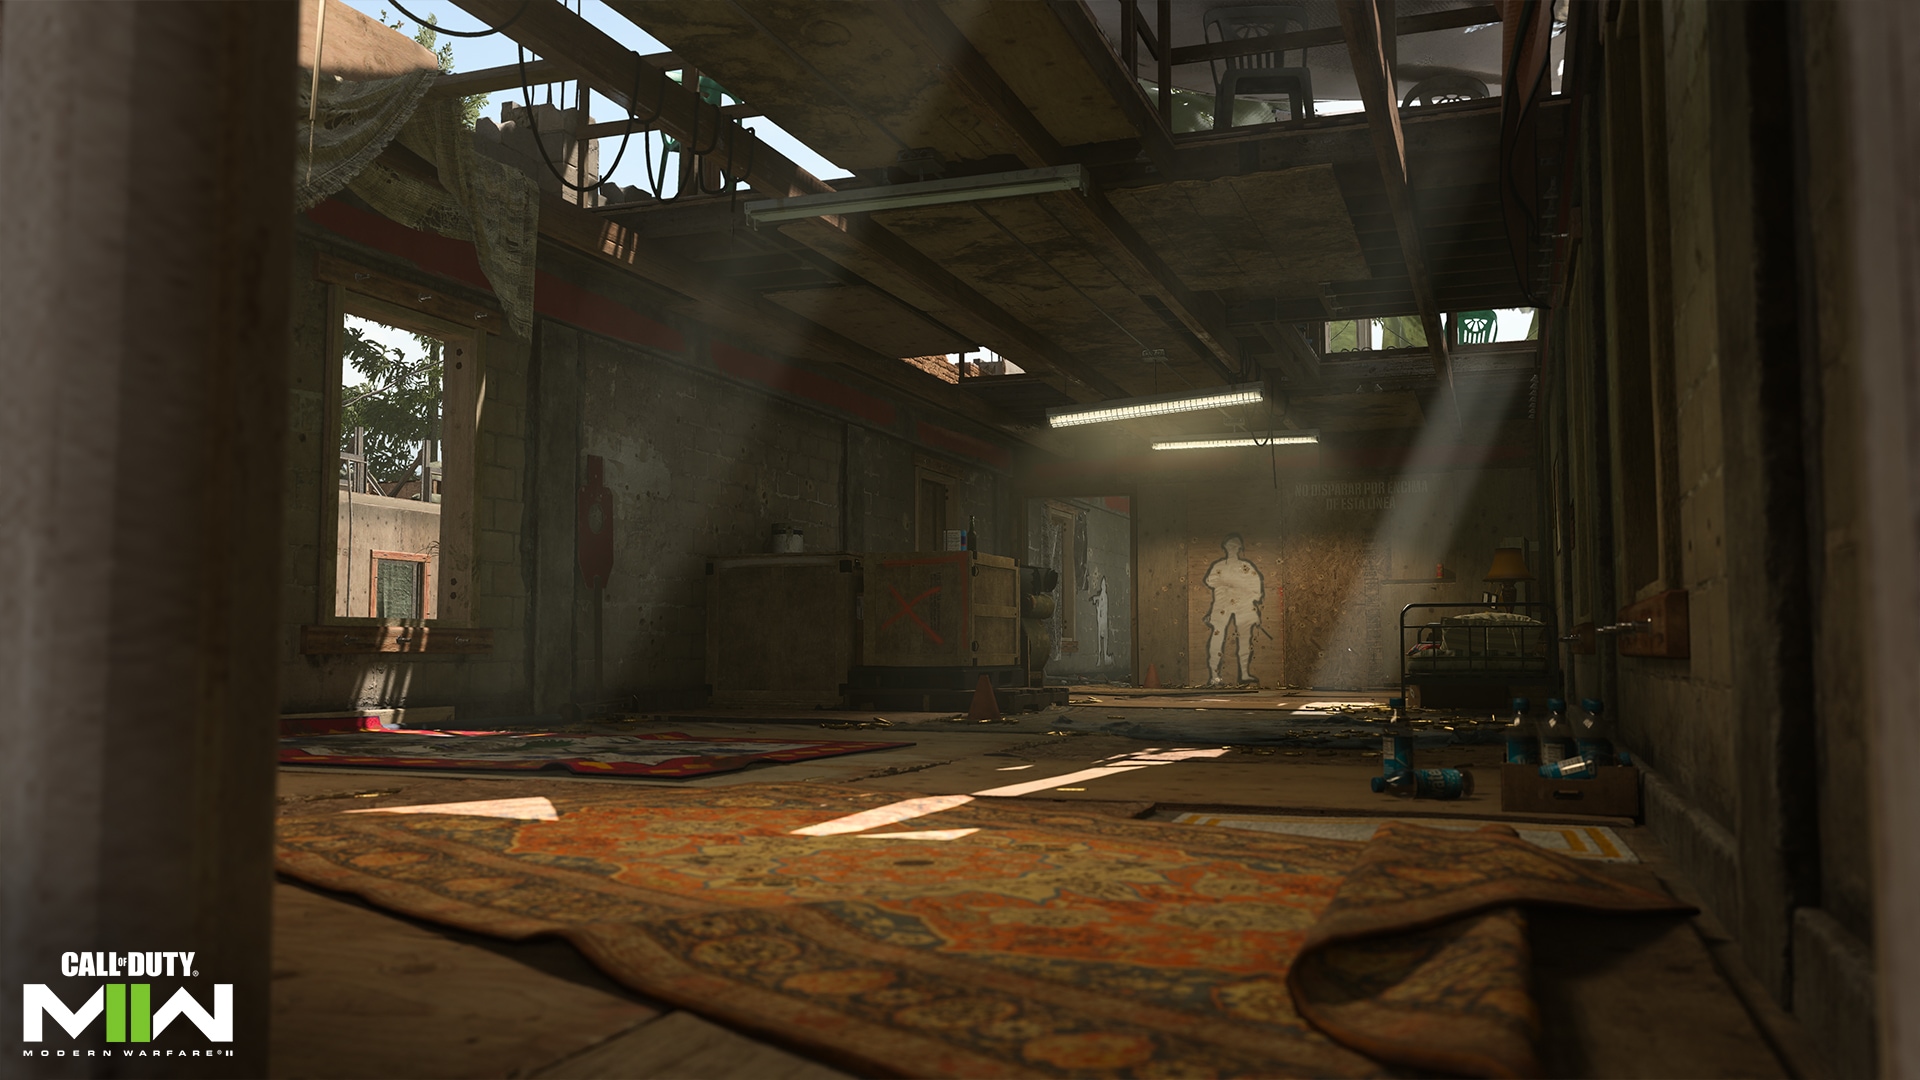 Shoot House’s northern route includes the aforementioned Forklift and Back Alley areas leading into Containers and Office.
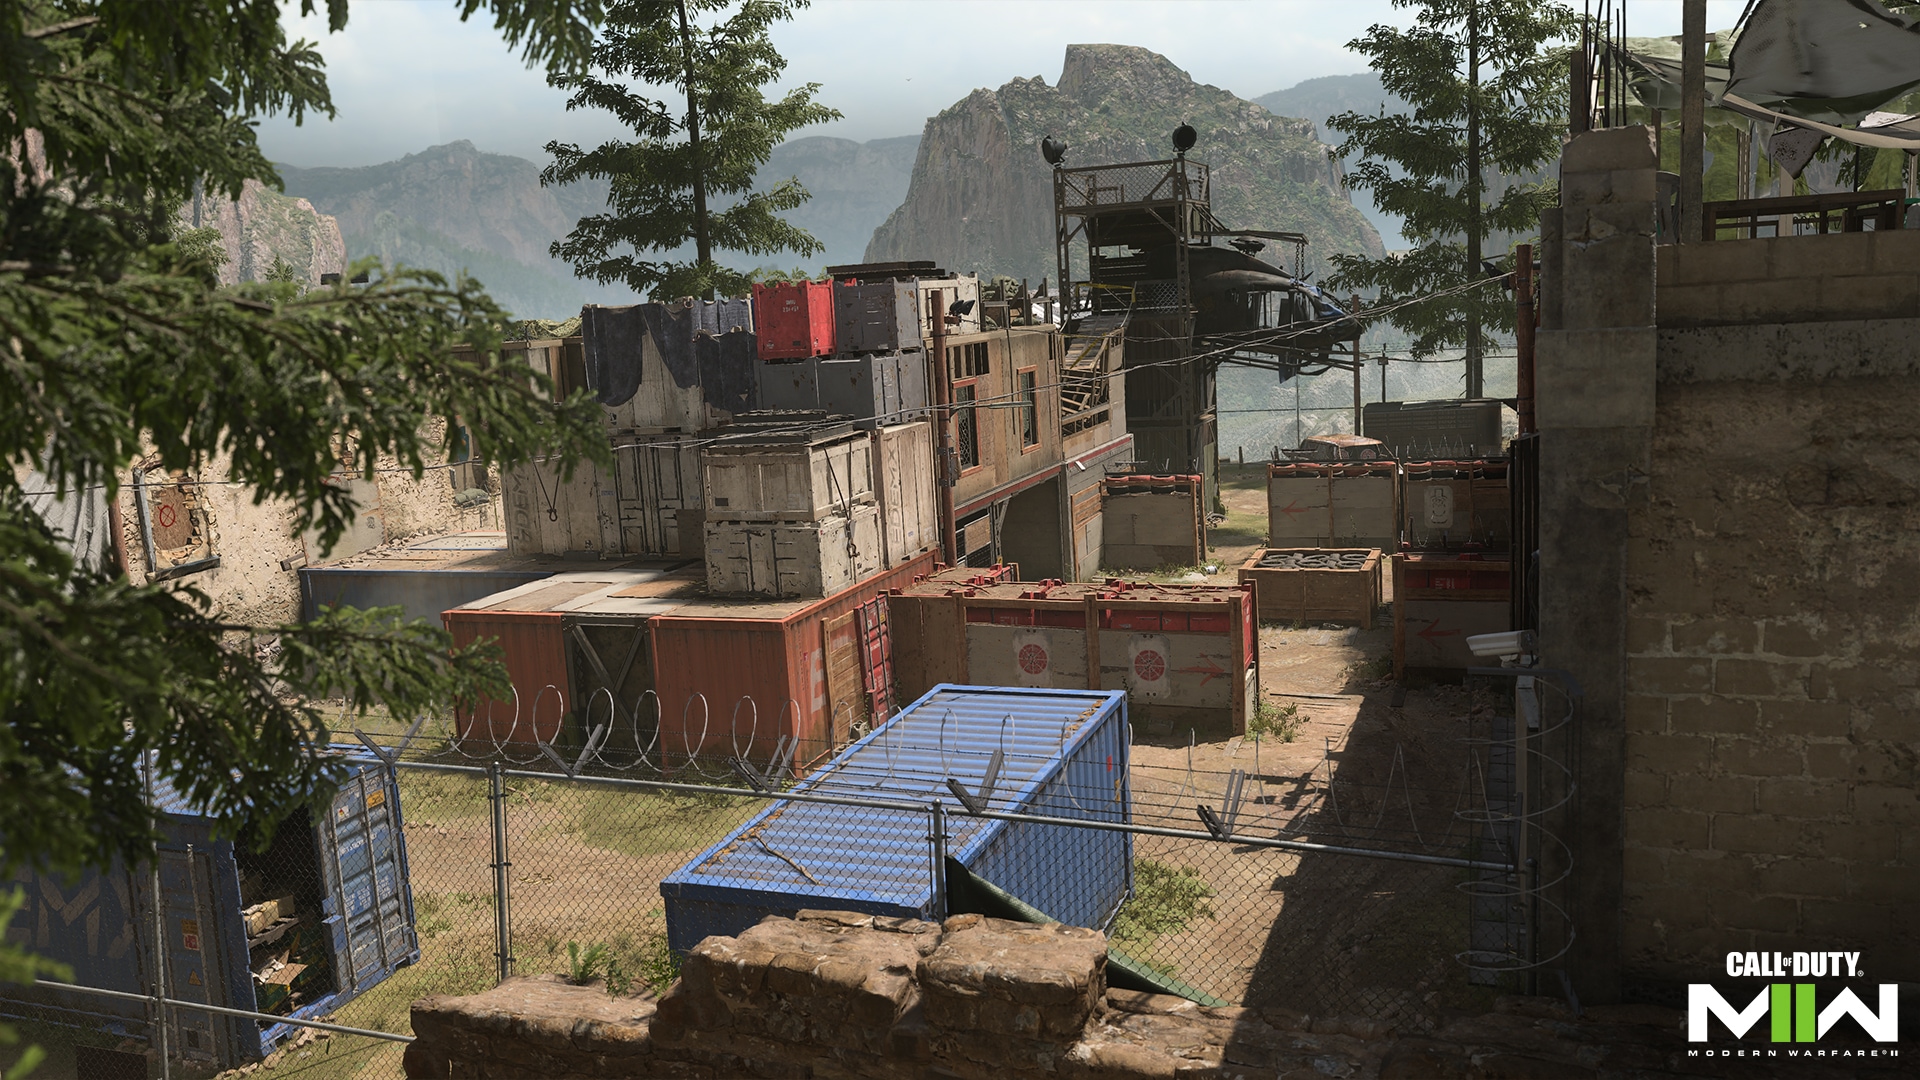
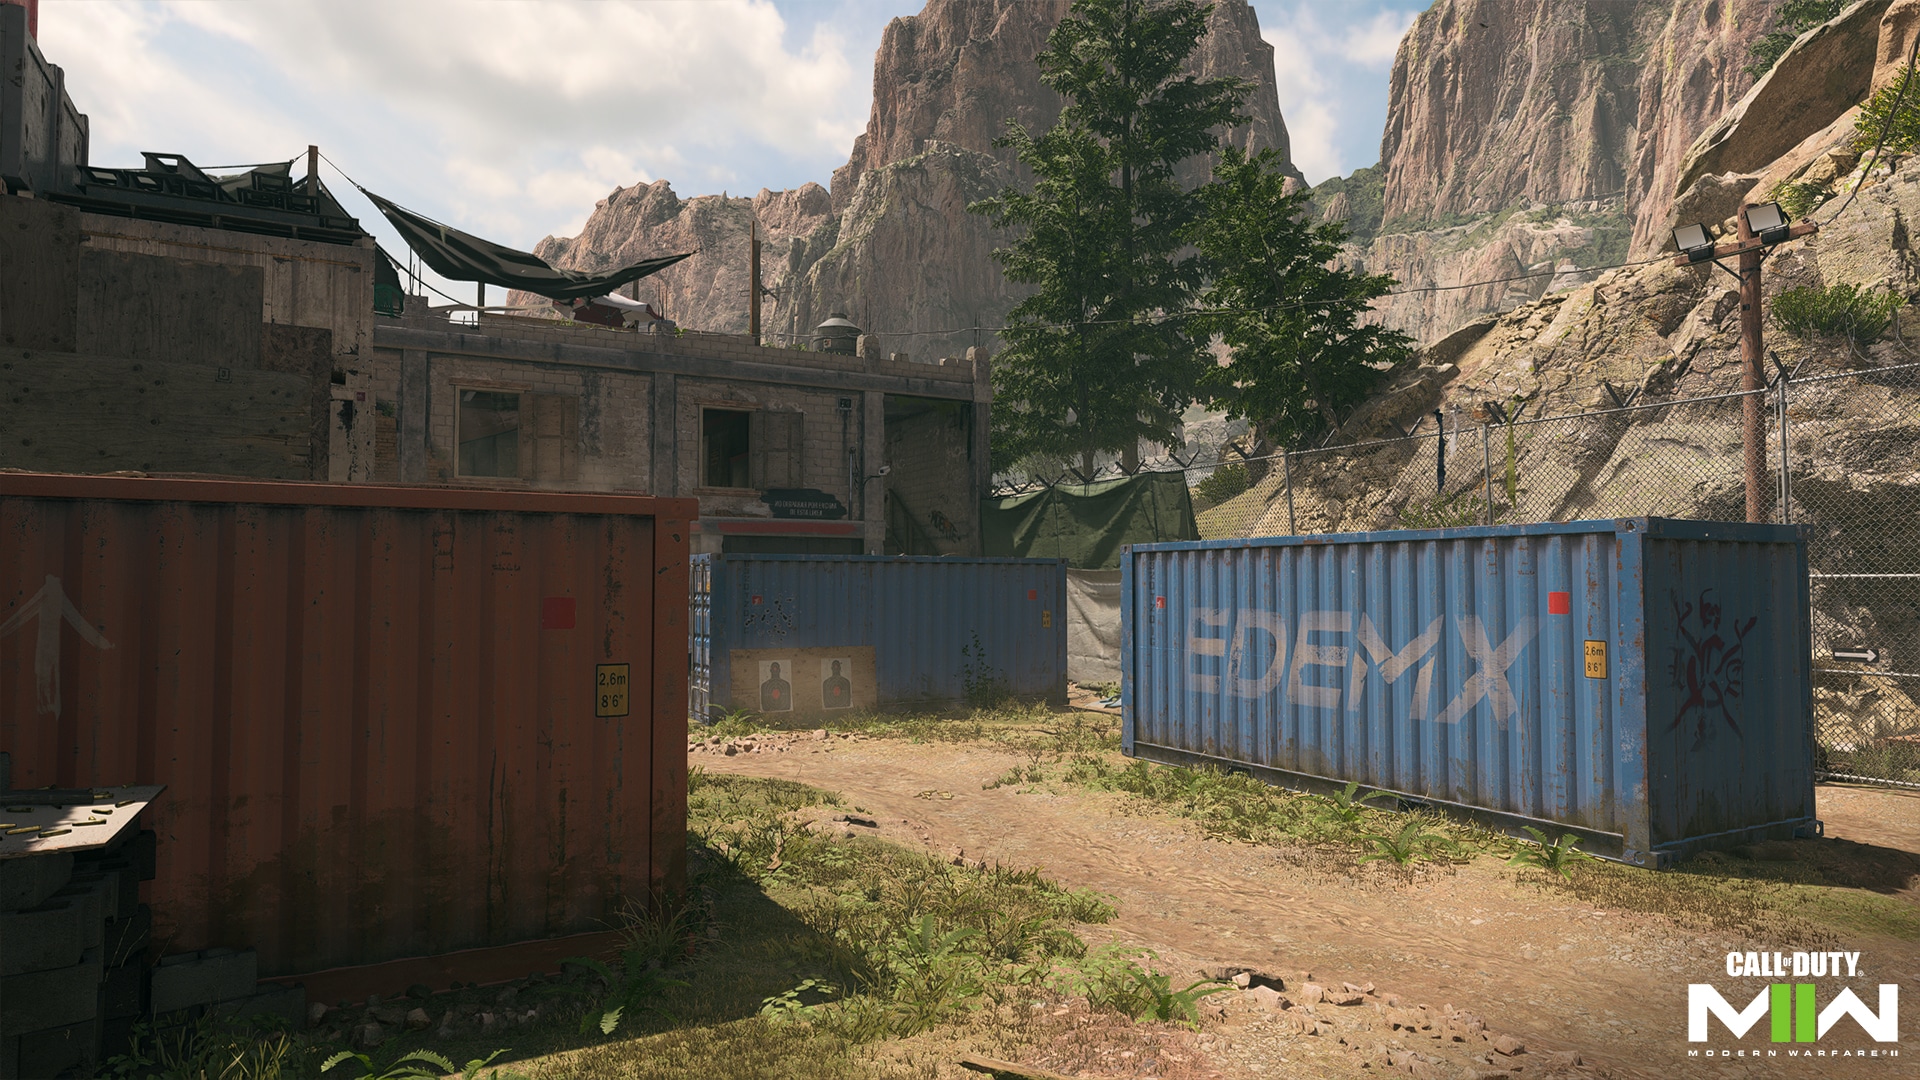
Arriving from the Back Alley, it’s best to avoid the middle of Containers where you’re a sitting duck against Operators firing from the Office and streaming in from Forklift, Center, and Main Street. Instead, head right and use the center “EDEMX” container for cover as you move toward the stairwell or through to Forklift, tossing grenades as needed into the Office windows to dissuade enemies posted up there.
You can also head left to climb up for a better view by the two red containers and smaller crates stacked on top of them. From up here you can more easily engage enemies firing from the Office and get the advantage over Operators down below, so long as you watch your back against enemies climbing up to your level from Main Street.
Largely situated in the northern route, the Office may be the most contested area of the map with its advantageous view over Containers, Center, and even a bit of the Junkyard. As a power position, it’s tempting to remain here to rack up eliminations, but it’s perhaps best to take out some enemies and then move on, as company is only ever a few moments away. You might even get some eliminations and then hang back from the windows, surprising anyone who comes in thinking the route is clear.
As for Forklift and Back Alley, use the cover objects provided when swinging around toward Alpha and Bravo Gate, revealing only as much of your Operator as needed to get a read on what’s ahead.
Center Route — Alpha Gate, Underpass, Center, Main Street, and Bravo Gate
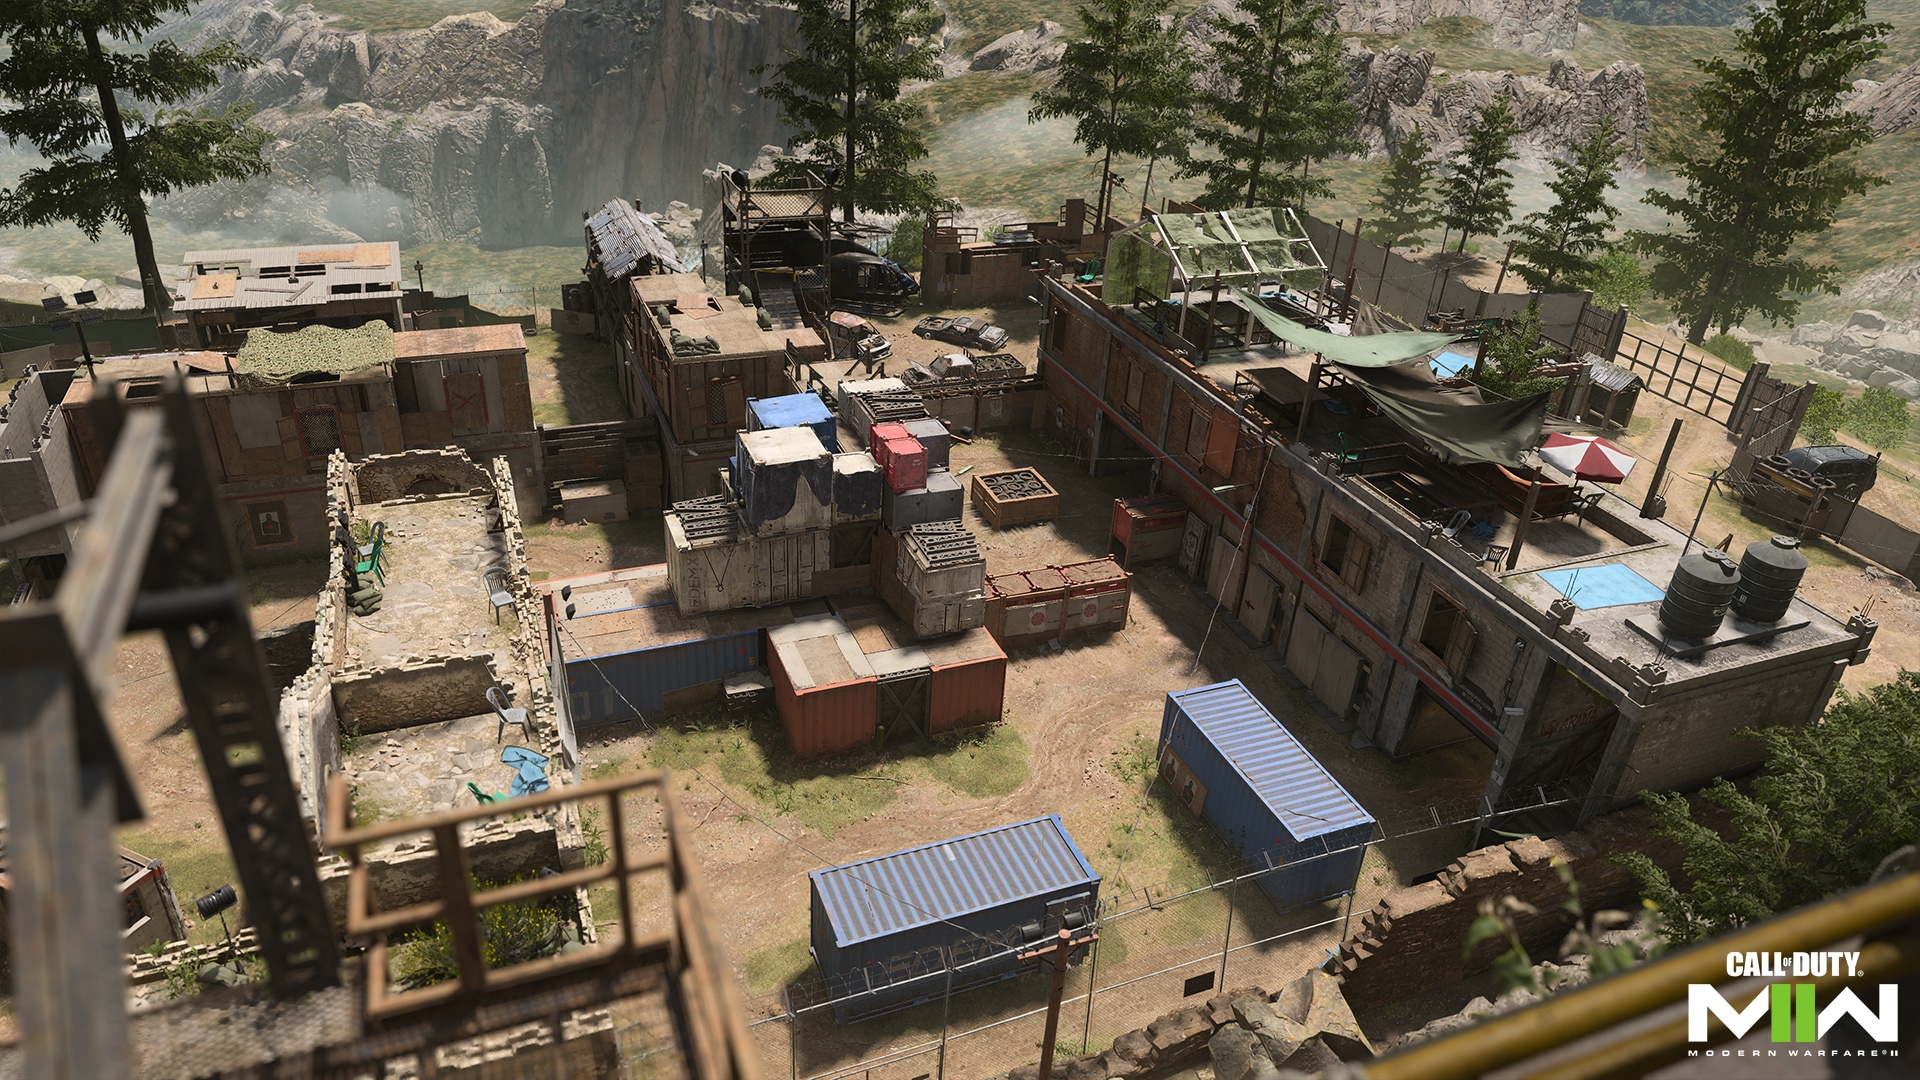 Though divided into three distinct sections, the Underpass, Center, and Main Street are all parts of the middle lane running from Alpha to Bravo Gate.
From Alpha Gate, take the southern opening or vault over the wall to make your way to the Underpass. Unless you’re sure that the lane is clear, take a moment to check the sight line before rushing straight through the Underpass; there’s always that threat of a sniper on the other end, or a camper in the central wooden tire container. Check your minimap for activity in Center, as well.
Center includes four access points, from either end of the middle lane as well as coming in north from the Containers and south from the Junkyard. As a major thoroughfare, expect a lot of cross traffic. If you need to get in for an objective, spread out from any teammates to better cover its multiple entrances. If you’re alone and have a mine equipped, toss it down near one of the pathways for added protection. Watch for crouched or prone foes hiding behind the low tire container in the middle of the Center junction.
Main Street, toward Bravo Gate, opens up some interesting pathways. Objects to either side allow mantling up either on top of the red crates abutting Containers, or up and over into the Junkyard. This a great way to get out of the center lane fast, or even to set up an ambush by getting the height advantage over enemies racing through below.
Southern Route — Courtyard, Junkyard, and Shanty Town
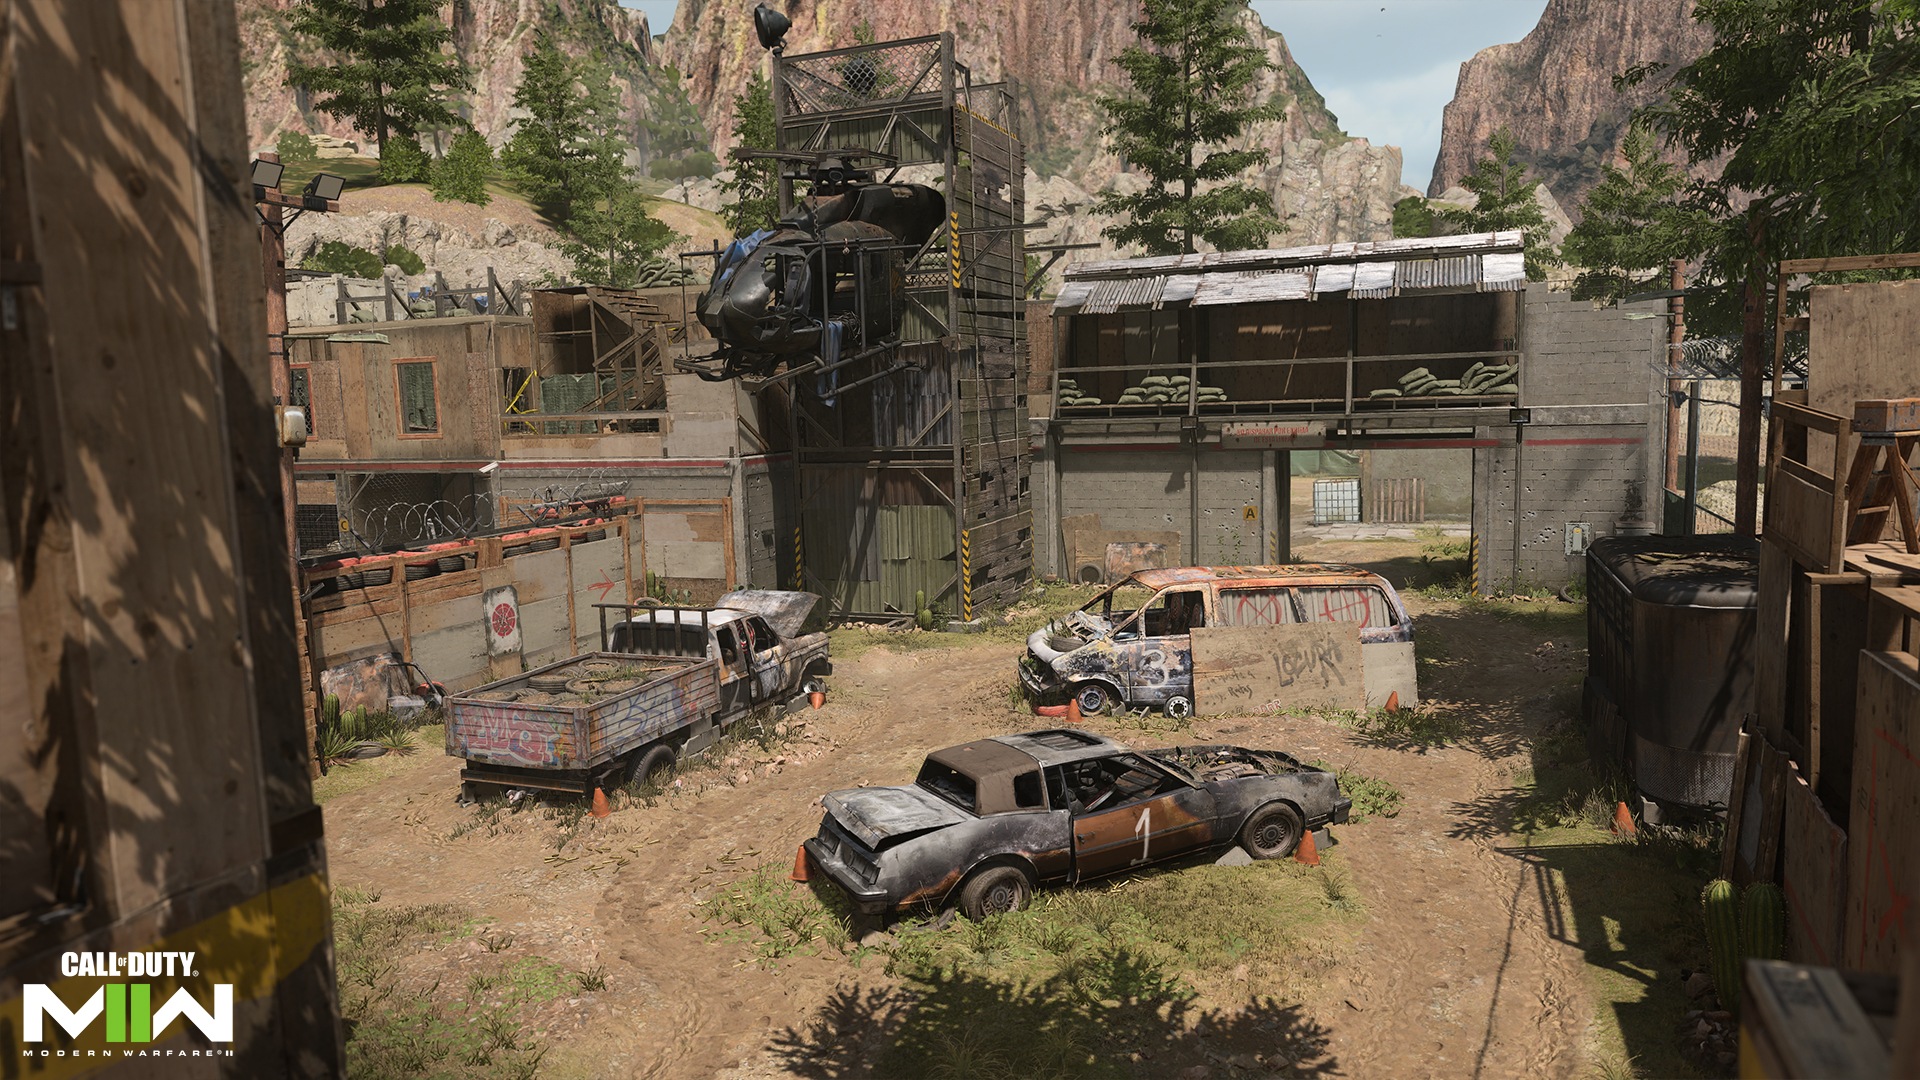 The Junkyard and Shanty Town are the two hotbeds of the southern path, with Junkyard’s central position often making it the most contested of the two. The vehicle wrecks obscure sight and offer partial cover, making it a prime space for ambushes. The tactical Snapshot Grenade can do wonders for you and any nearby teammates here, as well as any other tool utilizing a blast radius to catch hidden enemies.
The base of the tower (with the helicopter chassis hanging from it) in the northeastern corner is particularly dangerous, a tight shadowed narrow L-shape from which enemies can appear in an instant. Approach cautiously and utilize it yourself to surprise enemies.
If you’re defending the area against intruders from the Courtyard or Shanty Town, throw them off balance by waiting for them just to the side of the entrance, taking them out as they enter the Junkyard before they know what hit them.
When approaching either the Courtyard or Shanty Town in a skirmish, use the van with the wooden slats leaning against it for better cover than the pickup or car, as well as a means to more easily drop out of sight in a pinch. Stay alert for incoming grenades and, when the crossfire becomes too intense, book it between the tire walls and into Center for a brief reprieve.
When taking the fight to Shanty Town, utilize the inaccessible wood and corrugated warehouse along the southern edge of the map to obscure the enemy’s line of sight, popping out only when you’re ready to engage. The white plastic reinforced water container on the west side and the stack of wood beams with paint pots on the east side both provide good defensive cover for your lower body when engaging down the line.
In the Courtyard, in addition to using the available objects for cover, you can also mantle up on top of the vehicle, though you are prevented from jumping or climbing atop the security container hut due to the barbed wire at the top. Drop to prone for a low-profile sight toward Alpha Gate or the Junkyard.
Recruit Tactics
Flyswatter
 As chaotic as things may be on the ground, it’s clear, blue skies overhead. That paired with the fact that the Alpha and Bravo Gate spawns both provide good cover gives support minded Operators the chance to knock out enemy aerial streaks with a Launcher.
Shooting down enemy UAVs, Counter-UAVs, and higher-tier aerial streaks is incredibly useful. If you’ve got a knack for it, consider enabling Scorestreaks over Killstreaks, as you’ll be racking up points every time you swat an enemy vehicle out of the sky.
Control Your Sightlines
Many of the different areas in Shoot House connect to each other via large square openings. Your survivability will greatly improve by approaching these thresholds tactically.
Avoid racing straight through them, as doing this exposes you to multiple angles of attack. Instead, approach from one side, using the corner or another nearby object to provide cover as you scan the upcoming environment for enemy targets. This way, if you start taking fire, you can easily sidestep back behind the wall or object for protection.
The more you do this, the faster you’ll get, so you won’t have to choose between entering an area safely and getting to the objective in time.
Veteran Tactics
A Hop and a Skip Away
 From the top of the shipping crates in the northern Containers area, it’s possible to run and jump onto the shipping crate closest to the office and stairwell, and from there to the righthand Office window. It works the other way around, too, offering a quick route through Containers that can be used for a tactical getaway or to chase down a target going the slow way on ground level.
Shoot House is full of mantling opportunities, from its many vehicles to the various crates and other climbable objects. While in some respects you are more exposed up high, you often gain the advantage by throwing your opponents off course as they re-adjust from engaging on the ground level. That second of confusion is often all you need to open the attack and land the elimination.
Keep Your Senses
Areas like the Junkyard, Office, Center, and Containers are ripe for destabilizing attacks from Tactical Equipment like Flash, Stun, Gas, and Snapshot Grenades. If the enemy is using these to dislodge you from objective and power positions, consider equipping the Battle Hardened Base Perk to limit their effectiveness, and in the case of the Snapshot Grenade to completely nullify it.
Pair Battle Hardened with the E.O.D. Base Perk to additionally gain resistance against non-Killstreaks explosives. Through combining the two, you’ll be better prepared to take and defend objectives, hold power positions, and otherwise remain a thorn in the enemy’s side as their tactics fail to defeat you.
Prestige Tactics
Nice Try, Camper
 Is the enemy holding up tight in the Office, using Equipment, Field Upgrades, and streaks to solidify their position? Equip the Spotter Bonus Perk and, once earned in the match, you’ll be able to spot and highlight these items through the Office walls, sending a signal that there’s trouble inside. Communicate with your team for those who don’t notice the highlighted items and the grenades are sure to come raining in after them, clearing the Office for your own use.
With some practice, it’s also possible to lob grenades into the Office from the Junkyard by hopping up onto the car nearest the Center tire stacks for added elevation. Get this trick shot down to clear out any campers without exposing yourself to return fire. Or throw out a Drill Charge so it clamps and burrows through the exterior wall, catching foes in the Office interior.
Adapt and Thrive
Due to Shoot House’s compact layout, the focus of battle can quickly shift from one side of the map to the other. While in one moment you might be pushing the attack, in the next you may need to hold back and defend your position.
Adapt to the flow of the match by preparing at least two Loadout styles, one for offense and the other for defense. On defense, Base Perks like Battle Hardened and E.O.D. will help keep you in fighting form against incoming grenades, while on offense you may prefer Tracker and Pitcher, helping you to hunt down enemies and more easily dislodge them with your grenades.
Consider the Battle Rage Field Upgrade for use in both situations. Your boosted health regeneration is helpful in any fight, along with a constantly refreshed Tactical Sprint for racing after fleeing enemies, or escaping from imminent danger.
Objective Routes and Rotations
Mode Intel: Domination
 Domination
With the A and C flags positioned right at Alpha and Bravo Gate, they’re easy to capture right off the spawn, turning the teams’ attention on the coveted B flag situated in Center.
With entrances on all four sides and snipers often zooming in from the west and east walls, Center is a veritable madhouse. The team who throws more players at B can brute force their way to a capture, but that method comes with its own risks. For one, this gives the other team an opportunity to forgo the B flag and head straight for the A or C flag; after all, Shoot House is a fairly small map, so capping the flag at the enemy’s spawn gate isn’t too tall an order.
Play smart and spread out more evenly, covering a wider portion of the map. Those gunning for the B flag should equip Battle Hardened, E.O.D., and the Trophy System Field Upgrade for maximum defensive capabilities.
If the B flag role is already being fulfilled, consider taking Double Time to double the duration of your Tactical Sprint. This allows you to keep up the pressure on the enemy spawn flag, thereby forcing the opposition into falling back into a defensive posture, easing up their attack on the B flag. You can additionally flank enemy snipers sticking to either of the outer walls.
Watch for the Office, where players can hop onto the window ledge for a full view of Center, and don’t neglect the Junkyard and Containers as viable areas of B flag defense; by eliminating enemies before they can even get to the flag, you’re taking a lot of pressure off any defenders in the area.
Mode Intel: Search & Destroy
 Showing map with S&D Bomb sites at: A – Courtyard. B – Containers.
Slow down, Operator. In Search & Destroy, speed is certainly still an important factor in winning the rounds, but it’s tactics that will decide the ultimate victor.
As the Attackers, either bomb site is fair game, but you’ll likely encounter stiffer resistance at the B Bomb site where the Defenders have access to the Office windows and one of the shipping crates blocks your line of sight against enemies coming in from Forklift. You can mitigate the danger by rushing Main Street in the center lane, then hopping up onto the crates overlooking the area, thus providing cover fire for your teammates on the ground.
The attacking team can also find success by sending in a handful of teammates to the B Bomb site, going loud with grenades and pushing aggressively into Containers as the bomb carrier and some backup swing around to the A Bomb site in the Courtyard.
When approaching the A Bomb site, expect resistance partway through the Junkyard as the Defenders can get to this area much more quickly than the attacking team. If the situation is right, send someone through Center and Underpass to flank them.
For this reason, it’s helpful for someone on the defending team to stick back by Alpha Gate when defending the A Bomb site, using the stack of containers to block lines of sight. You might also consider mantling on top of the concrete block near the bomb site for the advantage over enemy Operators approaching from the Junkyard.
On a smaller map like Shoot House, many rounds will find teams rushing straight into combat, but don’t let that discourage you from rotating as needed, whether on offense or defense. There are several available routes between the A and B Bomb sites, whether you hoof it through Center and Underpass or stick to the Alpha Gate spawning area for quick access to both sites.
Most importantly, communicate with your team. Things move quickly here, but not so much that you can’t turn the tide with some fast thinking.
Mode Intel: Hardpoint
 Of Shoot House’s five Hardpoints, three are chaotic battle zones while two give the advantage to defenders with their placement in the map’s corners.
Right off the break both teams are assigned with capturing the first Hardpoint located dead center of the map. This is a great opportunity to get a feel for the enemy team, to see whether they rush in guns blazing or play more tactically with snipers and flank attacks. Unless you’re sniping, lead in with grenades and consider holding back for a moment so that the enemy is forced to make the first move.
It's worth fighting like hell for control of the first point, setting the tone of the match, but keep your eyes on that Hardpoint countdown. If you’re still not control in scrap time — the Hardpoint’s final moments before it changes — start moving toward Hardpoint 2 in Shanty Town. As a corner placement, you can set up a strong defense here, only needing to watch north and west. If an aerial streak comes in, head for shelter in the wooden shooting range.
Hardpoint 3 and 4, in Containers and Junkyard respectively, are much more difficult to defend, open as they are to multiple angles of attack. Remember that only one teammate has to be in the Hardpoint to capture it; it may be wiser for others to spread out in the area for better coverage against incoming enemies.
Hardpoint 5, like 2, gives the advantage to the defending team, so it’s worth rotating here early even if you have to give up some points in the preceding Junkyard. Use the Forklift and surrounding walls for cover as you hold the area.
All the Hardpoints are in the open, so aerial streaks like the Precision Airstrike, Cruise Missile, and S.A.E. can do a lot of damage here; use them accordingly when you need to clear out a new point.
Top Tips
1. The More the Merrier. It’s worth sticking near teammates when moving throughout the map, as you’ll often suddenly engage with two or more enemy Operators at a time. Use the minimap to see where your allies are located and move in for support; just don’t get too close or an enemy grenade might eliminate the lot of you.
2. Double Time. Shoot House is a great map for the Double Time Base Perk, as doubling the duration of your Tactical Sprint lets you cross over danger zones with a much greater chance of survival. You’ll also discover how quickly you can cover a lot of ground here. Considering the map’s many mid-height cover options, the increased crouch movement speed doesn’t hurt, either.
3. Take Your Chances. Even if you’re not sure whether there are enemies on the other side, it’s often worth tossing a grenade across Junkyard, from Containers into Back Alley, into the Office, and anywhere else where there are cover objects blocking your line of site into a large area. Due to Shoot House’s compact size, there’s a good chance you’ll catch someone in the blast.
4. Make it a Private Affair. As with many Multiplayer maps, it’s a great idea to load up a solo private match with an infinite time limit. Without the threat of attack, you can really focus on movement, transitioning between areas, and discovering uncommon lines of sight. Now head back into a public match and get blasting.
5. It’s Not Always Sniper Alley. Okay, there aren’t always snipers ready to fire down the center. Though it certainly happens often, it’s a detriment to think of the middle lane as a no man’s zone. If passing through Center or Main Street will help you get to your target more efficiently, it’s worth the risk; you can always toss down a Smoke Grenade first. If you do get taken out, you know where to find them.
6. Take Control of Your Future. The Tactical Insertion can be put to great use here, especially in elevated areas like on top of the red crates in Containers, the wall between Main Street and Junkyard, and atop the concrete storage in Courtyard. The next time you spawn, you’ll start with a height advantage.
7. Use Your Equipment! We’ve said it before and we’ll say it again: your Equipment is invaluable here, especially considering the distinctly compact areas filling the map. It’s good practice to lead in with grenades and any other tools on hand; you’ll get them back on the respawn anyway.
8. In Fact, Rain it Down. Getting a hang of your timing and angles for the most optimum grenade tosses? Take it up a notch with the Resupply Bonus Perk, granting an additional Lethal on spawn in addition to recharging Equipment over 25 seconds. Having a blast? Throw on the Extra Tactical Base Perk, too.
9. This Your First Rodeo? If you’re new to the map, not having played it’s 2019 iteration in Call of Duty®: Modern Warfare®, don’t fret. It’s not about how often you’ve played the map, but how smart you play. In no time you’ll have every nook and cranny at your fingertips and the old vets will feel like they’re playing against one of their own.
10. No Such Thing as Too Much Training. It may be a training facility, but there’s always more to learn here, no matter your Operator’s combat experience. Once you’ve got a handle on the map, experiment with new playstyles and Loadouts to further improve your skillset. There’s always room to improve.
Stay frosty.
© 2019-2022 Activision Publishing, Inc. ACTIVISION, CALL OF DUTY, and MODERN WARFARE are trademarks of Activision Publishing, Inc. All other trademarks and trade names are the property of their respective owners.