Mercenaries Gameplay Spotlight
So, you’ve selected a Bounty and are preparing to head out, but you’re not quite sure how you plan to get your target? It starts with a good team and strong fundamentals, then the rest is up to you and your Mercenaries! If you’re not ready yet, you can check out our Overview blog first. Come back here when you’re ready to start your first Bounty.
Mercenary Roles
Immediately after selecting a Bounty, you will be taken to a Party select screen similar to selecting a deck in Play Mode. From there, you can select a Party you’ve already created, or you can make a new one. Picking which 6 Mercenaries to put in your Party is one of the most important parts of taking on any Bounty.
The first thing you will notice when selecting Mercenaries for your Party is that they are separated into three Roles:
- Fighters have green frames. They tend to use aggressive Abilities to deal major damage to your enemies.
- Casters have blue frames. Casters tend to cast spells for powerful effects—sometimes supporting your Party, sometimes blowing the other Party up—but they tend to have less Attack, which can make them softer targets for your enemies.
- Protectors have red frames. They tend to be your tanks and supports. They often have a lot of Health and tend to utilize effects like Taunt and buffs to control the flow of battle. Some of them are pretty good at hand-to-hand combat, but do not have many ranged options and tend to be a bit slower than the other Roles.
You can build a team with any combination of Mercenaries, but neglecting one Role or another might expose your Party’s weaknesses. While on offense, Fighters deal double damage to Casters, Casters deal double damage to Protectors, and Protectors deal double damage to Fighters. You’ll want to keep these weaknesses in mind when building your Party.
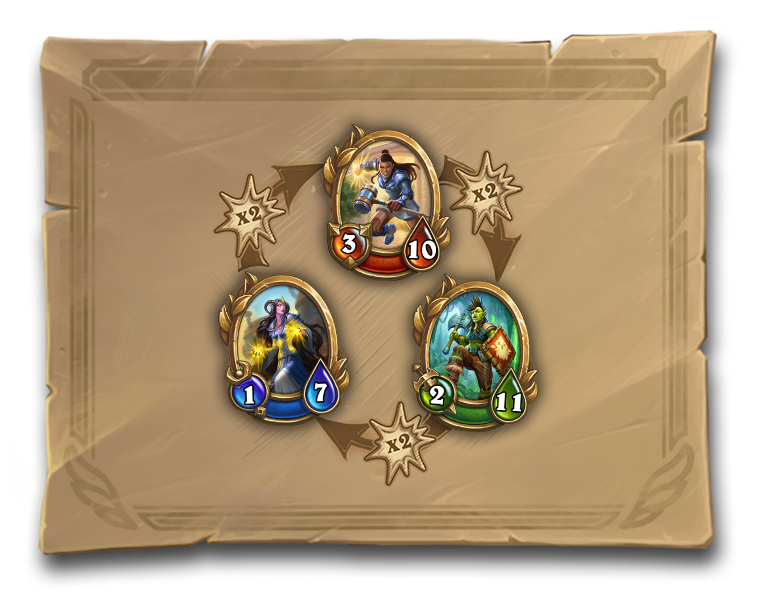
As you play through the prologue and introductory missions, you’ll gather 8 Mercenaries to start with—enough for a Party with two Mercenaries of each Role and a couple alternates. That balanced spread is a good place to start as you learn how to build your own Parties.
Abilities & Equipment
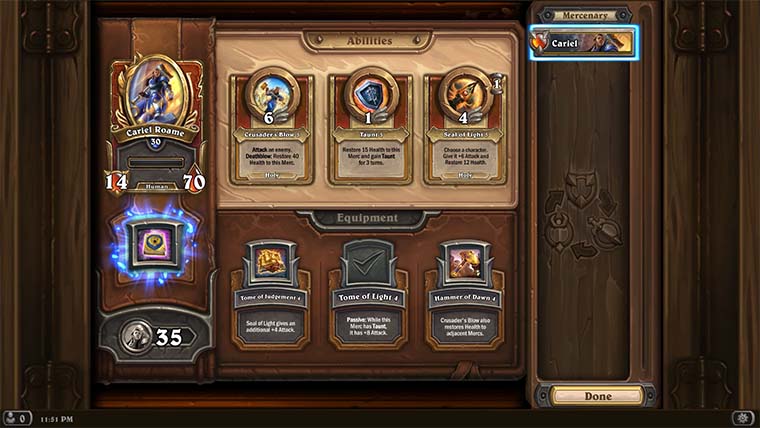
When you select a Mercenary in the Tavern, you will notice that each Mercenary has slots for Abilities and Equipment. These are another way to find synergies between your Mercenaries! At level 1, each Mercenary only has one Ability, but you unlock a second at level 5 and a third at level 15. As you continue to progress, you can upgrade those basic Abilities to more powerful versions with Mercenary Coins!
* Mercenaries is still in development and all stats and effects are subject to change. The Card Library will be updated when Mercenaries launches on October 12 to represent any updated versions.
Mercenaries start without any Equipment. As you play, you will unlock Equipment for your Mercenaries by completing Achievements and Task Board tasks—up to three pieces of Equipment each. Like Abilities, Equipment can be upgraded with Mercenary Coins. Unlike Abilities, you can select only one piece of Equipment per Mercenary at a time.
Chasing Your Bounty
Once you’ve selected your Party, you’re off to the hunt! Each Bounty includes a procedurally-generated series of encounters before culminating in the Bounty Boss. Those encounters include fights, the Spirit Healer, and random point of interest nodes that can either help or hurt your Party through universal Boons, additional characters, or a rule change for that Bounty.
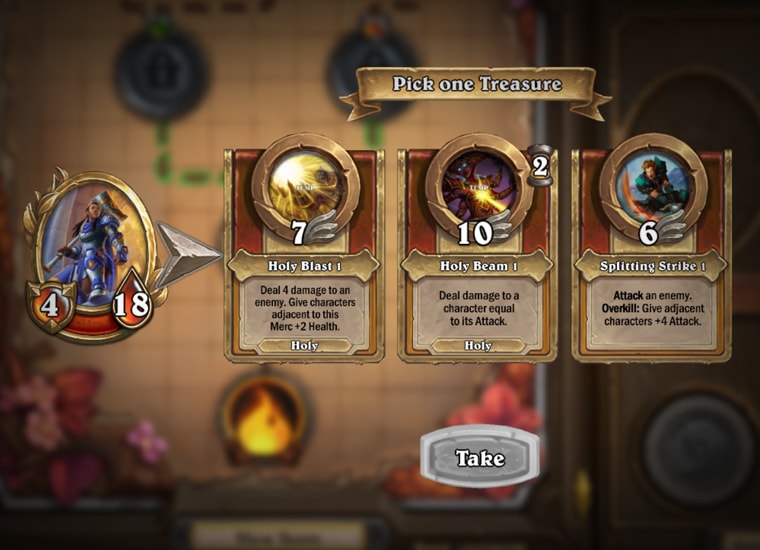
Fights make up most encounters on any given Bounty. After each fight, you will gain experience for all Mercenaries in your Party, regardless of whether they participated in the fight, sat on the Bench, or even died. You will also gain one Treasure per fight for one of your surviving Mercenaries. Treasures can come in the form of stats boosts, passive effects, or exciting and powerful new Abilities! While most progression in Mercenaries is permanent across the mode, Treasures only last for that Bounty, similar to picking up a Treasure during a Dungeon Run.
Some fights—marked with a dragon frame around that node—are extra tough. In these “Elite” encounters, you will go up against an extra enemy, and will likely lose a Mercenary or two. But, if your Party survives, you’ll get more experience and even better Treasures than normal!

After each fight, all surviving Mercenaries will have their health restored, but any Mercenaries that did not make it out of the fight can’t be used for the rest of the run. Unless you get to a Spirit Healer, that is. The Spirit Healer node randomly revives one of your fallen Mercenaries. If your team is weak after the long road or a tough encounter, you might want to choose a path in the Spirit Healer’s direction. Conversely, if you see a Spirit Healer ahead, you might feel a bit more confident about taking on that Elite encounter. You can see the map at the start of a run, so you can use that information while planning out which path to take to the Bounty Boss!
Combat Planning
You’ve taken up a Bounty, selected your Party, and chosen your path. The time for planning is over; it’s time for action! There are three main components to Mercenaries combat: placing your Mercenaries, choosing your Abilities for the turn (the “Command Phase”), and watching the Abilities play out automatically (the “Combat Phase”). Let’s take a look at each.
Place Your Mercenaries
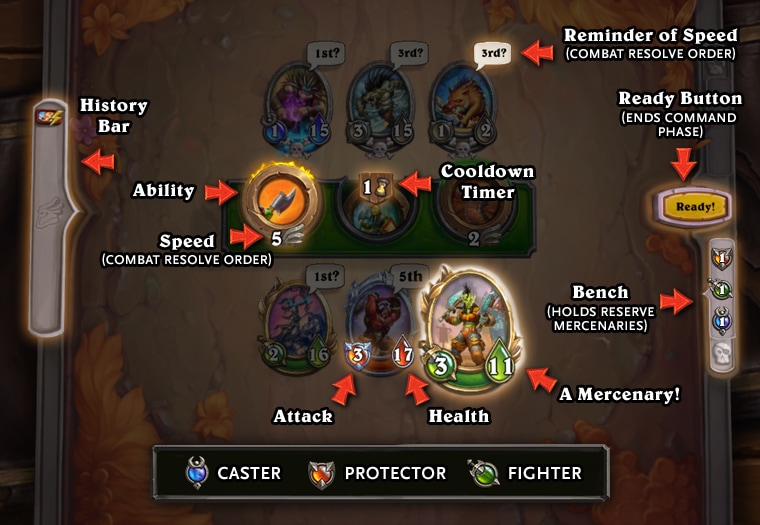
At the start of a fight, you will get to select three starting Mercenaries from your Party. Those three Mercenaries are placed on the board to fight while your remaining Mercenaries wait on the Bench. You can place your starting Mercenaries in whatever order you want, and rearrange them as you see fit, but once you’ve locked them in, they are stuck there—placement is not part of every turn’s turn progression. Though, if one of your Mercenaries falls in combat, you select an available replacement off your Bench at the start of the next turn, and can put that replacement wherever you want on your side of the board. Be careful! There are some Abilities in Mercenaries where positioning matters.
For the most part, Mercenaries on the Bench are unaffected by combat unless they have to tag-in for one of your Mercenaries who falls. However, as you progress in Mercenaries, you will find that there are also some effects that allow Mercenaries to interact with the Bench, from a tactical retreat Ability to Abilities that buff your Bench. Remember, Mercenaries gain the same experience even when just watching from the Bench, so don’t be afraid to let a Mercenary sit a fight out if they aren’t best suited for it.
Choose Your Abilities in the Command Phase
Once your Mercenaries are set, the fight can begin! In Mercenaries, each turn has two phases, and each phase happens for both sides, simultaneously.
The first phase is the Command Phase, when all commands are entered. For each of your Mercenaries, select an Ability to use and any appropriate targets. In PVE, you can also check on enemies to see some information about what Abilities they have queued up for the turn, and you can use that information to more effectively plan your turn.

You will notice that each of your Abilities has a number under it. That number is the Ability’s Speed, which determines action order on each turn. Taking note of your Abilities’ Speeds is crucial for making the most of your Abilities. Some Abilities also have a cooldown number, which indicates how many turns you must wait before each use of that move. Those moves tend to be powerful tools that are worth the wait. With the Speed order in mind, you organize your commands to make a life-saving heal before an enemy attack, set up a combo, or focus all attacks on a slower enemy to kill it before it gets to act!
If you change your mind before all commands are locked in, you can select one of your Mercenaries to start over from there. Once you’re all set, hit the “Ready” button and your commands for the turn are locked in.
Watch it Unfold in the Combat Phase
After all commands have been input, the actions play out automatically, in order from lowest Speed number to highest Speed number. If multiple actions have the same Speed, one side will be randomly chosen to take their actions first. If a character goes down before their action, that action is skipped. If a target of an action goes down before that action, then the action will randomly re-target.
Some Abilities include physically attacking an enemy. As you might guess, these types of Abilities are more common in Fighters and Protectors than in Casters. When a character attacks an enemy, they deal damage to each other equal to their Attack stats, just like in traditional Hearthstone. However, the damage that the defender deals back to the attacker does not get double damage based on the Mercenaries’ Roles. Spells and ranged attacks avoid taking any damage from the defender at all! You need to be mindful of not just enemy attacks, but also your own Abilities, when trying to figure out how to best preserve your Mercenaries.
Synergies & Strategies
There are a lot of synergies and strategies to Mercenaries. We already talked about the most basic of these: Roles. Your Party makeup can be adjusted to try to cover your bases or prey upon certain Roles. There are also some Role synergies that lie below the surface, like combining a powerful Protector’s Taunt Ability with a Caster’s powerful heals, or reducing an enemy’s Attack stat before your Mercenaries attack into it. As you play, you will learn more of these synergies.
Some Mercenaries also specialize in a particular Spell School, sometimes using effects that get stronger as you dig deeper into that Spell School. Those Mercenaries might give themselves bonuses based on their own continued use of a particular Spell School. Or, they might best in a team of like-minded Spell School enthusiasts, with keywords like Arcane Combo, which means that an additional effect happens if one of your other Mercenaries cast an Arcane spell earlier that turn.
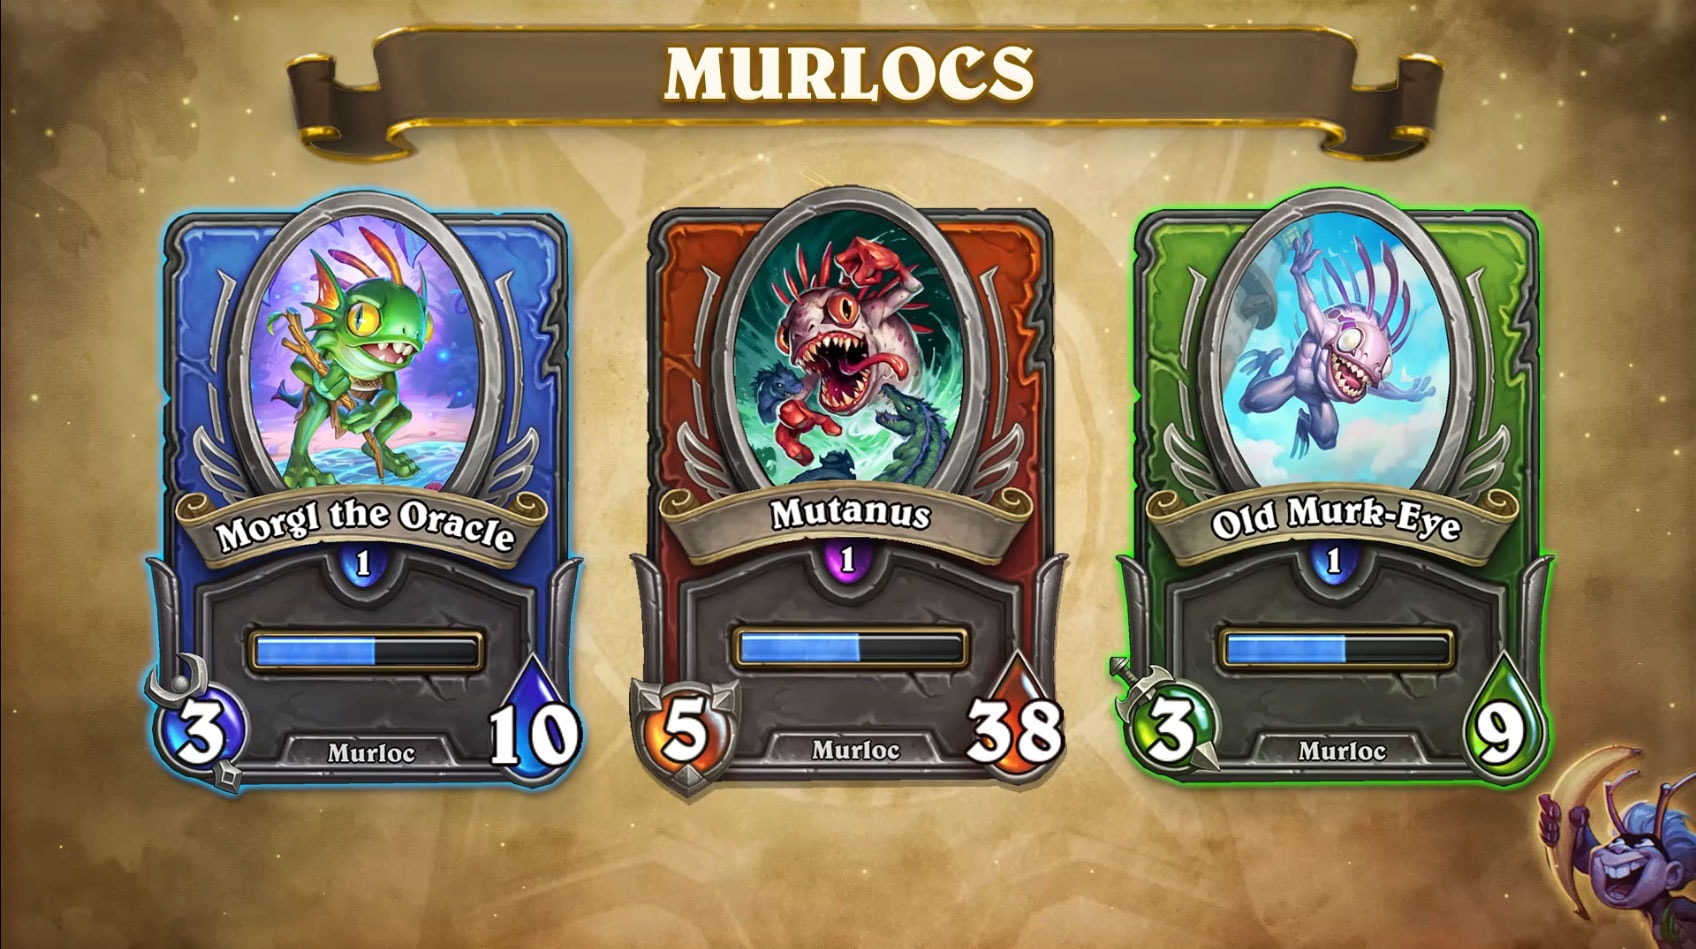
Finally, you’ll notice that each Mercenary has a minion type, including a bunch of minion types that don’t exist in the other game modes! Some Abilities are more powerful when used on, or in the presence of, another Mercenary of a particular minion type. Type synergies are yet another thing you can consider while building your Mercenaries Parties!
Tons of PVE Content, Rewards, and Challenges
The prize for a completed Bounty is a chest full of Mercenary Coins! Mercenary Coins are used to obtain a particular Mercenary, or to power up that Mercenary’s Abilities and Equipment if you already own it. You can learn more about crafting, Abilities, and Equipment in the Collection/Village blog post.


